


Hello guys and sorry for the late recap! Apparently, someone (me) forgot to hit ‘publish’ after finishing the post and nobody noticed until now… Ooops!
Oh well, ready for some new Housing info?
Our basic prototype is more or less done: the items that have been made so far have all been implemented, and most of the ones that will move in some way have their proper animations. Teddy is currently working on two things, the light settings (which are coming along rather nicely so far), and the rather complicated systems behind being able to add more rooms and change the layout of your house.
You see, previously we decided that you’d be able to select between a bunch of pre-designed layouts for your house, which could be unlocked at the proper salesman or through your housing menu (not fully decided). As our conversation went on, though, we started thinking it’d be really cool if you could design your house however you wanted, adding new rooms and change their sizes freely.
Before we fully commit to that can of worms, our current goal is to upload what we have to Frontline (any day now, possibly even tonight!) and let you guys try it out. We’re still a little torn between having pre-designed layouts or having you design the house more freely, as the latter definitely would add a ton more work and I’m sure most of you would like to see the game finished sooner rather than later.
So for now, we’ll upload what we have: a single layout, and the current housing items. The shop and house will be placeholder, with more finalized look for each of them coming later on, as we’ll use the Arcadia redesign versions as a base for the story mode versions after they’re finished.
With your feedback we hope to be able to gauge how much more work (and polish!) will be needed before the housing system can truly be complete, and as such will give us a better idea of which of our options to pick.
There’s also a third option here, where if people are satisfied with the basic version of the house, we might just stay off multiple layouts altogether as that would save a lot of time and would mean we could add the proper housing system much sooner. Anyway, your feedback will decide! Stay tuned for that :)
And now, time to make some walls for Tai Ming’s arcade mode!
“Walls?” you might ask. “Isn’t that quite straight forward?” Oh yes, my friend! Typically walls are the least of my worries when I make Arcade floors, as they’re just a very basic edge signifying the end of the battle area. In other floors, they’re a bunch of random generated trees, or a basic stone wall.
As mentioned in last week’s post, however, Tai Ming will be different. We’ll mix and match various ways to block off the battle area, ranging from streams of water, fences and even cave walls. And while creating each of those is a rather simple task in itself, they also need to be able to connect with each other and different types of walls – and they all need to work together!
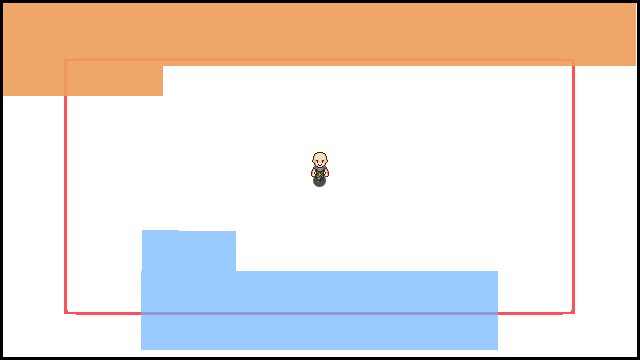
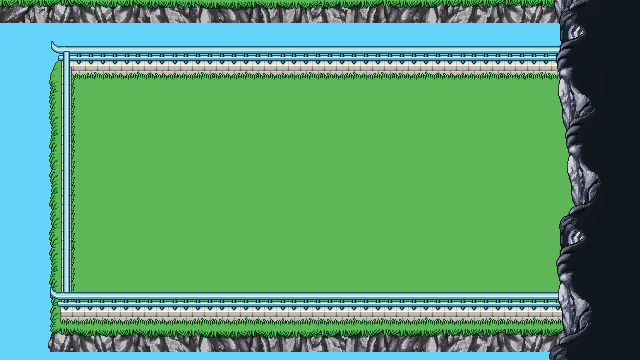
Above you can see the size of the battle area we decided to work with for these rooms. It’ll be slightly bigger or smaller depending on which walls are used in the room, but most will be of approximately the same size.
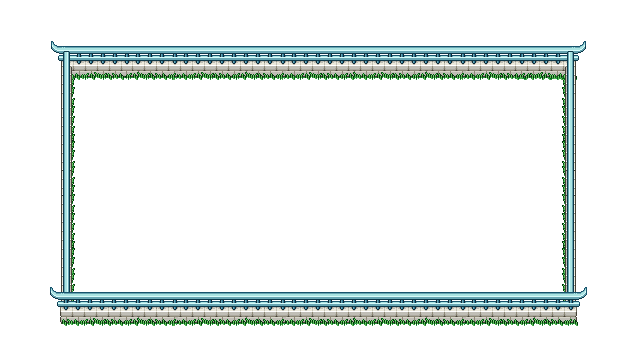
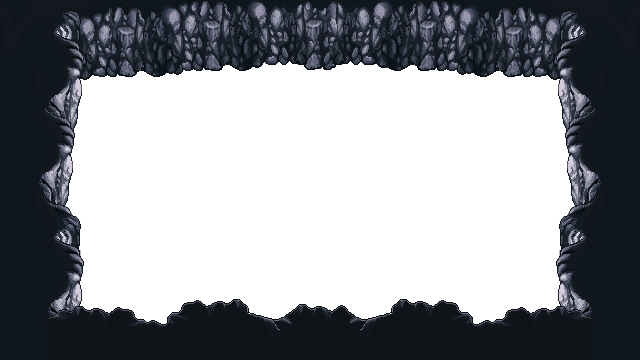
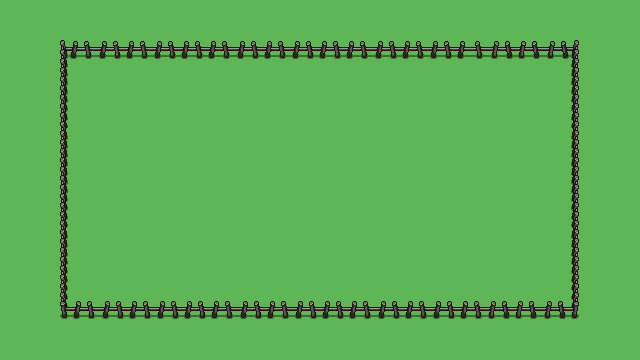
So, first of all, let’s take a look at what we have to work with. In order of appearance: wall, mountain, stream and fence:

In a coming post, we’ll also take a look at houses that will serve as walls, and maybe one or two variations of these that account for other town-like features. After all, we want to convey the feeling that this is town, in whatever ways we can while keeping the Arcade feel!
For now though, let’s look at how we can use these pieces together to create a variety of different room types:
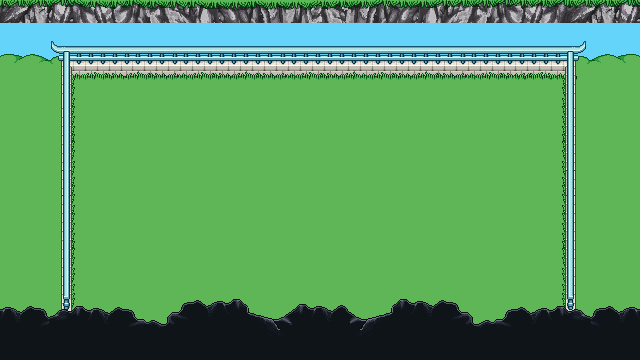
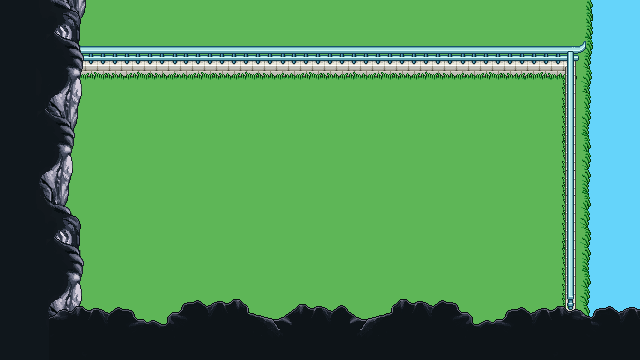
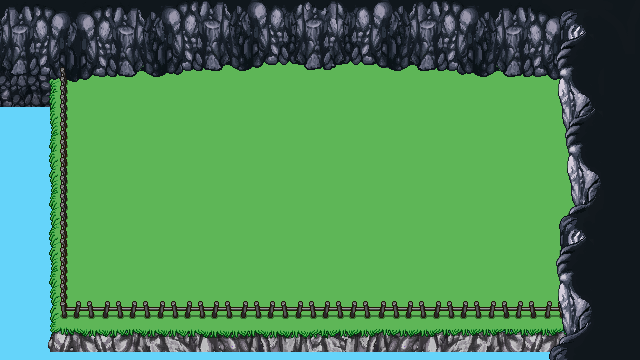
…and so on! Of course, not all of the rooms will have streams or mountain walls, though I suspect many will and they do make for more interesting looking rooms so far (at least until we’ve added some houses)!
There’s still a way to go, but the basics are down and I think this will end up quite interesting once it’s all done.
And now, some housing icons to indicate which tool you’re currently using! …Cause there are quite a few tools, actually. First up, the carpet tool:

This tool is used to edit the size of the carpets. You’ll be able to change the size of many of our carpets freely, and this icon will help indicate what you’re currently doing. The upper version is Fred’s basic version, but we’ll also make one featuring the carpet design beneath to see which one we like the best.
![]()
Next up, the move tool, which is rather straight forward:

Select a piece of furniture with the hand tool, and move it around to wherever you wanna put it. We’ll probably add some kind of animation to the arrows, as most of the tool indicators will be animated in some basic way (much like the carpet tool)
Next, the stack tool:

This “tool” appears when you try to select a square that has multiple objects stacked on it, and helps you select which parts of it you want to edit or move. Do you only want to select the top object, the topmost two or the whole stack?
Below’s a test animation I did to make the indicator easier to understand, and beneath it is Fred’s finished version:
![]()
Finally, the style tool, which allows you to change the basic appearance of an object. This is indicated by a painter’s brush and palette. The first version had a rather crude version of the brush, so it was quickly changed:
And now, another portrait!
Not much is known about this guy yet, I’m afraid! Other than the fact he’ll be staying in the desert, of course. I’ve been watching a couple of documentaries on Versailles in general and the era of Louis XIV in particular, which I guess shows through the design?
These portraits are a lot of fun to make, and I’m itching to remake the earlier ones to bring ’em all together style wise. That should probably wait, though :D

Finally, some animations! This week, Fred has been busy with the enemies, bringing the Cacute and Mrs. Bird to life~
First up, we have Mrs. Bird’s idle animations, and her laying one of those annoying eggs that will either spawn a new bird or slow you down if you decide to break it:

The annoying and OMG-SO-CUTE egg in question:

And next up, the Cacute! If you decide to be really evil, this is what it looks like when you kill it:
Though why you’d wanna do that when this is how cute it looks in its idle and movement animations, is beyond me:
Now that most of the Housing stuff has been animated, Fred will continue to work with the enemies to ensure that Teddy can just dive in and prototype them once he is done with his part of the housing. The less he has to wait on new animations, the more focused he can be when the prototyping phase starts!
For now though, both he and I will continue to be stuck for a while with housing and Arcadia stuff, as that’s our main missions before we can move on to the desert and rejoin Fred on that venture!
@Samucamon: Did you craft the new Wisp item?


Ok so i bought every house item and got every item in the game, did every quest, got all the cards, but yet when you guys updated the house stuff it came back to 99% is there something missing i already bought all the house itens… please hep.