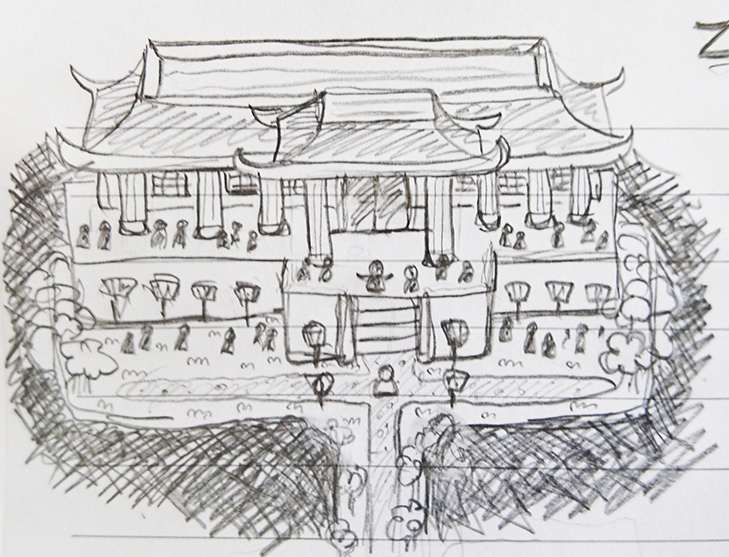
Last week was all about the Arcadia Rework for me, something which will continue to be the main focus for a long while to come. As you can tell, it’s coming along at a steady pace, one building at a time!

This week I will begin creating the underlying decorations, grass and paths between the various spaces. Since we’re also fairly sure about the Utility skills, I’ll also start creating their icons, while Teddy and Fred continue to deal with testing, testing, testing and skill graphics!

We’ve had two major discussions these last few days, both in regards to the new Utility skills. First, about the buffs: we are currently disagreeing whether it’s better to keep them as we originally planned (one buff for the offensive stats and one for the defensive stats), or to separate them further. Specifically, there’s an idea it’d be more interesting the have speed be it’s own buff, allowing the current Haste skill to remain (only balanced so it’s more useful). However, there are those of us who feel the “package” buff is a more interesting buff to use, even if it means the speed stat won’t be buffed as much as it could have been if it were its own buff.

Currently, we haven’t actually made up our minds about this! What do you think you guys would prefer? Two buffs: one for offense (damage, speed, crit) and one for defense (defense, shield reg, EP reg), or three: one for damage and crit, one for speed, and the defense buff left as is?

We’ve also talked about the amount of silver points spent on each Utility skill. We’re considering whether to have each skill have 5 levels (as was planned), or if it’s better to cap them at 3 each.

With 5 stages, the skills become more of an efficient silver point sink, but the skill improvement between each level will be rather small. With 3, each point spent on the skill will give a bigger upgrade, but you’ll also finish leveling the skills much sooner. Currently we’re leaning towards 3, as it seems more rewarding to the player that way, but we haven’t fully made up our minds yet.

If you have any ideas in regards to these discussion, feel free to share in the comments! We love to hear your input and what you think about decisions like these – after all, we want to do what’s best for the players :)

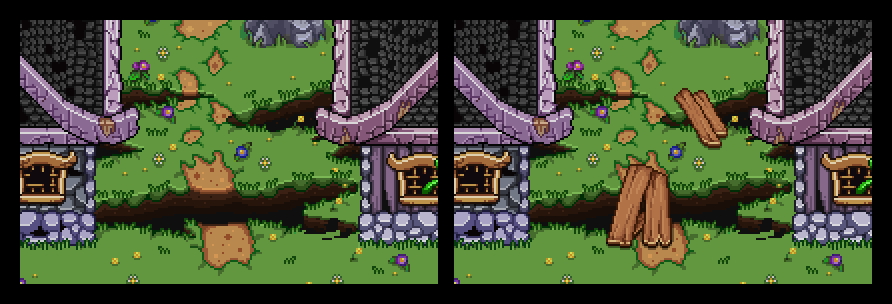
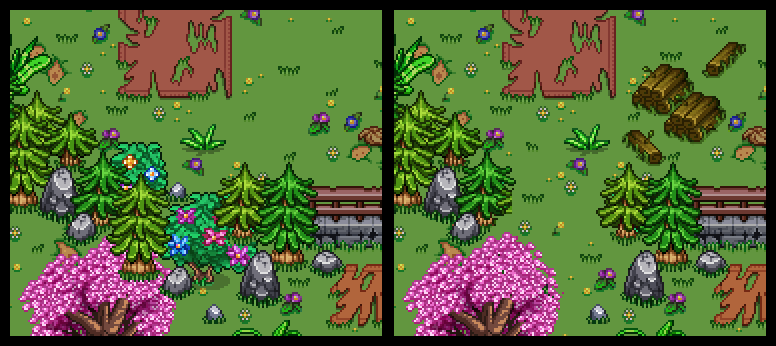
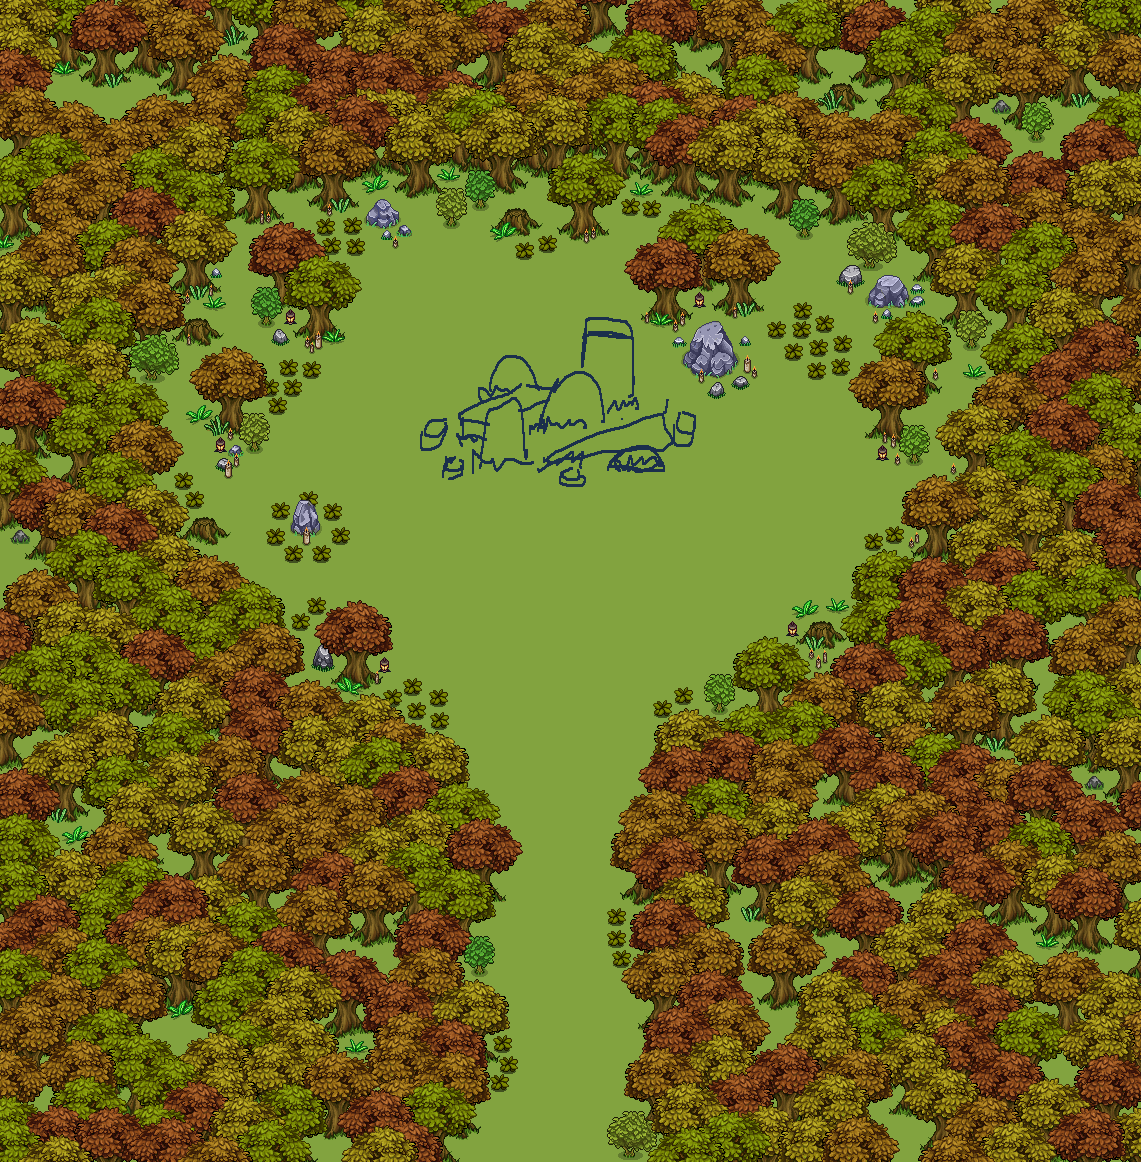
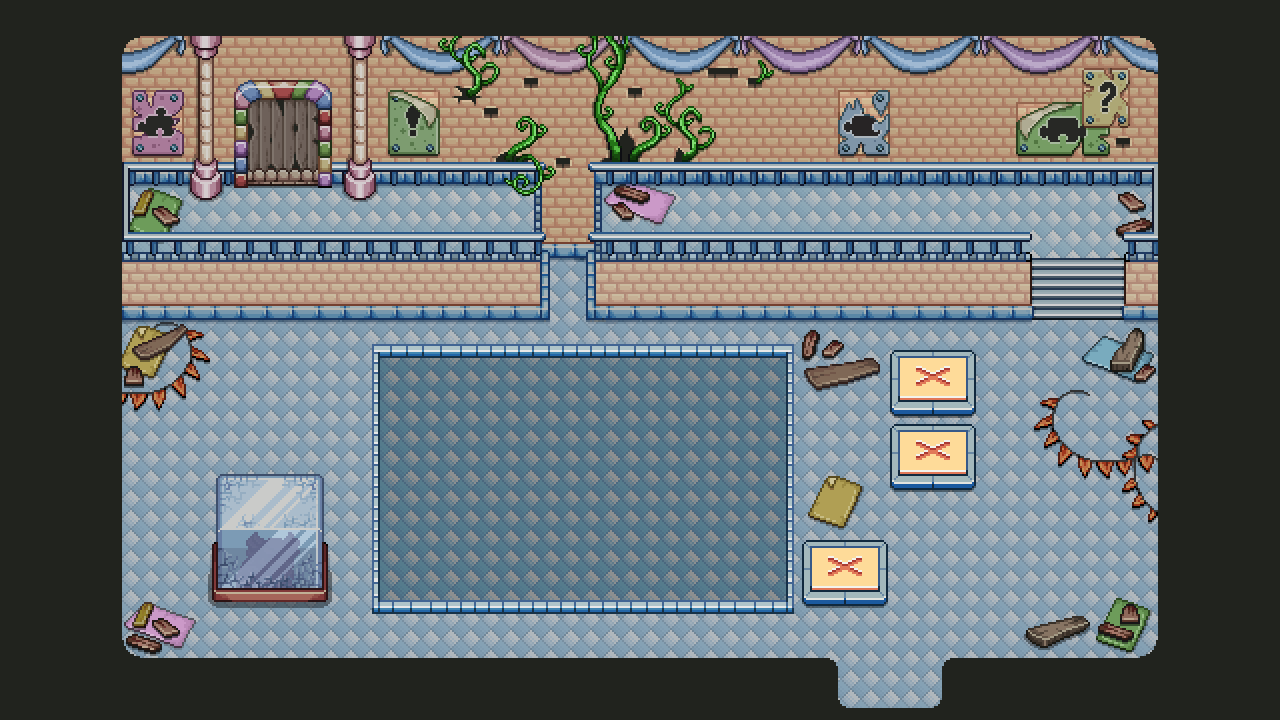
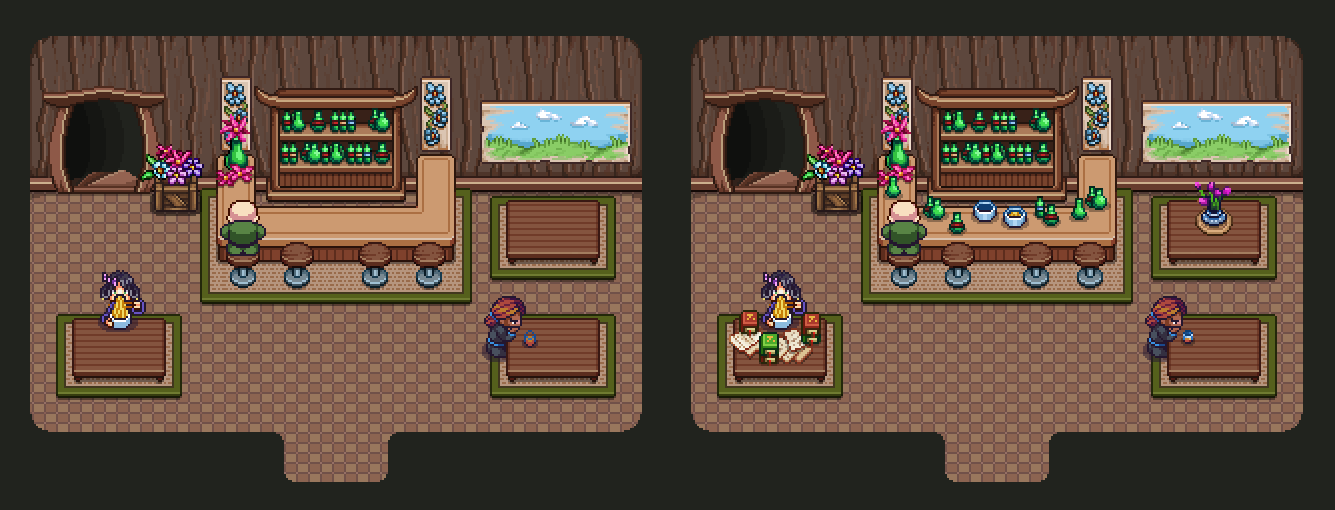
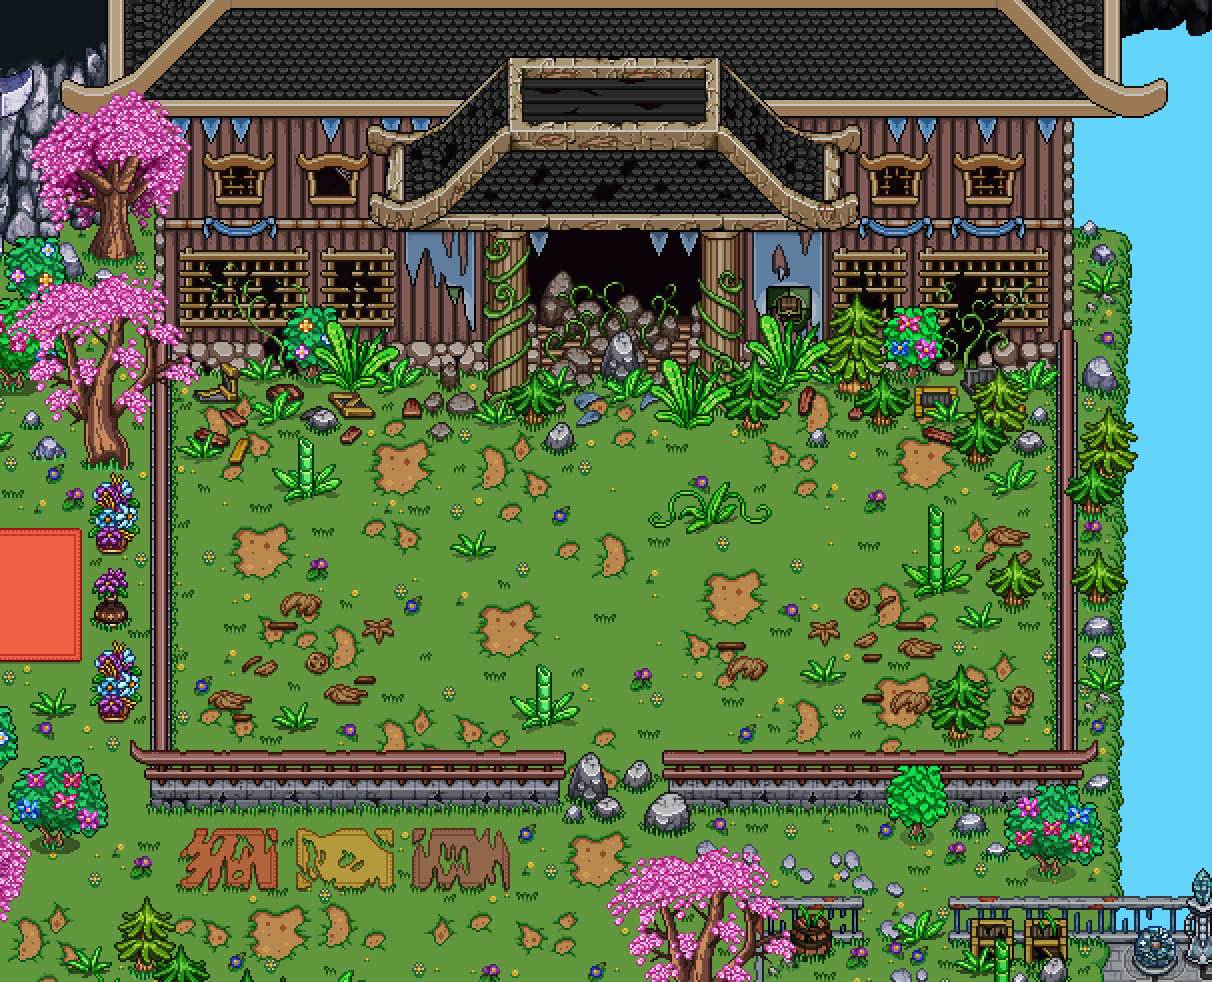
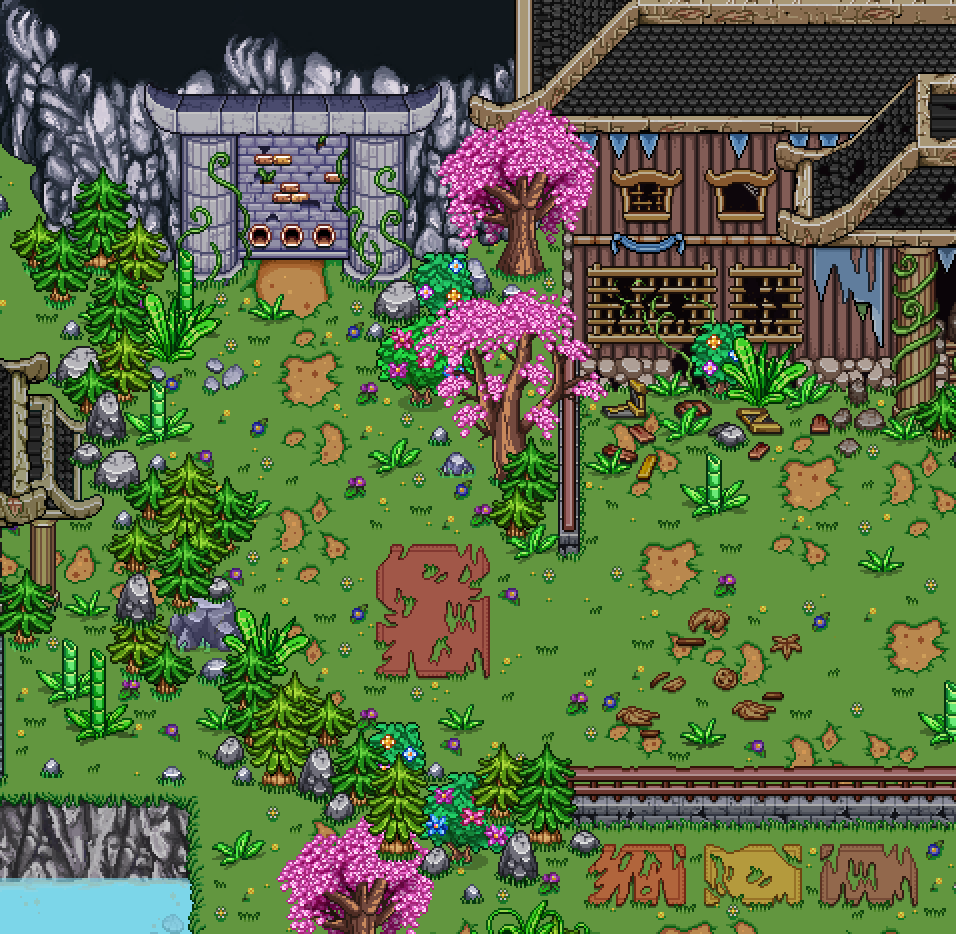
Now, last week we left Remedi with his wagon surroundings looking rather empty! Time to remedy (ha) that, and give him some fancy flowers for his collection:

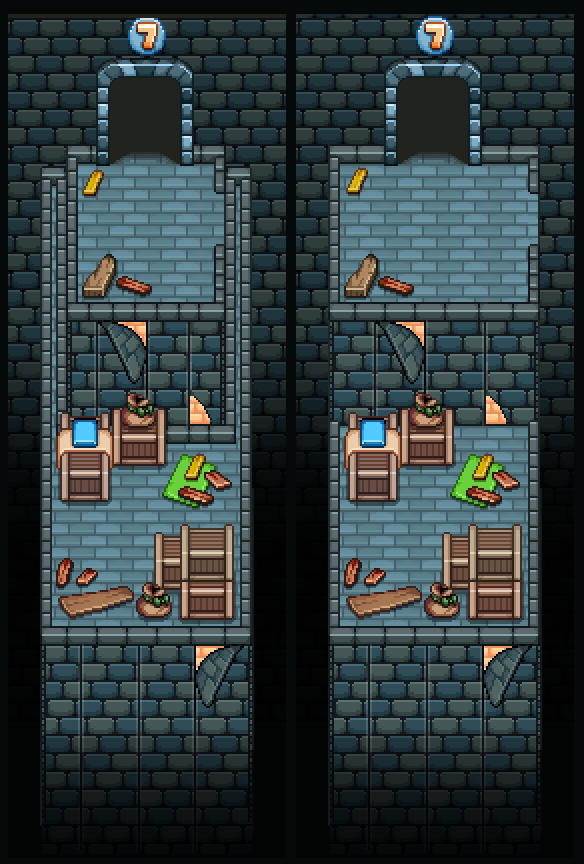
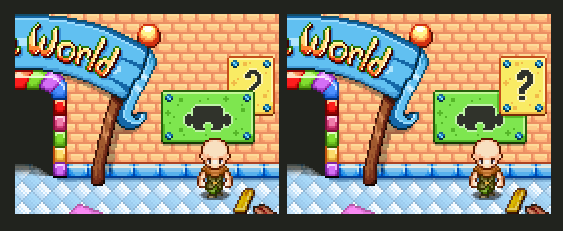
The idea is that, before you’ve unlocked this plot of land, the wagon won’t be there at all, leaving only some dirt in a half circle. A sign describing what will appear there will be in the middle of it, and we’ll probably use some flavor text, such as describing how an alchemist might be lured there if you just get some interesting plants for the dirt (done automatically by paying the amount needed by the sign).

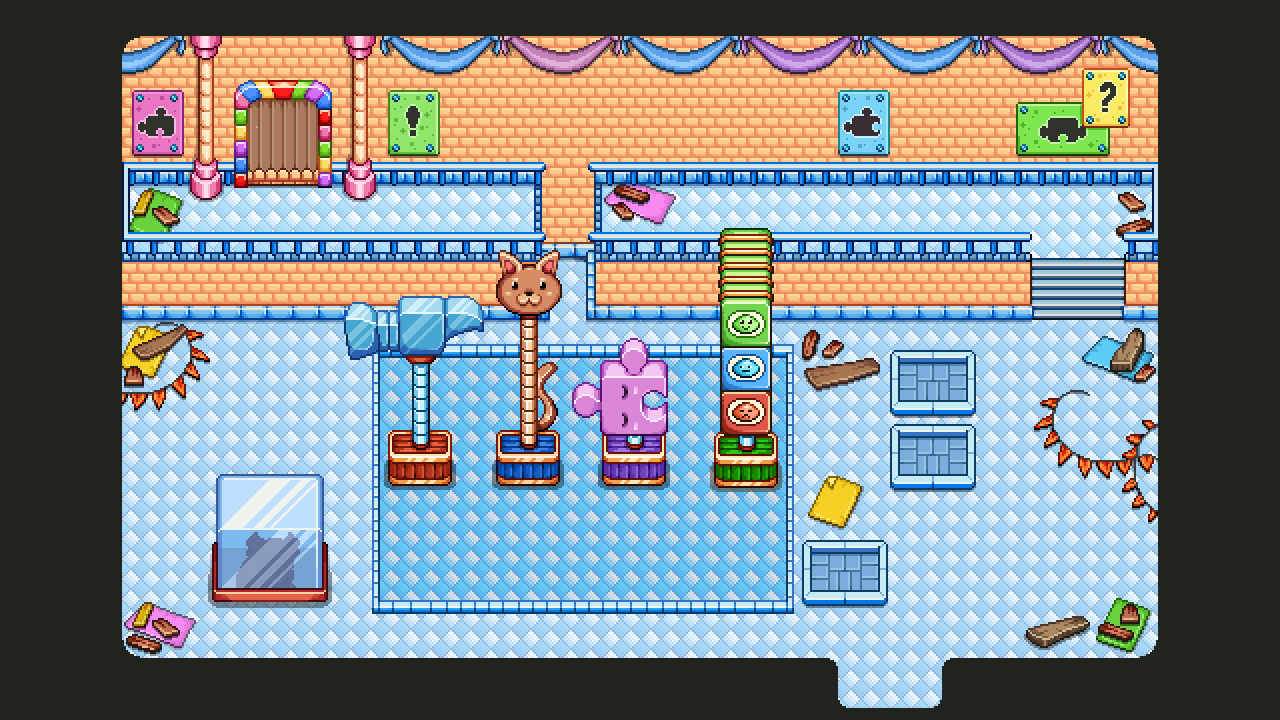
For now, this is what it looks like in its completed form:

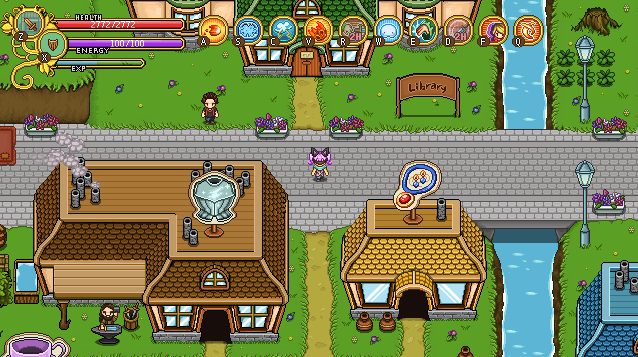
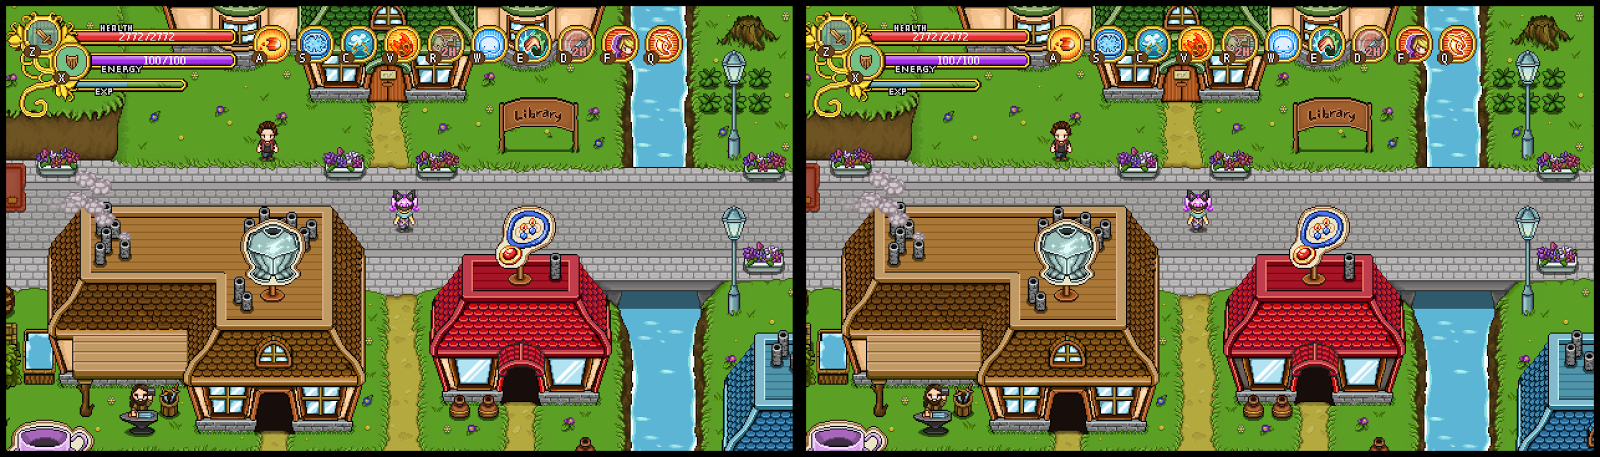
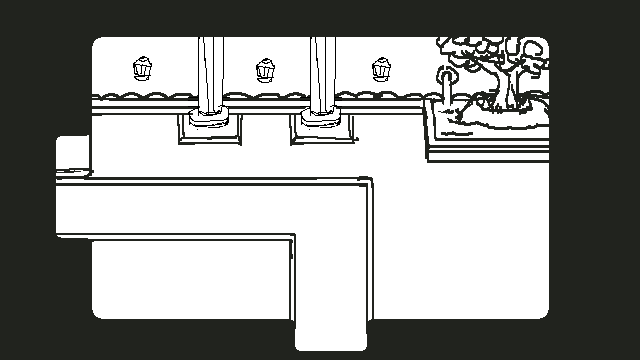
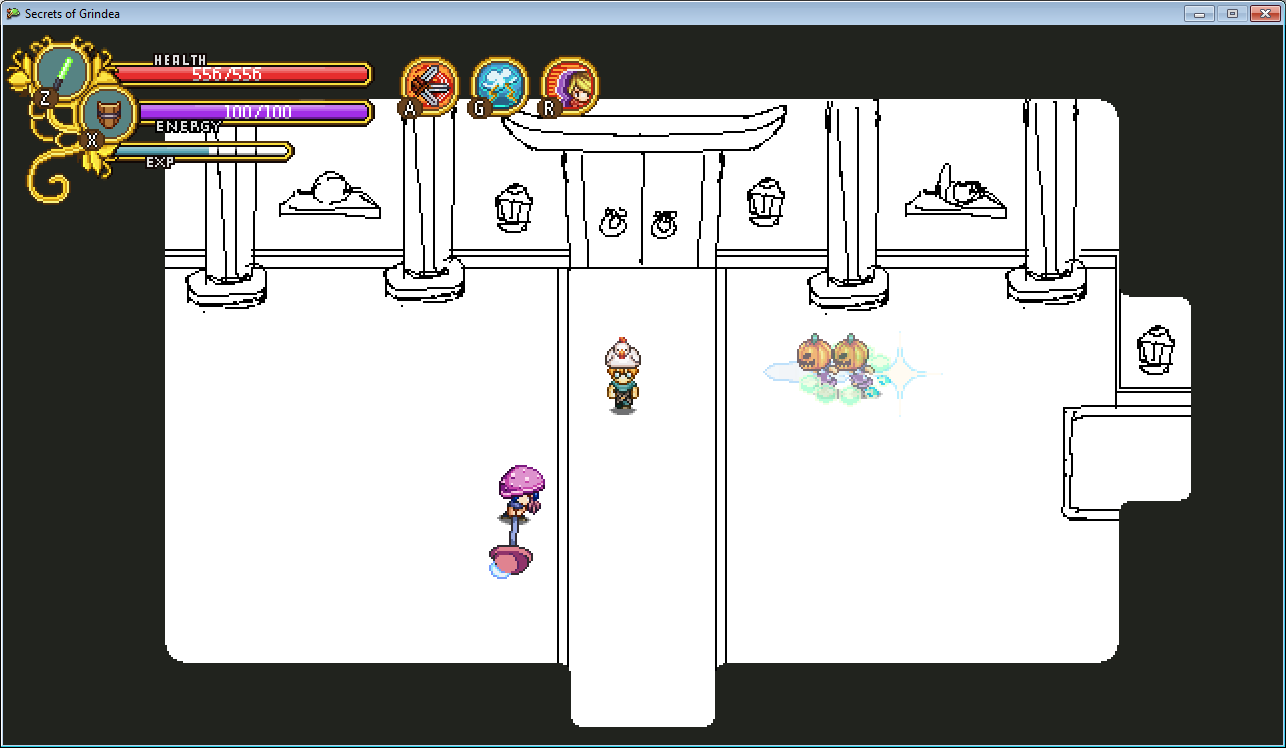
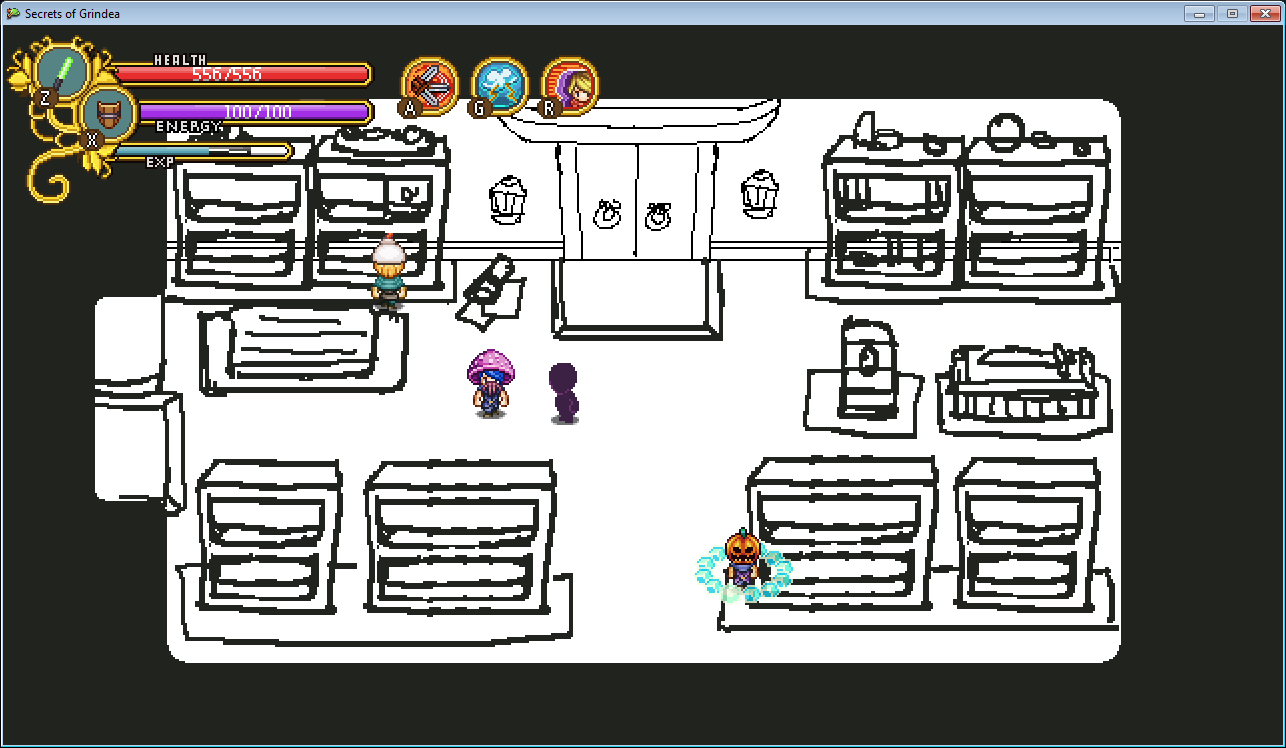
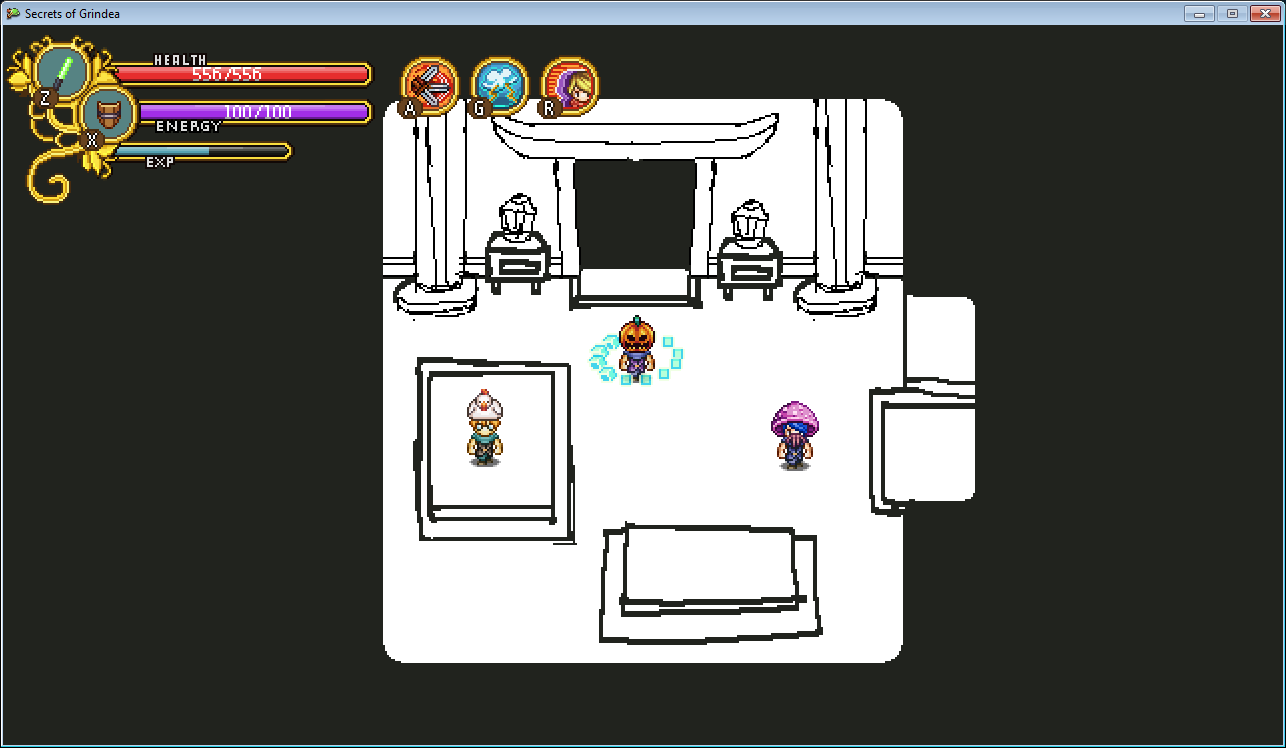
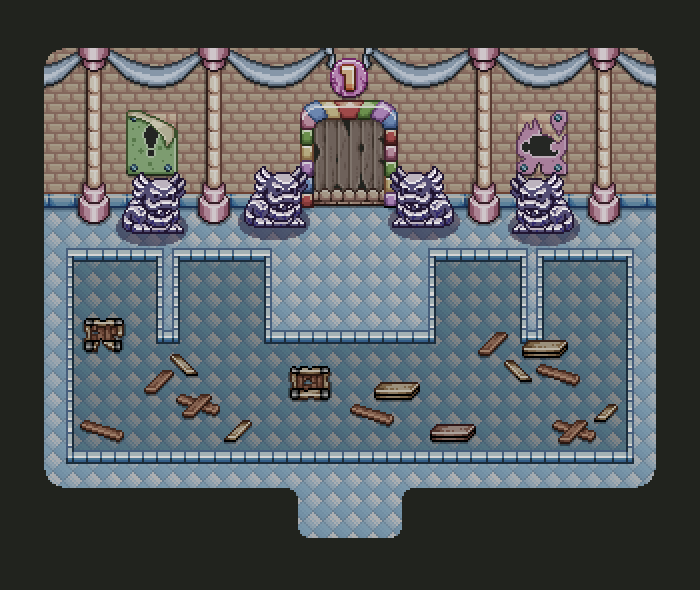
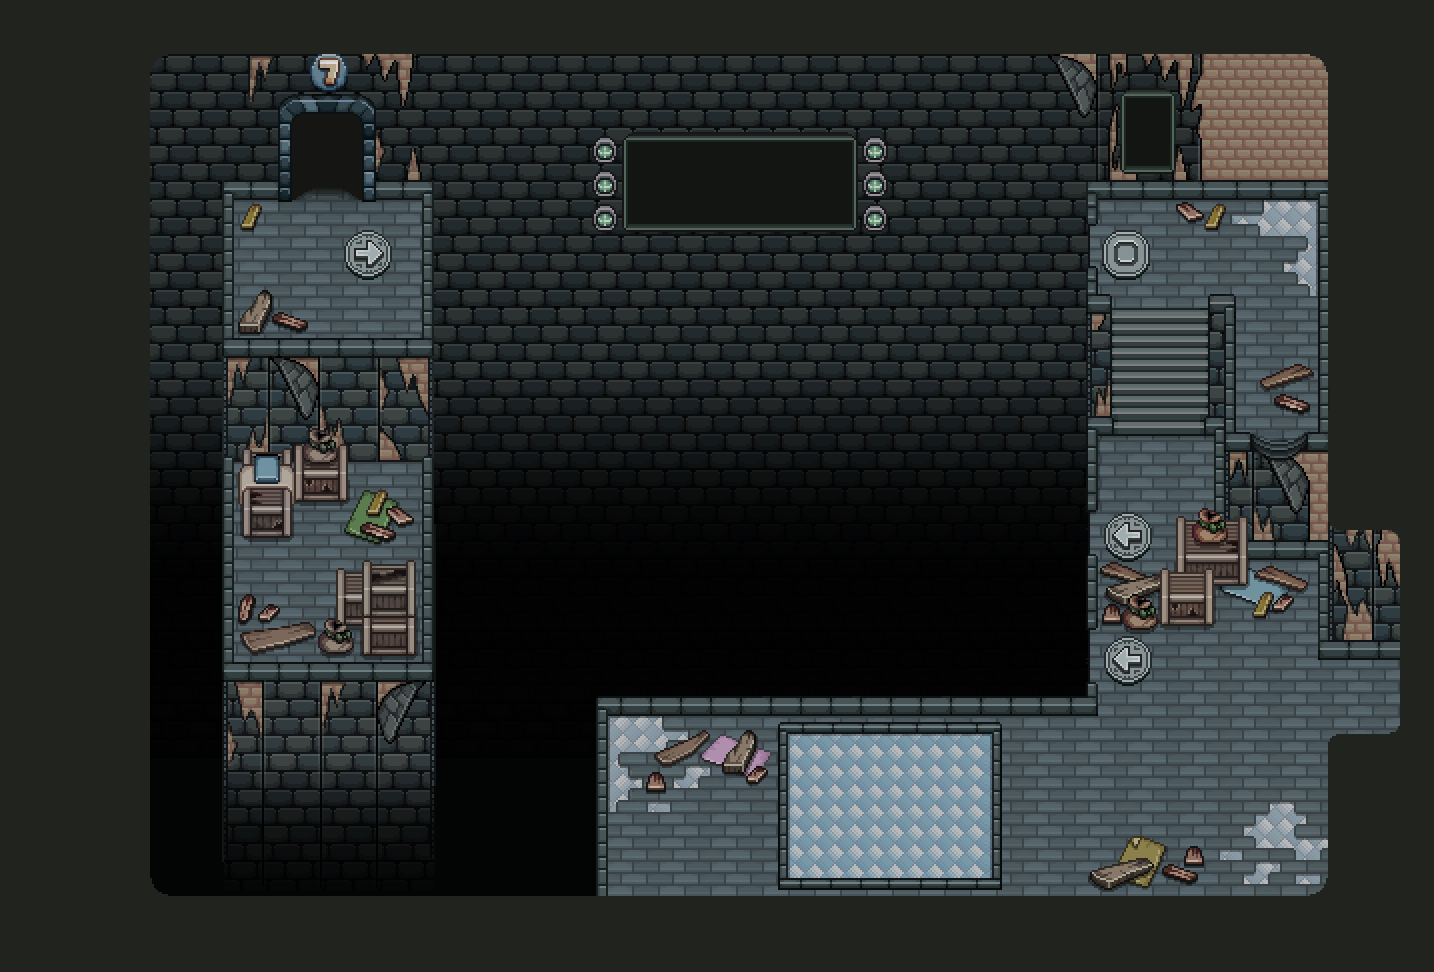
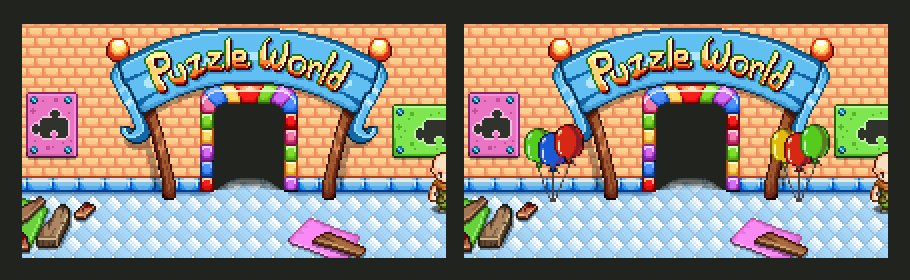
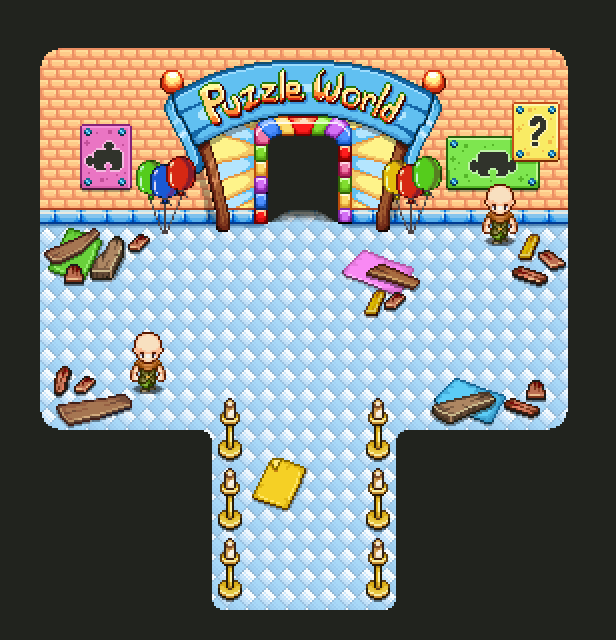
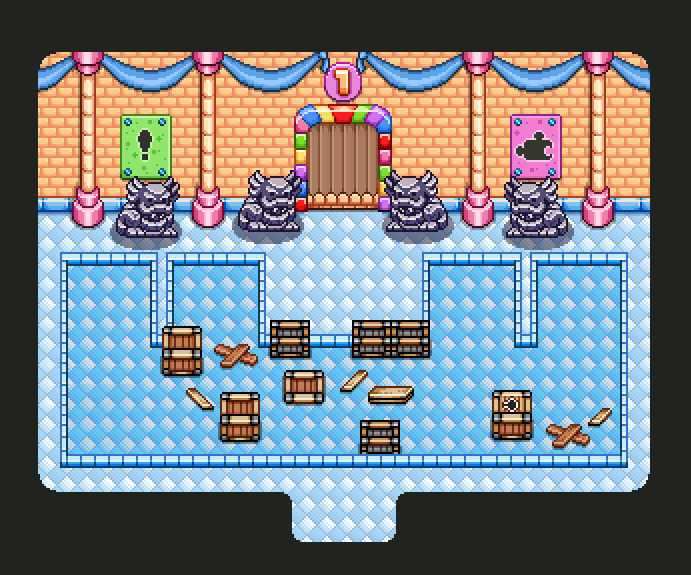
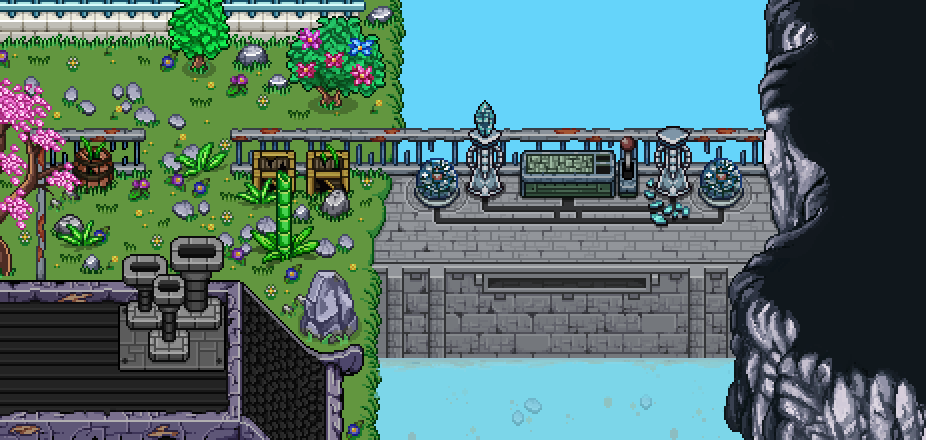
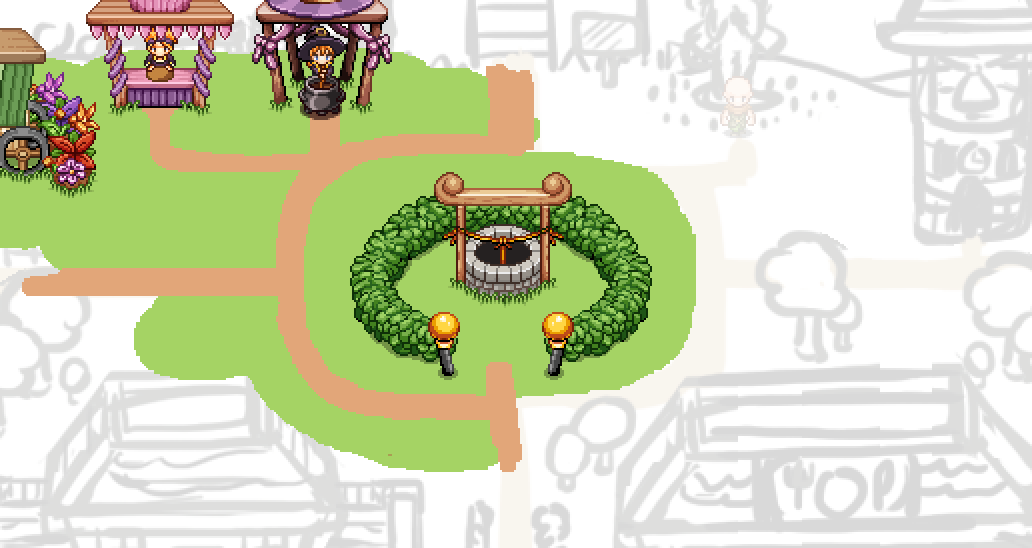
As Arcadia continues to grow, it’s time to add that central piece of decoration, right below the mountain where you set your course for another arcade run:

It’s a well! And not just any well, but one of those visual plots that will help increase the number of people entering your town! Instead of being functional in the sense it adds a specific mechanic, it attracts NPCs that might give you a quest or two :)

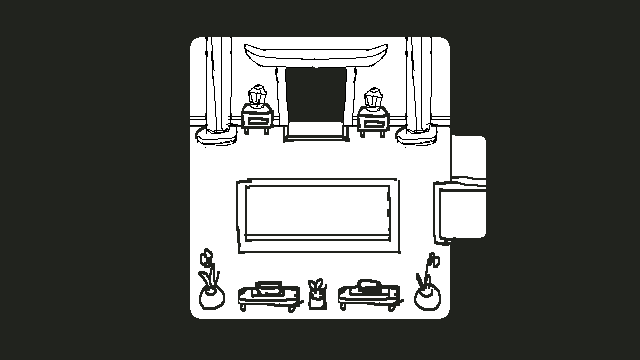
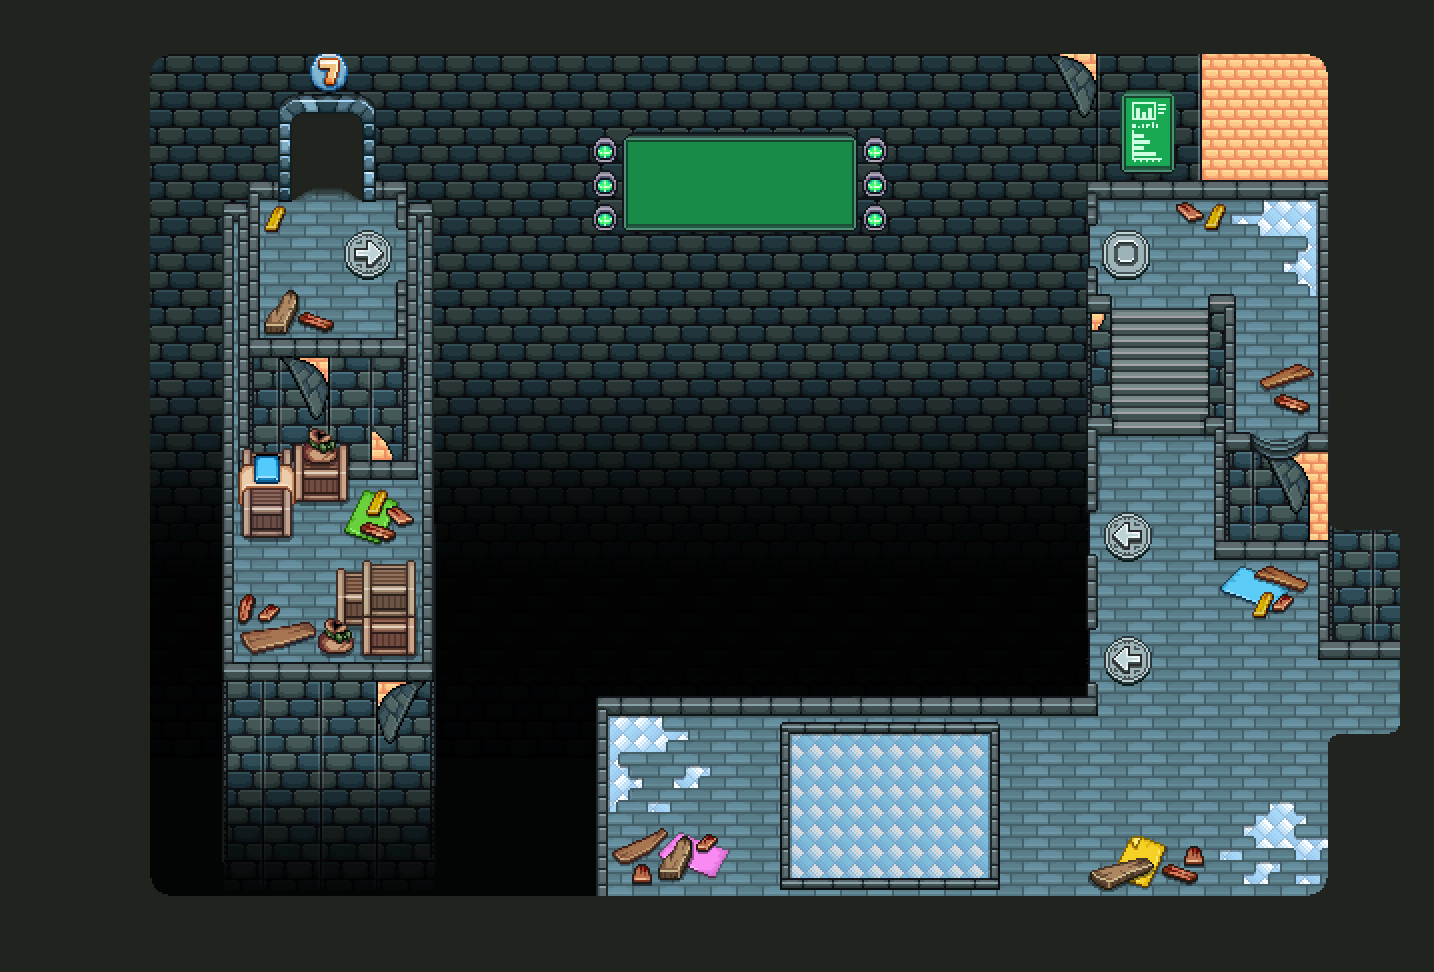
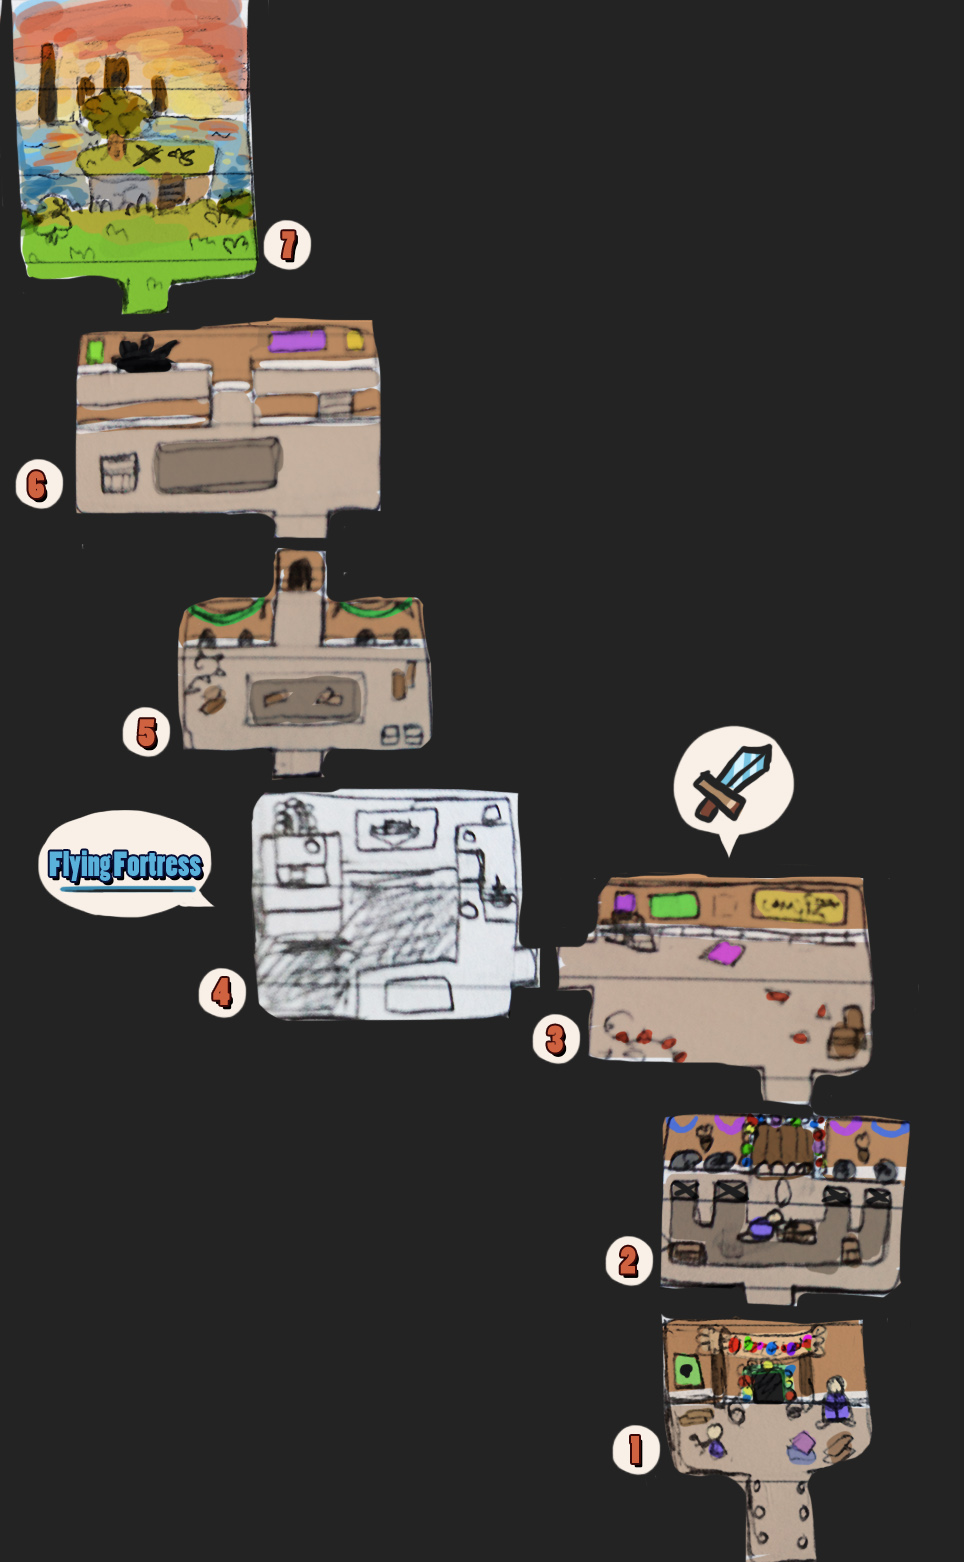
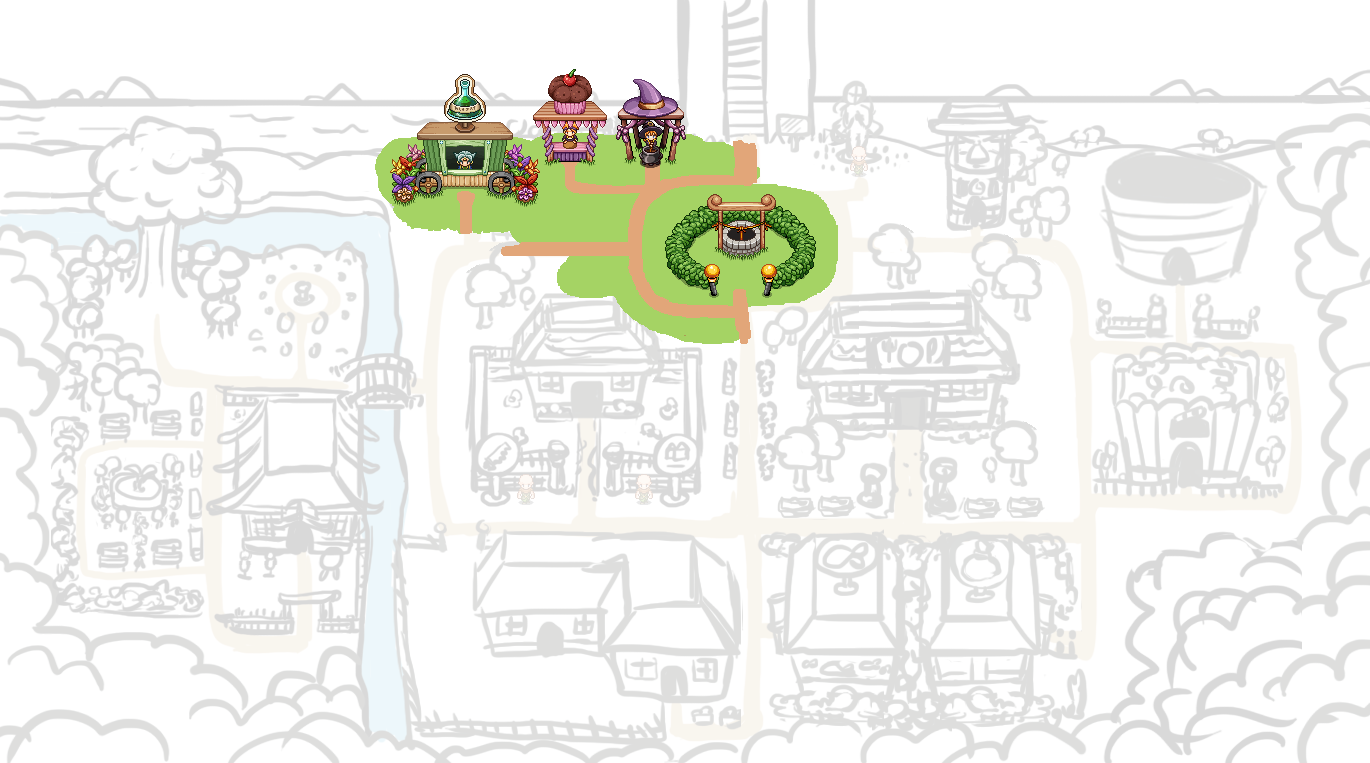
And here’s the progress on the big map:

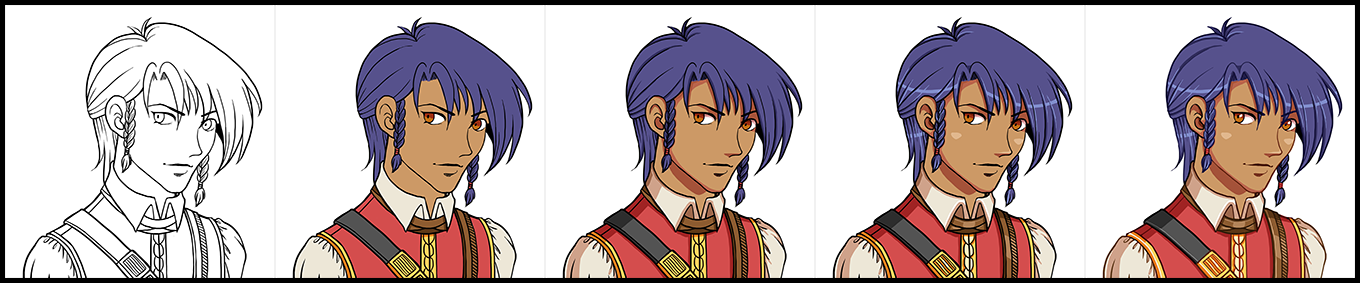
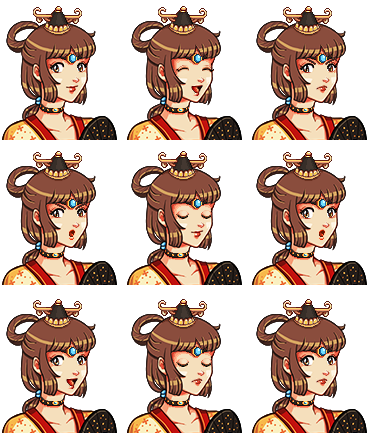
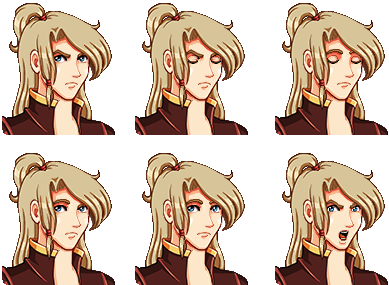
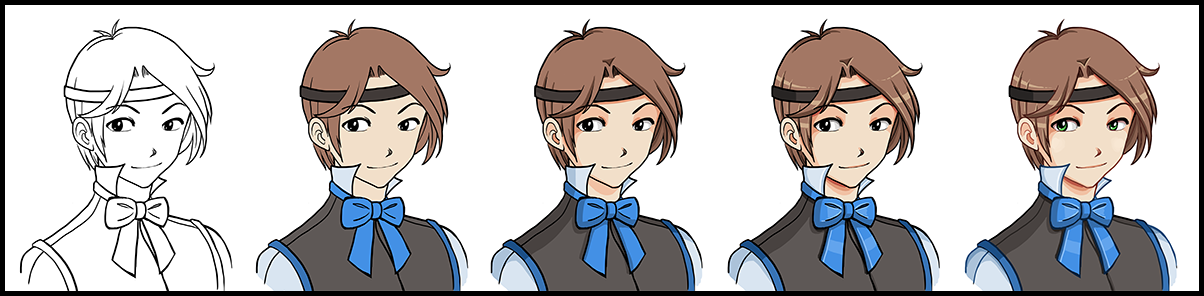
In the portrait department, it’s time for another kid roaming the streets of the desert/harbor town:

I have all kinds of ideas for this NPC, though I’m not entirely sure they will actually be realized, so I’ll keep quiet about them for now. All I can say is that Heero Yuy of Gundam Wing might have been an inspiration!

Finally, what Fred and Teddy has been up to: more skill work! The graphics for the Utility skills are coming together one by one, and here’s a few examples of the Barrier skill, tarting with it’s breaking due to a bee attack:

In the current iteration we’ve decided not to go with our original plan, which was that a barrier break like the one seen above would cause you to take the remaining damage (if any) after the last of your barrier hp is used up. Instead, it’ll now absorb the whole attack, keeping you safe from harm even as it’s close to breaking. Our reasoning for this is that it feels more satisfying being able to completely shield yourself from harm, especially against strong enemies which might be able to hit through the barrier with just one attack. We’ll balance this by lowering the amount of hits and hp the barrier can shield you from instead, but if it still ends up too OP we might bring back our original plan.

Of course, after a barrier break you won’t be able to recast the skill for a little while as well, as seen above.

Next, what it looks like as it expires due to the time limit:

After about 10 seconds it fades out, at which point you can recast it so long as it didn’t break due to taking too much damage. Finally, below, you can see the perfect guard effect as you bring it out in the right moment against a bee:

And here’s a closer look at the effects:

We’ve also begun implementing the Death Mark graphics seen in last week’s post! We are, however, considering changing it slightly, perhaps making the sword red and adding a skull, making it better fit its rather ominous name!

And to end this post, here’s a first iteration of the Challenge skill:

This, too, will be further improved. Below you can see an effect that will be added to the animation, to better indicate in which direction you aim your skill. Eventually there will be a speech bubble with curses thrown at the enemy as well:

Onwards we go! With some luck, these skills might be available as soon as this weekend for Frontline players, but it depends a lot of any more bugs that may surface as we continue to test these out. Fingers crossed!

And another week goes by! Last week we finalized Housing and finally managed to get a Stable patch up and running with the whole thing, meaning that (unless there are many more bugs that need fixing), it’s time to focus our attention on those Utility skills! If you are one of those waiting for Stable updates, please go ahead and try housing out, and let us know about how to make it better in the future or any bugs you might find! The full patch notes can be viewed here!

I know a lot of you are sad to hear about there still not being a healing skill, but hopefully the inclusion of the barrier skill will soothe that blow slightly, while still keeping true to our design. So far, we’re all happy about the skill ideas and hope you will be too!

Teddy is currently prototyping the Utility skills using whiteboxing methods (meaning he’s winging the art with what we already have or extremely simple paint art), just to get a feel of how they’ll work in the actual game. Sometimes it becomes very clear even at this stage that some things just don’t work the way we’d like it to, and if that happens it’s unnecessary to have Fred make complex animations for skills that will get cut!

So in the meanwhile, Fred’s continuing to work on the desert enemies until we’re satisfied with the first bunch of skill prototypes, and I’ll continue to focus on the Arcadia Rework, which is likely to be the next step after the Utility skills have been implemented and the skills and battle systems have received an overall rebalance. I’m also continuing to create portraits every now and then, for the inhabitants of the upcoming desert/harbor town, to avoid spending multiple weeks doing nothing but portraits once we get there! Stay tuned :)

For now though, let’s look at what’s been going on last week (aside from the stable patch)!

First up, a list of those Utility skills mentioned last week! Keep in mind, all of the names are working names for now and the effects might differ slightly from the descriptions below, depending on how things work out in the prototyping stage.

First up, the offensive ones:

Challenge – A taunt of sorts, where you make one enemy focus his whole attention on you. This means that if the enemy is currently attacking someone else (in multiplayer for instance), it will immediately target you instead. Under this effect, you’ll deal more damage against this enemy, but it will also deal more damage against you. So, a double edged sword, if you will.

The targeting works much like a projectile: your character will go into a shouting animation in the direction you’re currently facing, and the debuff will apply to the nearest enemy inside the effect.

Death Mark – A debuff that uses a earth spike/meteor style target which you can move between enemies as you hold the skill button. Once you decide which enemy to target they will get a marker on them that will look like a meter of sorts. As you deal damage to this enemy, the meter will fill up and once it’s full or a timer runs out, it’ll deal a percentage of the damage you’ve already done to the enemy as bonus damage. It will also trigger immediately once the damage it’d deal is enough to kill the enemy.

Sleep – A skill that puts an enemy to sleep and makes it unable to attack. However, if you hit the enemy it will wake up and return to battle. The duration each enemy sleeps may vary on their type and level. There will probably be a global limit for this skill, where only one enemy can be asleep at the same time. This means that if you or any of your friends cast the skill on another enemy, the one currently sleeping will wake up as the new one falls asleep.

For the defensive skills, we have:

Meditate – A skill that you hold to regenerate EP at a greater speed. As we rebalance the skills it’s likely we’ll edit how EP works slightly, making it regenerate more slowly (among other things) – which means this skill will be more useful for more people than it might currently be. We also have an idea that if you charge x% of your EP and reach max using Meditate, the next spell will cast will be cast for free.

Shield – A shield you can cast around yourself or a friend that absorbs some damage. If the shield HP runs low and you get hit by an attack that finishes off the shield, you will take the remaining damage of the shield-breaking attack, so beware!

In single player, this shield is cast like a regular skill, while in multiplayer holding the button will bring you into a wheel (like when you control the Frosty Friend), which shows the faces of you and each of your friends characters. Press up to cast the shield on yourself, or right to cast it on player number two, etc.

The shield will also have some kind of perfect guard effect, if you manage to cast it right before you or your friend would get hit by an incoming attack, but we haven’t decided exactly what this will be yet.

Blink – A short-range teleport ability that auto targets some distance away. This means that if you tap the skill you will blink across the screen, but if you hold the button down you can move the target around to change where you land.

Finally, there’s the two buff spells:

Offense – Boosts damage, speed and crit.

Defense – Boosts defense, shield regeneration and EP regeneration.

One important disclaimer in relation to these skills is that they’re all subject to change depending on your feedback or our experience while testing them out! For now though, this is the lineup we’re looking at and right now we all agree it’s gonna make things much more interesting :)

Now, time for another portrait: the summer fae luring her winter fae friend to the desert town!

As with the other harbor/desert town characters, nothing has been properly decided about these characters, but my general idea is that she took her friend with her, and while she enjoys herself he has a hard time dealing with the climate! I guess we’ll see if that story makes it in the end, once we finally start implementing the town.

In the Arcadia rework business, it’s time to introduce Remedi’s Alchemy, an important part of your future arcade runs…

In this first part we focus on the wagon itself, and in the next we’ll add a bunch of interesting surroundings: strange and mystical flowers that have luring the alchemist to this remote town!

Finally, let’s end this week by taking a look at what Fred has kept himself busy with: the Solem animations! In order of appearance: Appear (spawn), attack, dig (for when he charges at you), grab (as he appears from beneath your feet to hit you), and a regular movement animation!

Important to notes is that these are still in the ‘sketch’ stage, so they need some cleaning up (as you can see on a few, there are holes in the middle of the poor Solem). This is the way Fred prefers to work when he creates animations: first making a rough sketch, then filling in more and more details until they’re properly polished (and all holes removed).

This week we uploaded another patch to the frontline beta, featuring a bunch of smaller updates! The biggest changes, from the patch notes:

World Map Completion: Based on a suggestion on our forums, we’ve added completion tracking for the World Map! It tells you how many cards, drops, fishes, quests and secrets you have yet to find in any given area. This should help people figure out what it is they’re missing for that juicy 100 % completion! Note that the Achievements and Crafting completion is still tracked via their own menus.

Damage Numbers: The new default setting for displaying damage numbers is “Composite”, which turns your damage into one big number per enemy instead of many small numbers. We did this change mainly because some builds dish out so many hits that the old damage numbers cluttered everything, and in multiplayer this happened pretty much regardless of builds. It also makes damage over time a bit more readable, as well as how much damage a flamethrower or blade flurry cast actually does in the end! For people unhappy with this change, there’s a “Classic” option that mimics the old style, as well as an even more streamlined option called “Minimalistic”, and of course… an option to turn off damage numbers completely!

HP Bars: Enemies now have HP bars above their heads by default. These appear after an enemy has taken damage, and fade away after a while if no new damage is taken! Also, low HP allies in multiplayer also have their HP displayed above their heads. Both of these types of HP bars can be disabled, or set to always appear if an enemy or player is below full HP.

There’s also the accessory shop, among other things (which we already began preparing in last week’s post), and a bunch of new characters!

Joining his sister in the store will be this young fellow! Yes, it’s a guy, you know the drill, Vilya can’t draw guys… though I think they do look a bit manlier now…maybe (ignoring the braids)??

01-wip

Anyway! Being the heir to their father’s business, he’s sick and tired of the boring stuff and would like nothing more than to become a collector. Perhaps there’s some way you can help him? We actually haven’t decided on any quests surrounding this family but it would be pretty cool :)

02-sprite

There’s also the father of the accessory store’s shop keeper and her brother! This is one famous merchant, visiting to check up on his daughter who has moved abroad to open up a shop of her own:

01-wip

As mentioned before, he’d like nothing more than for one of his children to take over his business, but with the daughter setting up a store of her own and his son’s lacking interest… Whatever will become of it?!

02-sprite

Now, remember the person entertaining a bunch of artifacts in the first part of Tai Ming?

01

Well, they’re back! Only this time in the second zone! Some of the artifacts have been replaced, and this Helmet appears instead!

02-wip

Not much is currently known about Helmet, but I’m quite sure Teddy has come up with some awesome dialogue for this guy (or girl). I mean, life has to be kind of cool as a helmet, right?

03-sprite

…Right?

Now, as always before a patch, there’s a bunch of smaller things to be edited or fixed!

First up, the accessory-siblings. We adjusted the skin tone of the brother slightly to make him fit in better with the rest of his family, and changed the hair color of the shop owner girl for the same reason:

accessorybrother

accessorysister

We also played around with the Accessory shop title, which previously was called “Accessory & Co” but is “Ruby’s Rubies”. Our current favorite (and the one who made it to the patch) is the middle one:

accessorytitle

Next up, we wanted the Accessory shop to stand out a bit more, so I was tasked with changing its colors! Below is the previous version as well as two color alternatives for the shop. We’ll probably go for the standard wall color, though in the future I might go back and edit the houses in Evergrind City in general.. Who knows what colors the walls will end up having then?

Before:

accext01

After, version 1 and version 2:

accext02

The ruins in the west needed their own title to appear as you enter the area as well as a name! We settled for Ancient Ruins for now, subject to change if we come up with something else… :)

ancientruins

Some of you noticed the chest closing in the present after you opened it and the water is low. Fear not, it has been solved – the chest will now remain open. Though where did the plants go? :o

chestinrubble

Then, since a flashback scene with Mana and the children (Zhamla and Tessen) has been added, so I got to make a bunch of new expressions for our favorite nanny! :)

mana

Finally……. Back to the third Tai Ming map and that old shrine!!

01

Aside from being a place to battle enemies in the present, this room will also hold another flashback orb, with the people of Tai Ming enlisting the help of the Flying Fortress crew to deal with a certain threat.

Since I don’t know exactly how much of the room will be shown in the flashback orb yet, I’m keeping the past version quite bare for now. I’ll probably add more decorations once I know where and how the cutscene will play out :)

02

Next week we’ll continue working on the third part of Tai Ming, and since the holidays are coming up and we’ll spend some time apart we’ve begun having more design meeting so everyone knows what’s coming next in the game! For those cases when we want to work but can’t get a hold of the others to ask questions, you know. Therefore, I expect the next two posts (or so) will contain more design talk and mentions of upcoming features…. But we’ll see :)

Hello guys, Vilya here! The first week since the second part of Tai Ming was uploaded to Frontline has now gone past, and we’ve spent eagerly listening to your feedback (and fixing bugs)! Thank you to everyone who left comments and suggestions, we’ll add and improve a bunch of things before we consider this part properly done.

Some of you have already noticed that after finishing the first zone, it’s possible to get stuck, with the time warp portals disappearing. While this isn’t quite working as intended, the truth is that once you’ve finished an area, you’ll only be able to return to it in the present time.

We have a couple of reasons for this, and it wasn’t an easy choice to make. I mean, of course it would have been great if you could always go back to finish any puzzles or secrets you might have missed. On the other hand, we felt like the area would have a bigger impact once you realize that when you’ve seen all there is to the story here, you can’t go back to talk to the people again. They have passed on already and belong only in a distant past which you shouldn’t have had access to in the first place.

We also didn’t want the player to feel frustrated because they can’t go back to, say, the first zone, and simply try to convince Zhamla or Sizou to change their ways once you realize how events in that zone turned Zhamla from a young, optimistic boy into a serious and rather obsessed young man.

We could have just simply not mentioned the fact, or thrown in a line about not changing past events, but again, this way felt like it’d have more of an impact.

Now, obviously you’re not supposed to get stuck anywhere in the present. So how are we gonna solve the fact that there are a ton of blockades that you need time travel to get past?

Cue this guy:

pratrutan

This fellow is a traveling adventurer (with dreams of becoming a Collector, perhaps?) who you’ll meet many times on your journey. Once you’ve finished the first part of Tai Ming, he’ll arrive to move things out of the way and create a passage that you can use as well. Once you’re done with the second zone, he’ll move on and do the same there.

adventurera

So what about all the treasures you might have missed on your first play through? Worry not, you’ll be able to get them later in the game, one way or another (we have a bunch of ideas), so missing an item in Tai Ming won’t affect your 100% completion if you manage to find it somewhere else later.

adventurerb

After all, hundreds of years have passed since the time when Tai Ming was a bustling town, and it’s not unlikely that once you stop messing around with the time jumps, someone simply moved the items somewhere else.

adventurerc

With this new information, it might be worth going through Tai Ming one more time to see if you missed any secrets, would you say? Head out and collect! The 100% completion awaits you!

Next up, in celebration of having completed my part of Tai Ming’s second zone, I decided to take a quick break from the asian theme and move back to Evergrind City and its surrounding fields!

This map here is in fact the one that can be found north of the farm, in the western Evergrind Fields! It’ll be the key to opening the final dungeon, but until you figure out how to do that it’s just a bunch of resting ruins in the middle of the woods.

For this area, I began with a very simple sketch just to get a feel of the layout. Then I added a bunch of the surrounding props (trees, and the like) with our editor, before creating the new stuff:

03

Then, it’s on to making the actual ruins:

gif01

gif02

gif03

gif04

gif05

gif06

And finally, adding all the details to bring the place together:

ruins_081

While this map likely won’t be implemented until all three zones of Tai Ming are completed, it’s been on my mind for a long time, and I’m sure the “this way is blocked until we implement temple x” notice has bothered a lot of you guys as well! This way, at least you’ll be able to move around almost everywhere (with the exception of the desert and onwards, which hasn’t been added yet of course) without annoying notices!

And now, time to start working on Zone03. We’ve already begun prototyping most of the area, with the exception of the final two rooms (one which will house the Mimic boss, and one which will feature… something else).

00a

Our very first prototype consists of extremely simple black & white sketches, where I just draw whatever I think would look cool. I mainly freestyle the size of each map, but try to keep in mind certain things like whether there will be battles taking place, or where the camera will pause in cutscenes and such.

00d

Once I’ve sketched whatever I feel is important to size-check or run by the others, I give the sketches to Teddy who adds them to the game engine. He won’t add any colliders or anything at this point, but often he’ll make sure the doors work in cases like this where we need to run through more than one map connected to one another.

02

Then, me, Teddy and Fred run through the maps in multiplayer, talking about what we think as we go along. Are the rooms big enough? Will there be enough room to fight? Does the camera position well?

03

Often I’ve come up with ideas for what should happen in the rooms, either before or while I make the sketches, and in this multiplayer test we tend to brainstorm a lot as well. We’ll ask ourselves things like “wouldn’t it be cool if this happened here”, or “wouldn’t it be nice to have a painting of x there”, among other things.

05

In the case above, I made a design with 2 tables, but as we talked about what the flashback orb will show in this room, we decided it’d be better to have it take place at one long table instead. We talked about how long the table should be, and two of us had to act as indicators so I could take a screenshot and add a table approx. the size the characters show (plus some more decorations):

fix02

After going through each of the rooms in a similar way, with us talking about the sketches and me editing them as per what we decide, we’ve got a decent “whitebox” version of the place. There are no final graphics, but since we’re satisfied with the size, it’s possible to start adding colliders as well as prototyping enemy encounters.

Since this zone is only four rooms, two outdoor areas and a boss fight, we certainly hope finishing this place will be faster than zone02. There will be a lot of epic things happening here though, so I guess we’ll have to wait and see how many super difficult animations Fred will have to make before we’re satisfied…. Stay tuned ;)

Hey guys!! It’s been another week, and it’s me, Vilya, back to bring you another recap of what’s been going on in the Pixel Ferrets office!

Last week I made the past version of the final Puzzle World room – this week it’s time to transform it into its present version! Since this is the last room before you manage to get outside again, I got to add some vines again! Long time no see:

01

I also got to paint a lot of cracks on the huge glass thing, which also is something I love doing. Nothing is more soothing than listening to music (or an audiobook) and just painting crack after crack… Well, since we wanted what’s inside to be somewhat visible I decided not to go too crazy with it. Not sure how it’ll turn out in the end though, maybe I can add a few more before calling it a day… :)

02

Next up, I should start making the statues you’ll use for this room’s puzzle! First, a video showing the progress of making the past versions:

03

Since the progression from standing to fallen statues happen as you time travel, there’s no need for animations. As such, I was also able to make the present, crumbled ones:

To make it easier seeing where any given statue needs to go, we decided to keep their boxes on the floor (who also got slightly different dimensions since the last post) in the present, in various states of decay. The alternative would have been to have the statues fall with base and all, but we believe this makes it easier to read which statue is where on the puzzle floor.

There’s still two things I need to make for this room. First we need standing, decayed version of the statues for present times, as the statues won’t fall if they’re standing next to a statue that would block the direction it would have fallen in. This is mostly to make it easier for us – instead of having to figure out how to stack the statues on top of one another, they just won’t break as severely if it means they would have fallen on top of another statue.

I also need to make a broken version of the glass box in the lower left corner, so it’s possible to let out the statu– whatever’s in there. But, that’s for another day!

04

Next up, as Teddy has been working on the cutscenes in Tai Ming’s second zone I decided to go over the dialogue and start making a bunch of expressions so that can be properly finished!

First up is Tessen, the little girl from the first zone who has grown up to become a young priestess of Grindea:

05

She’s both happy to see you, and has some serious worries on her mind. Wonder what those are about..

Next up, Zhamla:

06

Since his adoptive father’s speech about being strong, Zhamlas life has taken quite a serious turn, and unfortunately there’s not a lot of room for positive emotions in his life nowadays.

Speaking of adoptive fathers, Zisou’s life has actually become a bit more lax these days, so he can afford a smile or two – but there’s still room for some quite serious expressions in there as well:

07

The second batch of expressions features four different characters:

08

First, the dam manager, who has quite a bunch of expressions, as you can see! He has both a serious(ly annoyed) and goofy side, and quite a peculiar quest to bring these expressions out!

The ancient Quest Master, Quinton’s ancestor(?), has a few more expressions than his present day counterpart. He has added both surprise and happiness to his range of emotions!

Mana, the lady with the dog in the first zone, has become older and grayer, but is still quite the happy person, while young mister Go, still is quite miserable in his adult form. He was the kid who lost the key in the first zone, remember? Poor Verment, he has had quite the tough life!

Finally, some Caveling animations from Fred! What are they up to in Tai Ming?!

cavelingss

Hello guys! It’s been another week, and now I (Vilya) am back with another recap of the big things we’ve been working on :D

This week, the work on Puzzle World continues! Next step is to transform the Statue Room into it’s sorry present state. Since this will be the first room to be turned into a present version, it’s extra important to get everything right since a bunch of the props, such as the planks, will be reused in upcoming rooms.

Here’s a GIF showing the process:

01

As usual with transforming rooms or environments from past (fresh & new) to present (old and worn), most of it is changing colors. But just turning a bright yellow into a dull brown won’t cut it in many cases, such as the door: as wood grows old, it will get worn down and cracks may appear. Therefore I added more lines in the wood, as well as holes here and there, where I imagine the wood has been broken over time:

02

Next room is a little different! It’s been sponsored by the Flying Fortress crew, and so it has been decorated to look like a room in Flying Fortress – only with wallpapers and a fake floor… :)

When creating this room, I had two options. Either I use the already-made texture of the Flying Fortress walls & floor, or I make a new one. It’s likely people wouldn’t be able to tell the difference, since it was so long since you went through the Flying Fortress in the main story – but I still opted to make new graphics.

I did this for two reasons: one, it gave me the opportunity to make the texture look even more like a wallpaper texture – instead of looking exactly like it does in Flying Fortress (which is built of what’s at least supposed to be real rocks), I could make a softer texture which would be easier to pass off as wallpaper. Second, the Flying Fortress graphics are very old at this point, and I worried that adding such an old texture among all the new stuff would look jarring – I’ve developed a lot as an artist since that time, so the difference in quality and style is quite big.

The smaller screen to the right will hold a message about the room being sponsored by the Flying Fortress – the big one to the right will either have something cool animated by Fred, or a graphic representation of the flying Fortress made by me. Or maybe a graphic representation of the Flying Fortress made by Fred or something cool (non-animated) made by me – who knows! :)

phaseshift-past

Since this room is already quite gloomy to begin with, it was a bit of a challenge to darken and dull the colors down without everything becoming too dark for the present version. Instead of going too crazy with the darkening effects, I decided to ruin more of the wallpaper around the areas where you’ll run around, having the real wall show through:

phase01

After finishing the past version, I added a pair of boxes that block the exit to the right. In this version however, the boxes are moved (since you enter the room in this timeline) and instead block your path to the top part of the room. To get there, you’ll need to complete the phase shift puzzle!

phaseshiftpresent

And yes, for those who noticed the difference between the Past and Present version: we decided to change the design of the left platform a little, as the previous version was a little hard to read for some people. The previous version is to the left, the new version to the right:

phaseshift

Next, after Fred finished adding some NPCs to the inn (left), I took over and added some props that I thought would suit them:

inn

The girl on the right is a bit underage, so instead of drinking she’s having a meal while studying hard to become a Collector like her sister (which will also be added to the table later on). Faita, the sword teacher from the first zone, is kind of drowning her disbelief at being second best at everything with a glass of unnamed alcohol (or is it soda?) ;)

Meanwhile, instead of cleaning up the bar, Montbel the owner (who isn’t present in the picture) has left all kinds of bottles and bowls on it for visual effect. ‘Aint he nice?

Speaking of NPCs, Fred has kept working on adding more of them to Tai Ming’s second zone, so here’s another bunch:

npc-lineup

Finally, let’s end the week with a portrait! I actually forgot I still had two more to make for the second Tai Ming zone. Guess I got a little bit too excited about starting to make backgrounds for Puzzle World!

portrait01

This guy is a hat salesman, having his shop set up outside the ancient Collector’s HQ. Like the hat salesman in Evergrind City, he has a kind of elegance to him! I guess it comes with the job, huh?

portrait02

This week I (Vilya) have finally started working on Puzzle World, the small extension of Tai Ming’s second zone set in the north! It’s been a blast – but first, let’s take a look at something I forgot: the Giant Thorn-Worm boss portrait!

01-sprite

02-gif

Based on Fred’s sprite, the Giant Thorn-Worm boss portrait is pretty straight forward, as it’s.. well, just a worm. Of course, it had to be adjusted in some ways: for one, it needed to be a lot longer than it is in the sprite, or it’d barely reach above the title text! I also added a few more spikes to its back.

Other than that, I tried to stay true to the sprite. Perhaps I could have added some texture to its skin, and maybe I will at a later stage – but I think it’s important that the boss portrait resembles the actual sprite as much as possible, especially when the sprite is as big as the Giant Thorn-Worm is.

As for the boss title itself, the main title will be “Giant Thorn-Worm”, with “The Threat from Below” as its sub-title. This is actually a reference to the movie Tremors, which was known as “Hotet från Underjorden” (The Threat From Below/the Underground) when it came to Sweden!

03-thorn-worm

And now…. It’s time to begin! Using the sketches from last week, I’m going to create the backgrounds for each of the Puzzle World rooms. It’s gonna be a lot of fun, since this place will be totally different from everything else in Tai Ming graphics wise: bright colors and crazy color combinations everywhere! Wohoo!

To celebrate a completely new set of graphics, here’s a video showing the process of creating this room! Videos are definitely more fun to do when there are a lot of new graphics involved, so I’ll probably do one or two graphics for each new area, rather than spam a ton of videos of me recoloring and reshaping previously made objects from now on:


After finishing recording the video, I decided to add and change a few minor things before the finished room. First up, moving the question mark poster to the front – in the back it could be anything, and I think it’s unnecessary to confuse players about it:

01-poster

Next. adding some balloons. I mean, it’s a theme park, after all – so it’s not really complete without a few balloons. Right?

02-balloons

Third, in the original sketch I had a “cool effect” around the first door of the theme park, which felt a bit redundant after I completed the rest of the room. However, after giving it some thought, I wanted to try creating it after all – in the worst case we’ll simply remove the effect again, but for now I kind of like it:

03-door-effect

Here’s the finished first room after these changes:

04-room1

And now: the first actual puzzle room of this brand-new theme park! This one is focused on statues, but solving it won’t be as easy as you might have thought – you see, the guys building the puzzle haven’t actually finished it yet, so you’ll have to figure out another way to get out of here.. :)

02

A step-by-step GIF of the design! Since most of the wall and floor stuff has been made already, there’s a lot less to do in this room. The banners are actually reused from the HQ (though resized and remade just a tiny bit), while the pillars and the puzzle parts on the floor had to be made from scratch.

Next, some half-built puzzle blocks in wood, lying around on the floor:

05-room-2-boxes

These puzzle blocks are made in wood and are supposed to be based on the ‘real’ puzzle blocks you find out and about in the world of Grindea. However, I chose to make these in wood so that when you travel to the present to fight enemies, there aren’t a bunch of puzzle blocks blocking your way as you battle – they have decayed and only planks will be left on the floor, which have no colliders.

It also serves to remind people that the guy who build this theme park is kind of cheap and would rather build the puzzle blocks in a cheap material than order the more expensive plastic- or stone versions… ;)

Finished version of the room:

06-room-2

Now, after focusing so long on Tai Ming’s second zone, it’s finally nearing completion and we can look on to the third and final zone! As such, we had a meeting where we discussed exactly how it will look and what will take place here…

shrine_ext

Since the second zone has become quite big and advanced, we agreed that it’s best to keep the third zone smaller and a lot more straight forward, in order to pace things well. When you first enter this zone, you will see a weird celebration and a bunch of strange things happening in front of a lot of people outside an ancient shrine! I know I’m vague, but it’s gonna be really cool if we get it right!

shrine_int

Next, you’ll be sent back to the present, where you’ll make your way through the shrine itself. Here you’ll be sent back and forth in time seemingly randomly – the time warp thing has gone crazy it seems! There will be some battles and some cutscenes explaining what’s happening next, and things are getting quite scary..!


outside

Finally, you’ll reach your destination: outside, on the other end of the shrine, is a meadow with an altar at the end. At the altar, you’ll find an artefact, and not one but two epic fights draw close…

I’m so excited to begin making the third zone now that it’s been designed much more thoroughly and I almost feel like the end of the temple is within grasp! Of course, there’s still a lot of stuff left (we’re still not done with the second zone, after all!), but having it all designed really helps a lot with looking ahead :)

Oh yeah, meanwhile, Fred has been finished one NPC after another! Soon all of Tai Ming will be full of people :D

market-npcs

Hello guys! Tai Ming’s second zone is finally coming together: this week I (Vilya) have finally finished up the last backgrounds (except for the Puzzle Cave, which we’ll talk a bit later in the post)! Aside from a few fixes here and there, the backgrounds are now officially done for this area, and “all” that needs to be added now are a ton of NPCs, and of course, the cutscenes.. :)

Let’s take a look at this week’s main tasks:

I quit making the second zone’s outdoor transition from past to present around the HQ, as we hadn’t decided if the area needed to become bigger to properly house the Giant Thorn-Worm battle. Since we decided to keep things as they are, it was finally time to get a move on and finish things up!

First up is the area around the dam, where you can adjust the water levels of Tai Ming’s second zone. As with all other present versions, it’s time to demolish everything:

01-damb

Next, the HQ itself, along with the yard in front! At this point it’s actually not 100% finished – I’m gonna break the wall up a bit so you can move through the left side in the next step (and in the future I might break the right corner a bit for visual effect as well:

02-hqb

Finally, the area near the exit to the third zone! The main focus on this part of the job was the doorway to the third zone. In the past version, the door is open: here it needs to be closed, until you’ve gathered 3 emblems that activates the door opening mechanism. So, the emblems of the past needed to be removed, the door lowered, and some kind of ruin added to the whole thing:

05-exitb

In the end, I also had to add a ton of stuff in the editor to serve as colliders: this part of the area will be blocked unless you get here from the right time rift. Right not some of the items aren’t correctly sorted, but they will be once the game engine does its work!

It’s likely I’ll add more stuff here later if we feel like the blockade is too thin, but that will be in a future mixed bag update, in that case :)

Here’s the final result, for now:

05-exitc

Meanwhile, Fred has been busy filling this area with the NPCs living here! Tai Ming has attracted all kinds of people, ranging from collectors, priests, merchants and bar owners! Some might resemble characters from the present: distant relatives, perhaps?

npcs

Now that I’m finished with my share of the Tai Ming 2nd zone backgrounds, it’s time to move on to something different: the puzzle cave in the north part of the map! We’ve actually made a very basic sketch of the area, which includes all the rooms and what you’ll face there.

Be aware of spoilers if you look at the map below or it’s explanation, if you prefer to explore the amusement park on your own:

04-puzzleworlddesign

I already mentioned the rooms in a previous post, but now we’ve actually designed the rooms! The sketches above are very messy and basic, but they show in which order the rooms will appear, as well as and approximation of how they’ll look.

Room 1 is an introduction room where you’ll meet the owner of the amusement park and his workers.

Room 2 is the Ancient Statue Puzzle, where you’ll have to use statues get to Room 3, where regular battles will take place.

Room 4 is sponsored by Flying Fortress and features a Phase Shift puzzle (shown here), Room 5 is where the Monkey Madness takes place, and Room 6 is the “Path Puzzle” shown in the same post as the Phase Shift puzzle.

Room 7 is where you’ll find your mysterious treasure, as well as a hopefully fancy view! I both look forward to and dread making this map. Good thing I can make the other 6 first ;)

Next week I’ll start making the above rooms, while Teddy and Fred work on adding more NPCs and cutscenes to the village! In the next post we’ll take a sneak peek at what our plans are for the third zone as well, since we’re drawing ever closer to finishing this second part of the temple. Stay tuned! :)

Hey guys!

This week has been all over the place. Vilya and Teddy have been out of commission the entire week due to one of their cats becoming sick. They had to leave Gotland and travel to an animal hospital in Stockholm. Vilya’s written a lengthy post about it over at her personal blog, be sure to send her some love.

Because of this we don’t have that much to showcase this week. Fred has been staying behind, acting cat sitter to Vilya and Teddys other cat, while continuing to work on NPCs for Tai Ming.

Besides interacting with the NPCs through out the dungeon, Tai Ming features a pretty hefty amount of cutscenes as well. Below are some animations from one of the scenes we are working on at the moment!

Combo

Walk

Sword


This week, we’ve managed to push out a new content update for the Frontline beta. The main focus of the update is the new Marino Encounter, as well as some new cut scenes setting up where the story is heading next.

The update is not massive in size but we are still very much interested in hearing feedback from you guys who are in the beta, especially about the Marino fight. Was it too hard, too easy, any suggestions how to make it more interesting?

The in house testing has been a bit all over the place ranging from it being “impossible” to “I’ve played this game so much I don’t even know if it’s hard”. We’ve set up a thread over at the forums where you can post any suggestions and thoughts you have about the fight, it would really help us a ton!

With this update out of the way, we are already hard at work with the next one. Below are the sprites for the rest of the Season Fae Elders, which all will play a crucial role during your visit in the Winterland!

FallIdle SummerIdle WinterIdle