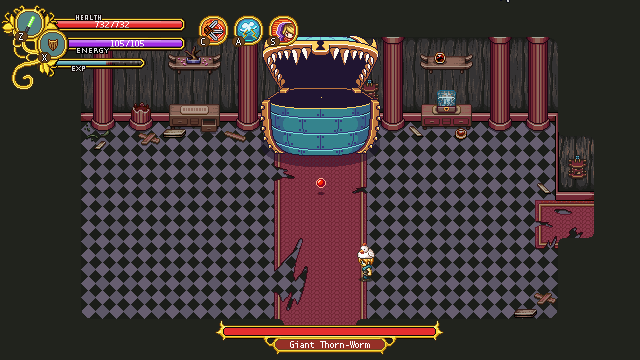
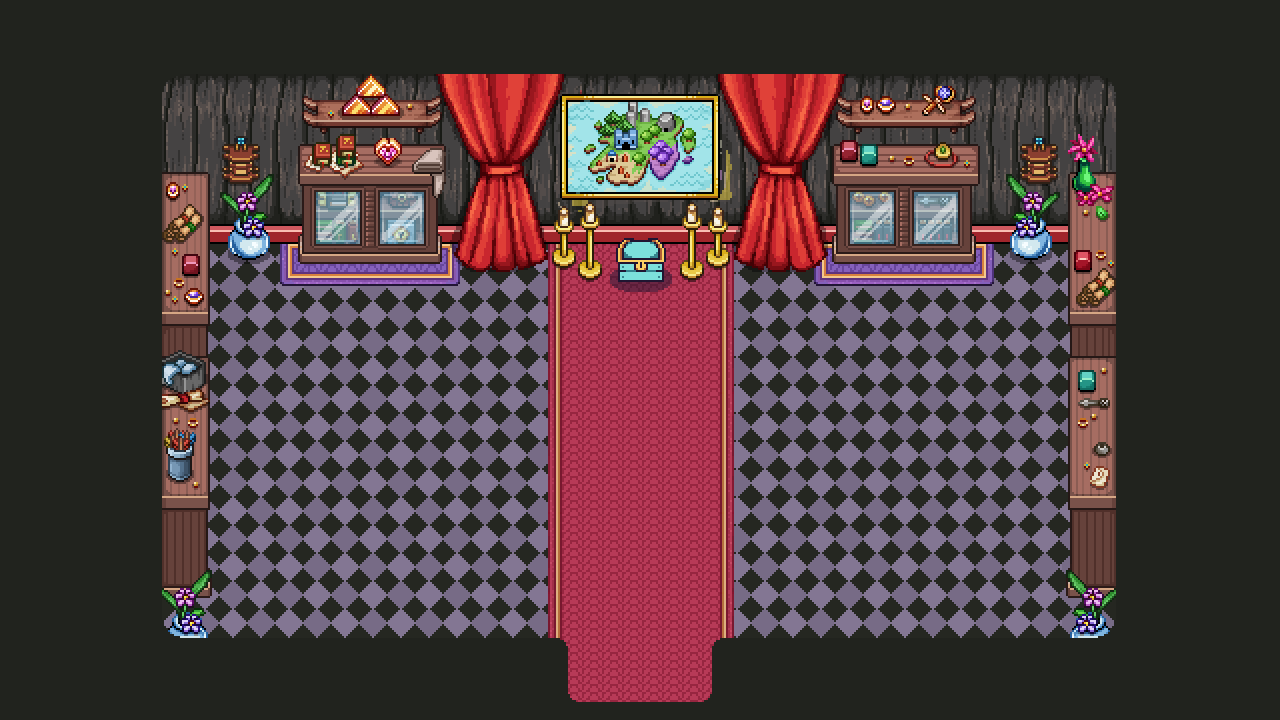
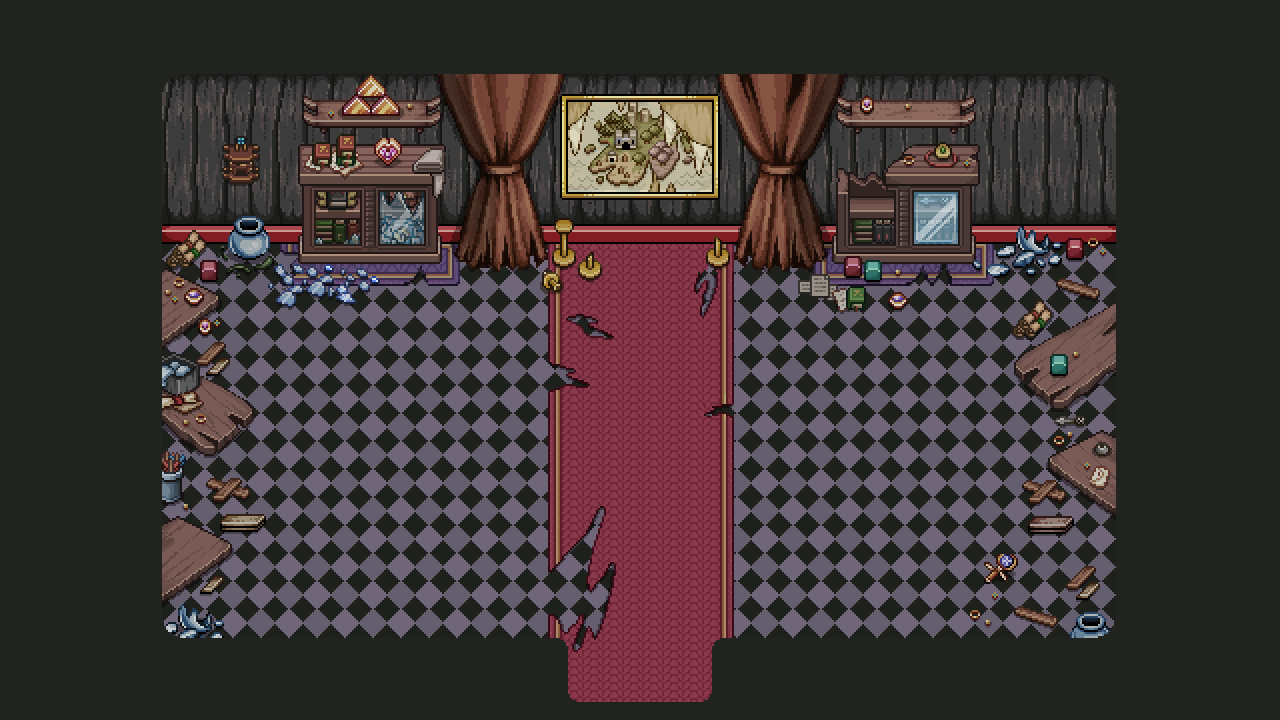
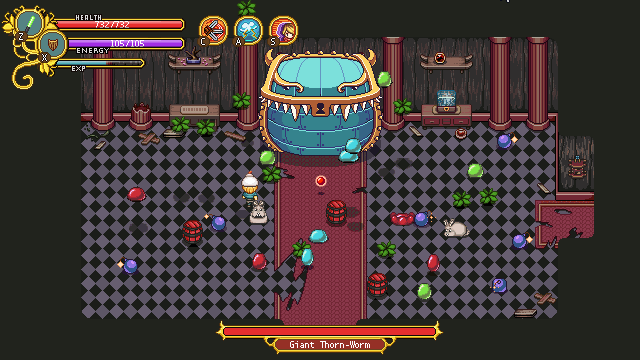
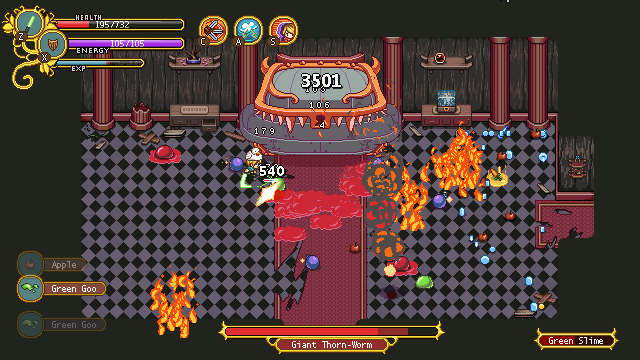
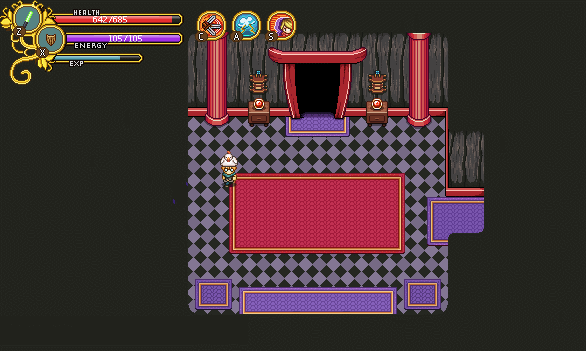
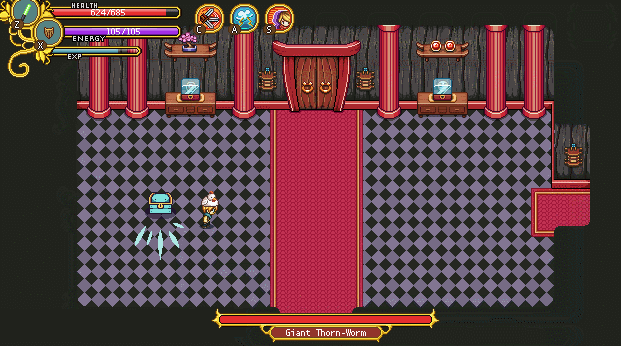
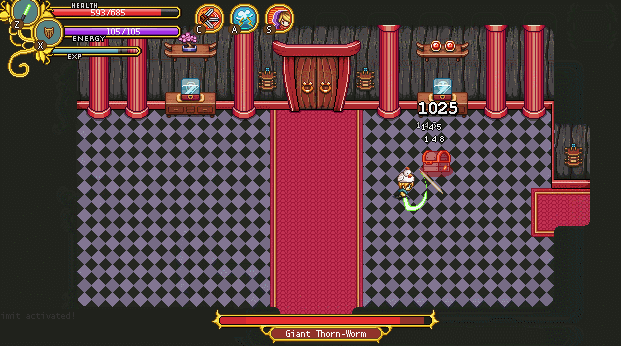
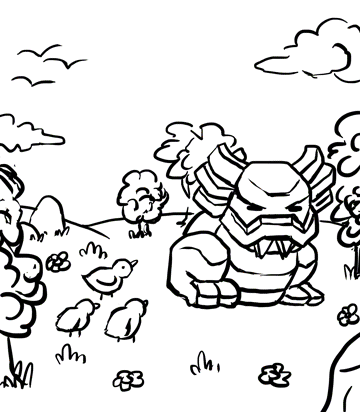
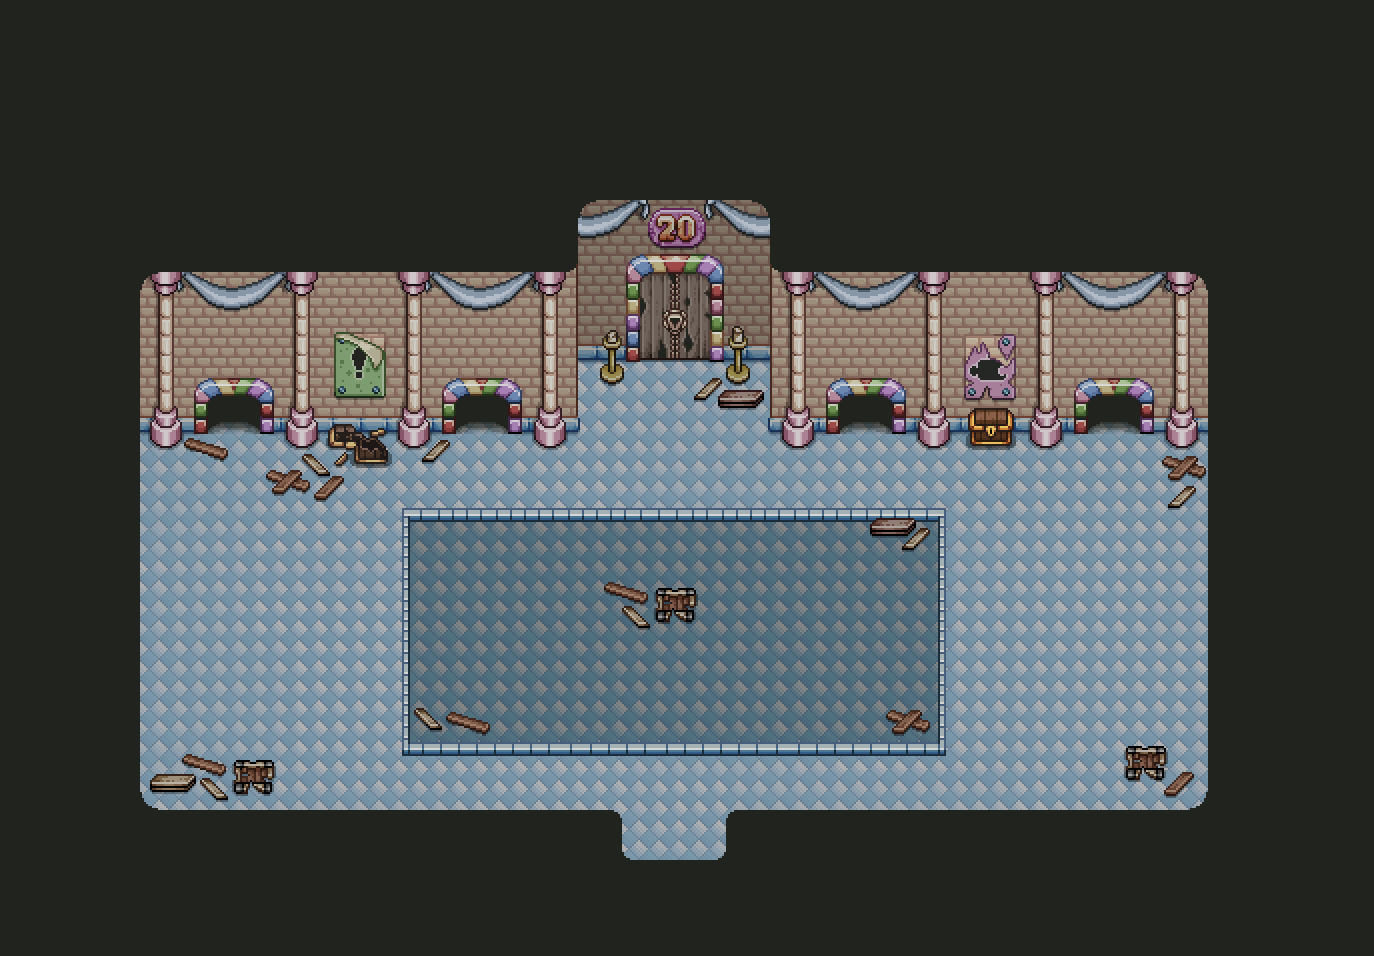
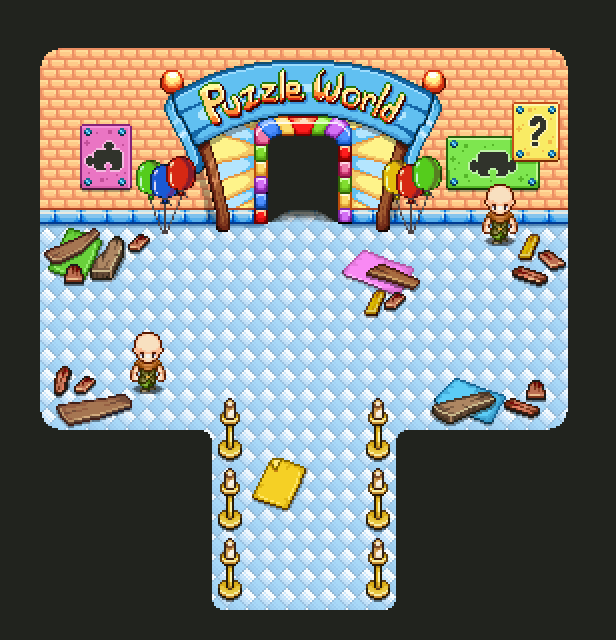
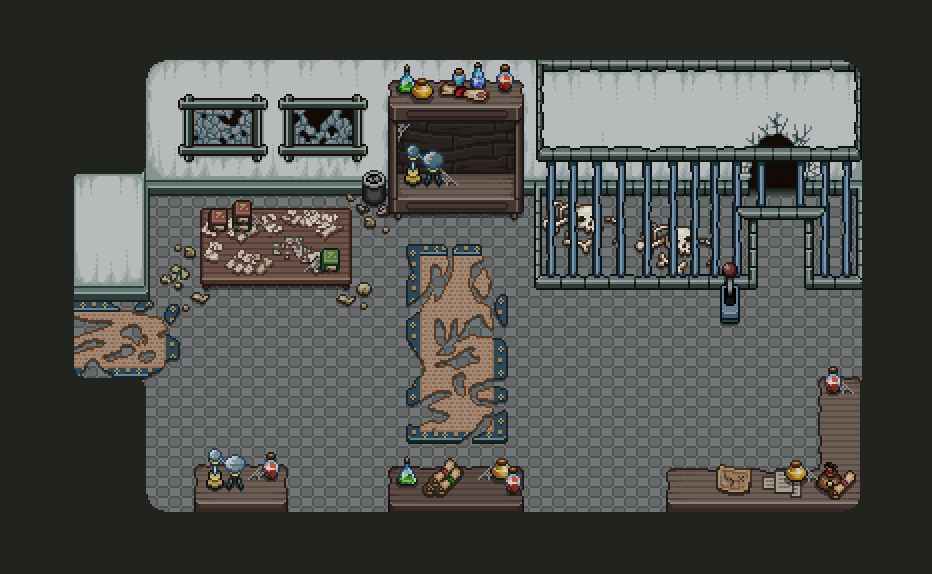
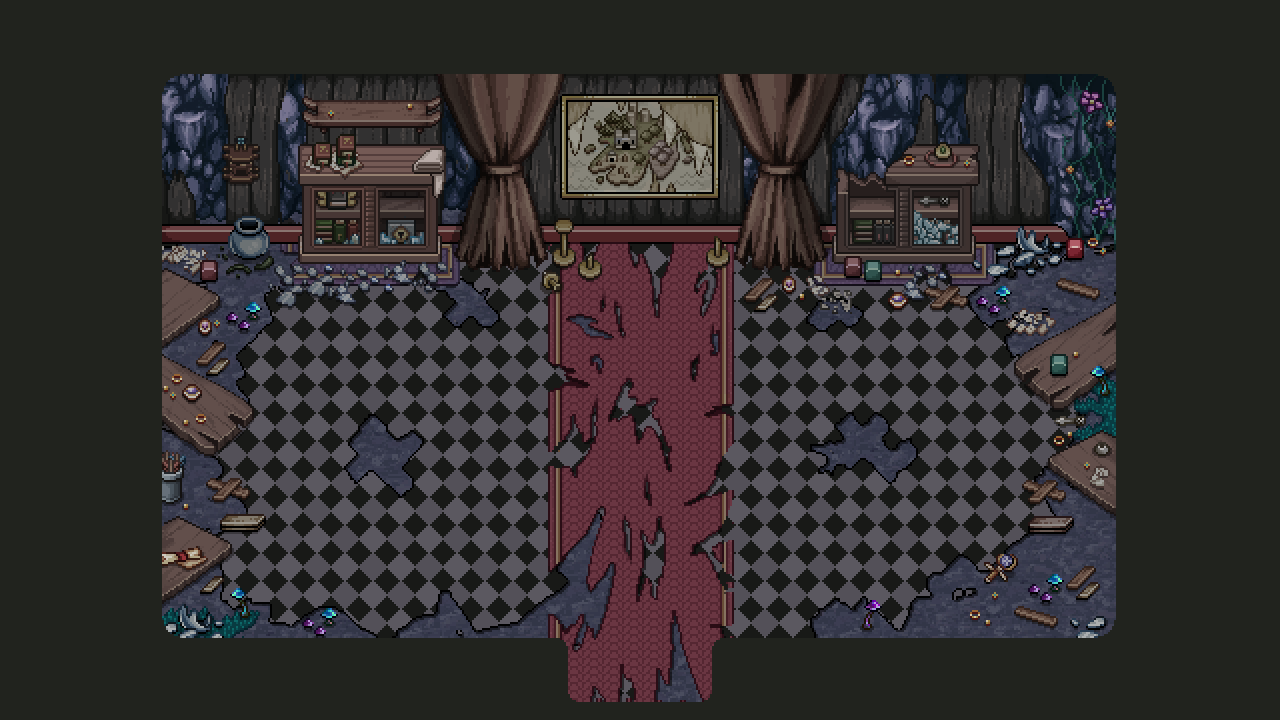
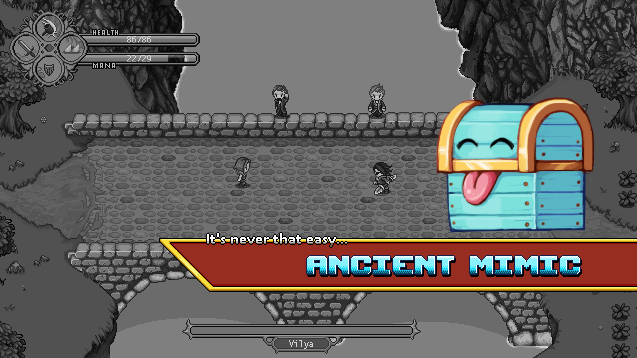
Another week has passed, which has been another week filled with preparing for the final Tai Ming boss. Finally, we’ve completed the third and last stage of the Mimic boss room… Time to bring in some Mt. Bloom!

01

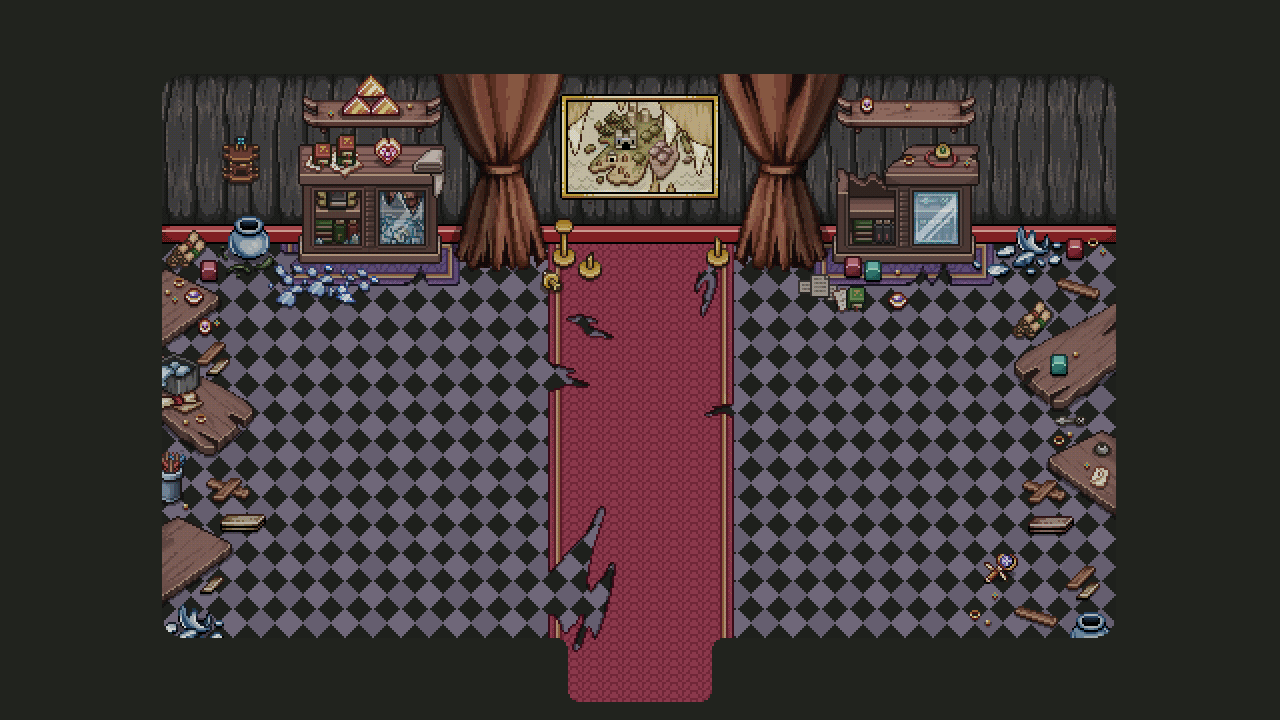
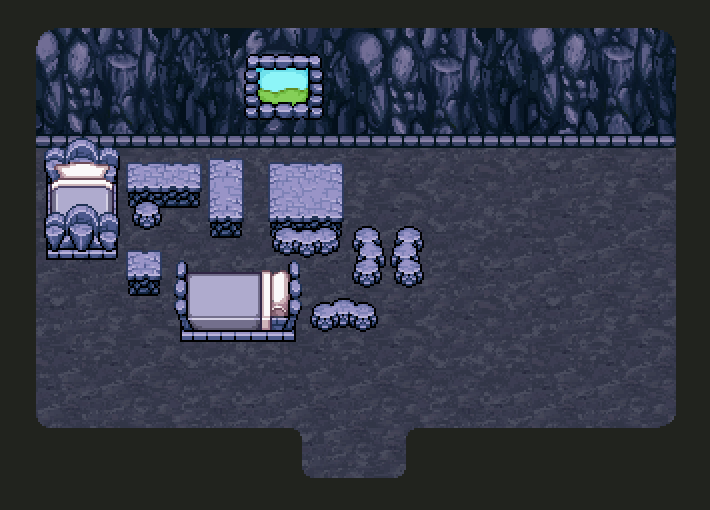
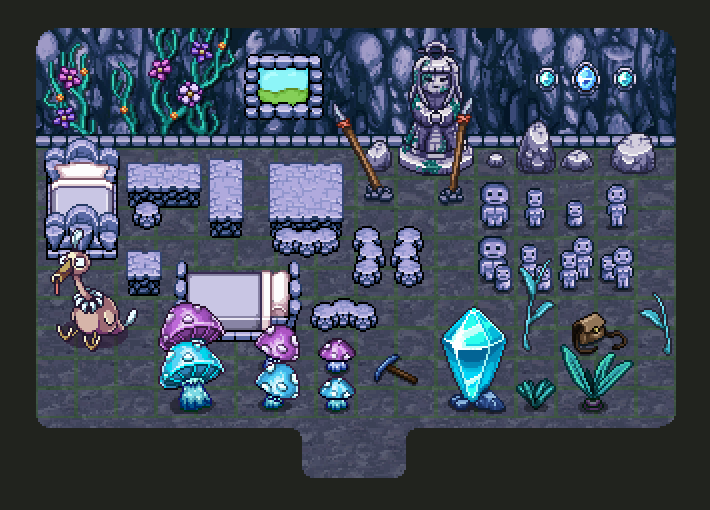
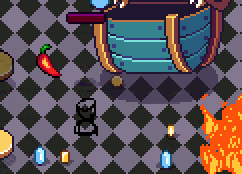
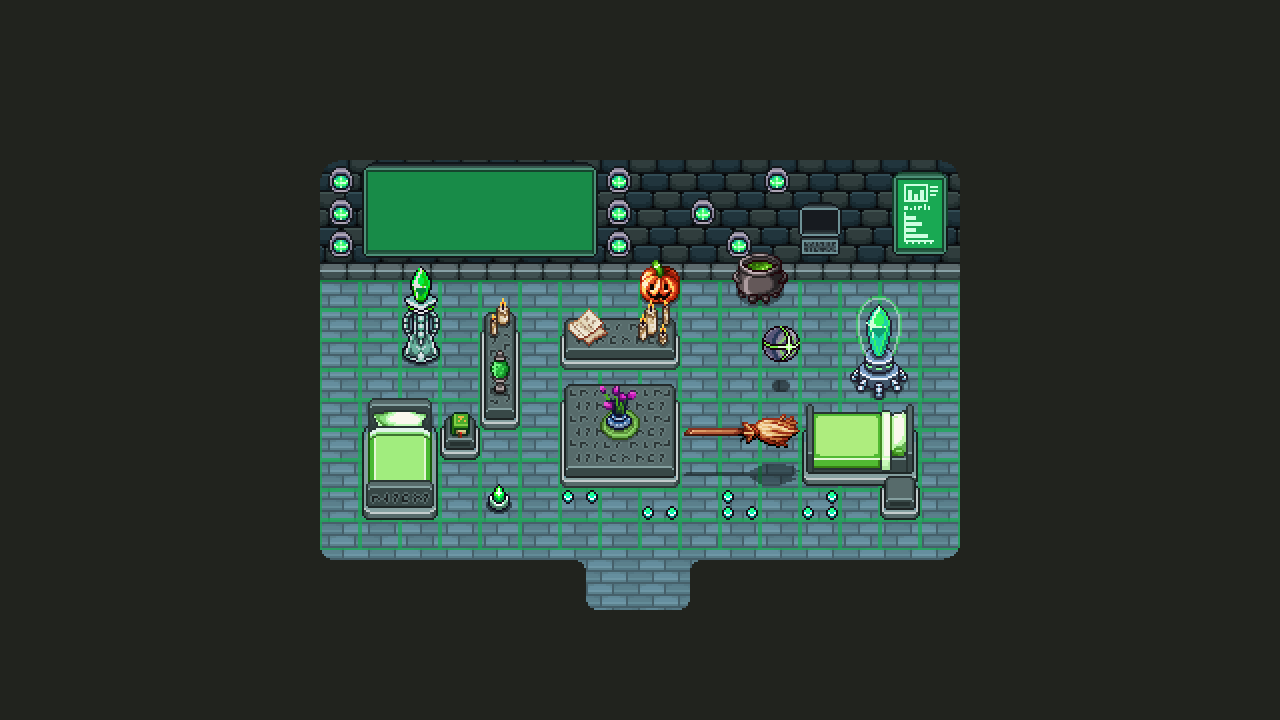
So basically in this third stage you’re back to your own time, but we wanted this room to be more ruined than the rest in order for some health crystals to have grown in the room after this time jump! The boss battle is very long, after all, and being so close to Mount Bloom we thought this was a nice solution for including some health without forcing random health orbs.

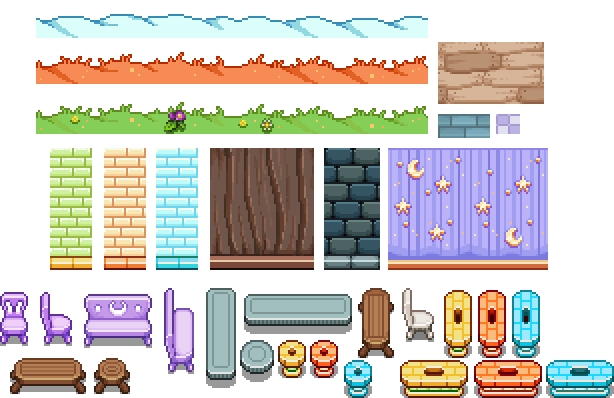
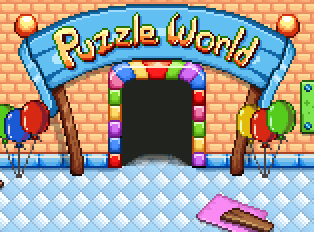
The health crystals aren’t pictured in the finished version below, but they’ll be growing in the parts where the cave floor is peeking through:

02

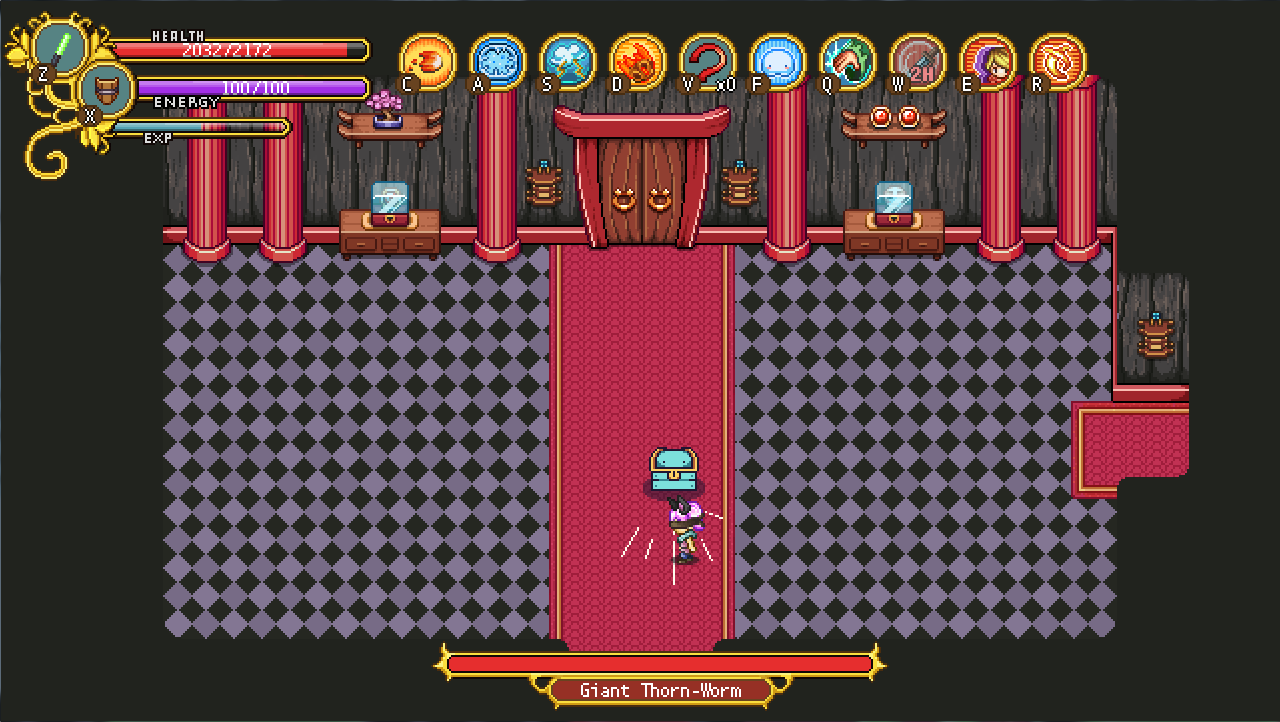
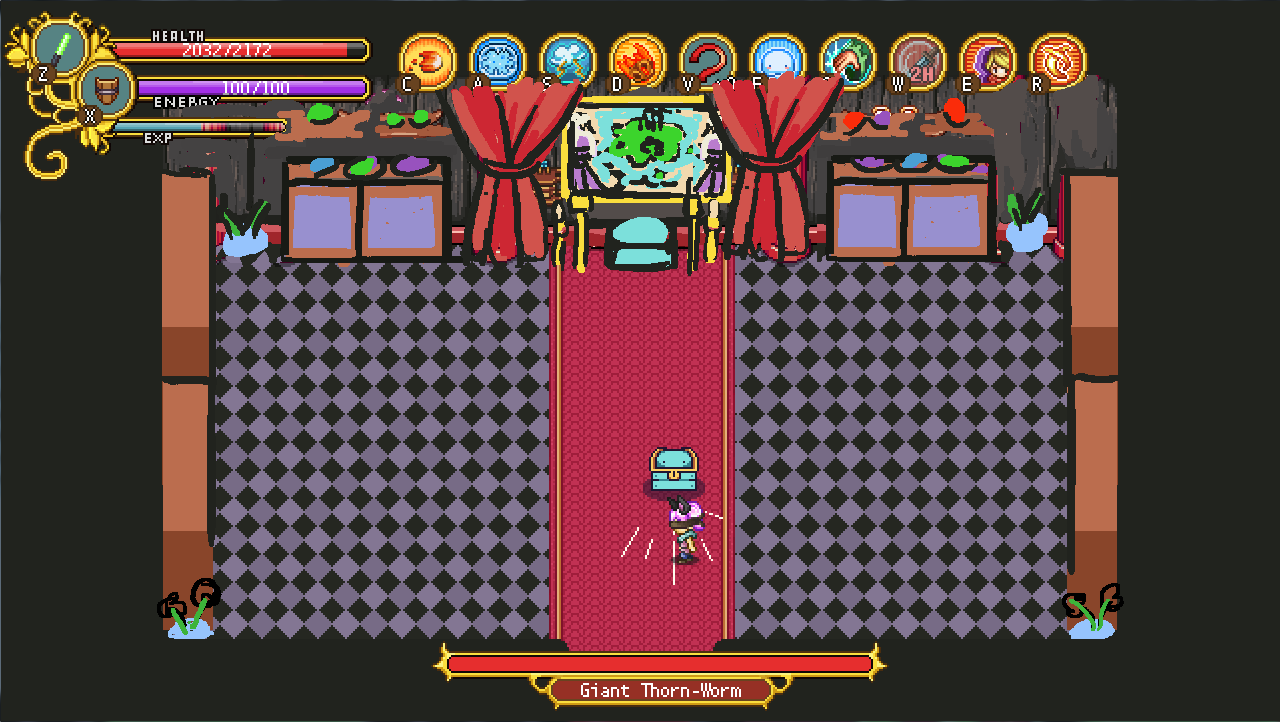
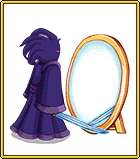
Another thing we’ve been focusing on lately is the cutscenes surrounding the Mimic fight. And with this one, we have a question for you guys!

03

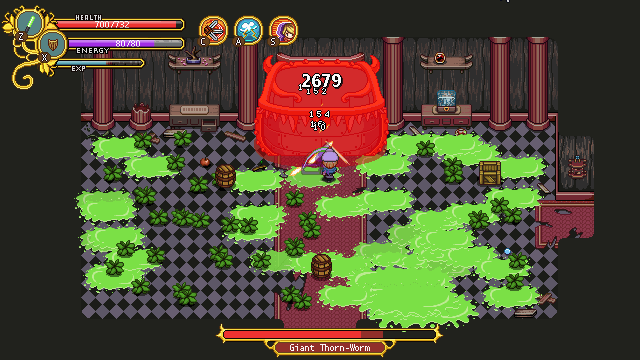
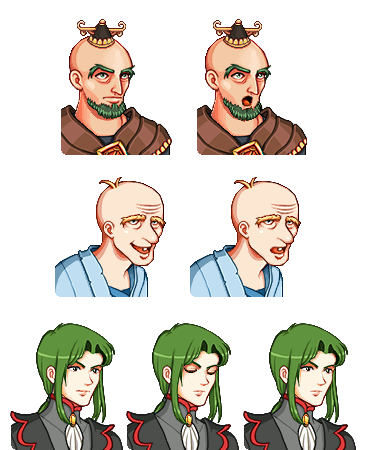
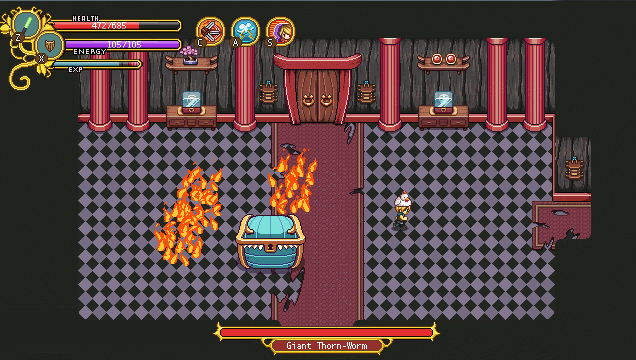
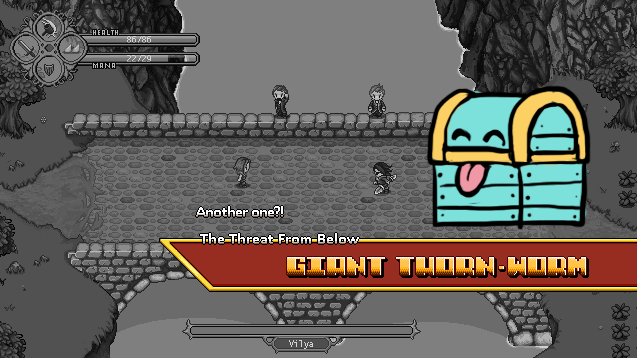
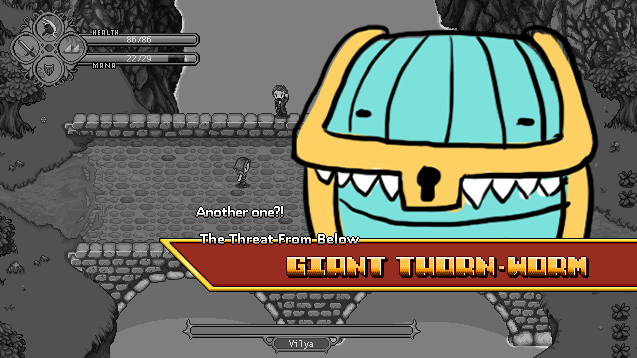
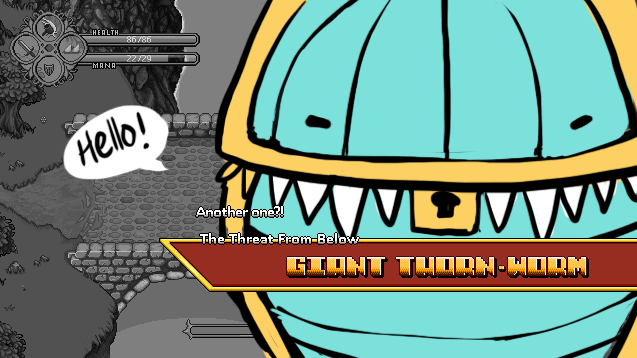
Above you can see one of the cutscenes we’ve been prototyping lately. Now the question is: when should the boss portrait appear? We have two suggestions:

04

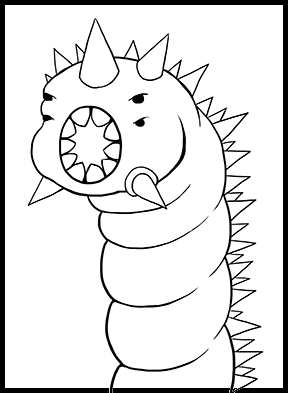
In this first alternative, the boss portrait (yes it’s a thorn-worm for now, since the real one hasn’t been made yet) appears as the Mimic sucks the crown into its chest.

05

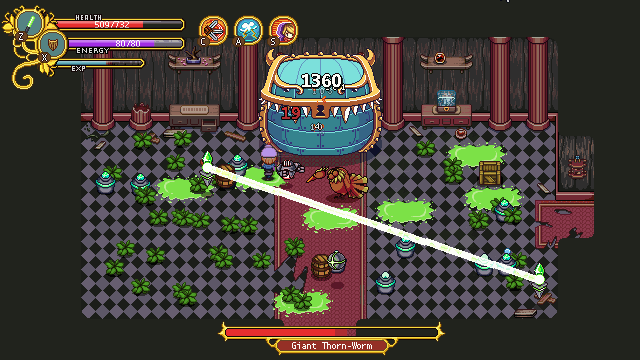
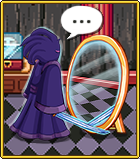
…And in this one it appears as its tongue is around the crown, pausing mid-animation.

What do you guys think? We’re currently torn, and while it might not seem like a huge decision, it’s always better to pick the version that the most people like better! When I asked this in my own work blog, the overwhelming result so far indicates the second one is better. Do you agree? Please comment with your preference! :D

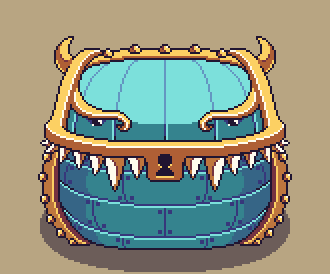
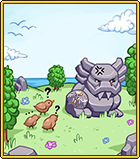
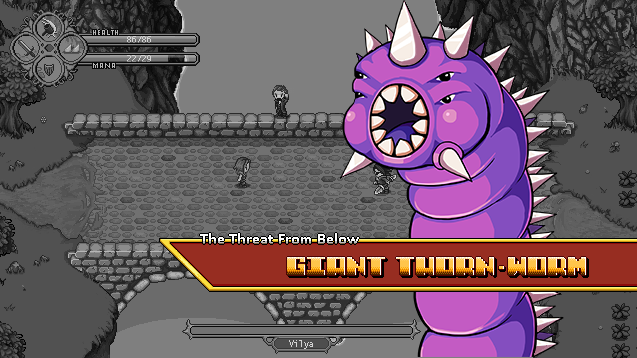
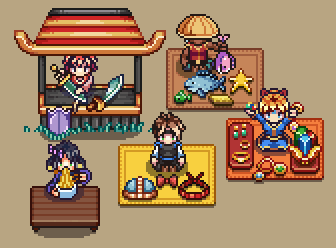
Now, we can’t let the Mimic boss portrait remain a thorn-worm now, can we? Time to fix that!

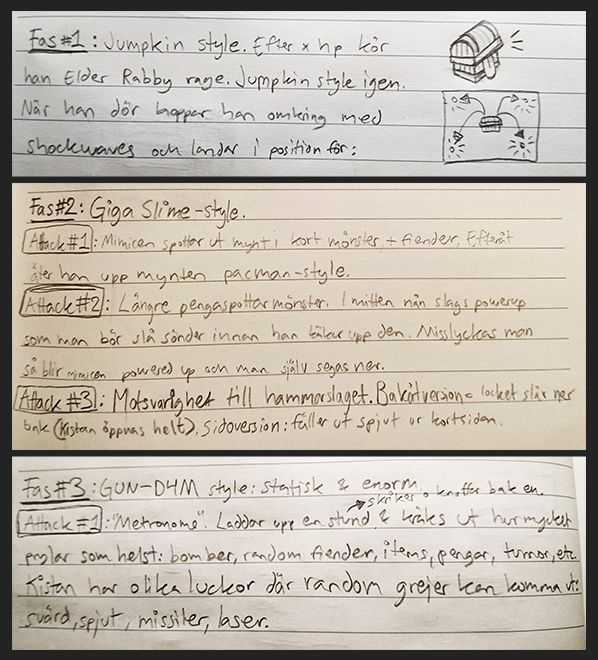
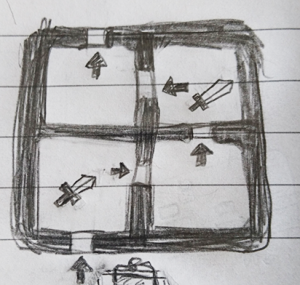
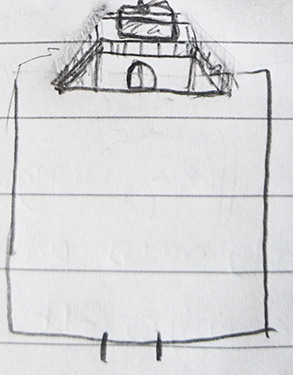
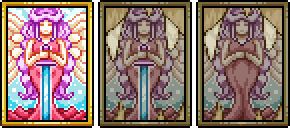
We are actually not yet sure if this will be *the* boss portrait, or if we’ll have several, one for each state. So before making this one, I made some quick sketches to work out what size each of the iterations would have in their portrait versions, should we decide to add the other ones:

06

07

08

For now though, we are gonna start with just the small one, and play around with adding the other two in a prototype, to get a sense of what it’d feel like to have them appear after you complete each iteration:

09

What do you think? Would you like to have a new boss portrait appear every time you beat one version of the Mimic, or do you feel it would get too spammy, throwing you out of the mood of the battle? I guess it’s hard to imagine without actually trying out the fight, though.. Maybe we should include a way to try out the different versions in next frontline update, unless it would mean too much work for our poor overworked programmer!

And now, some mixed stuff!

10

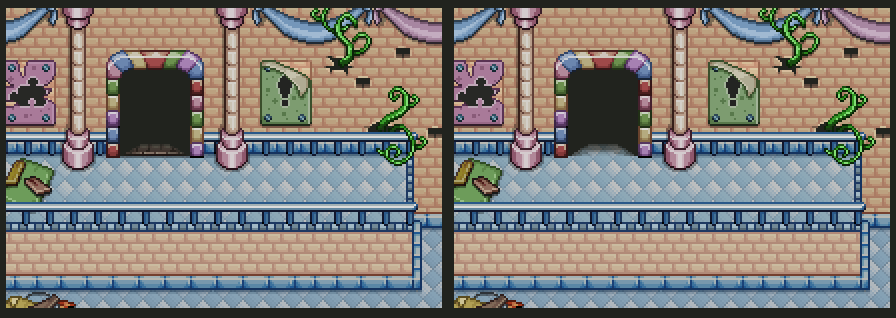
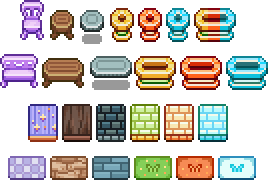
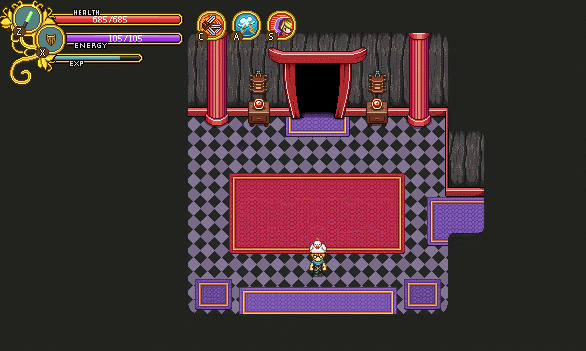
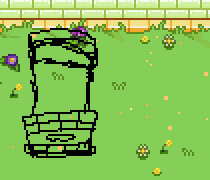
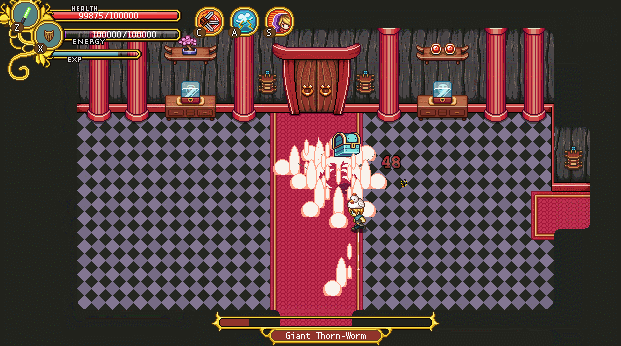
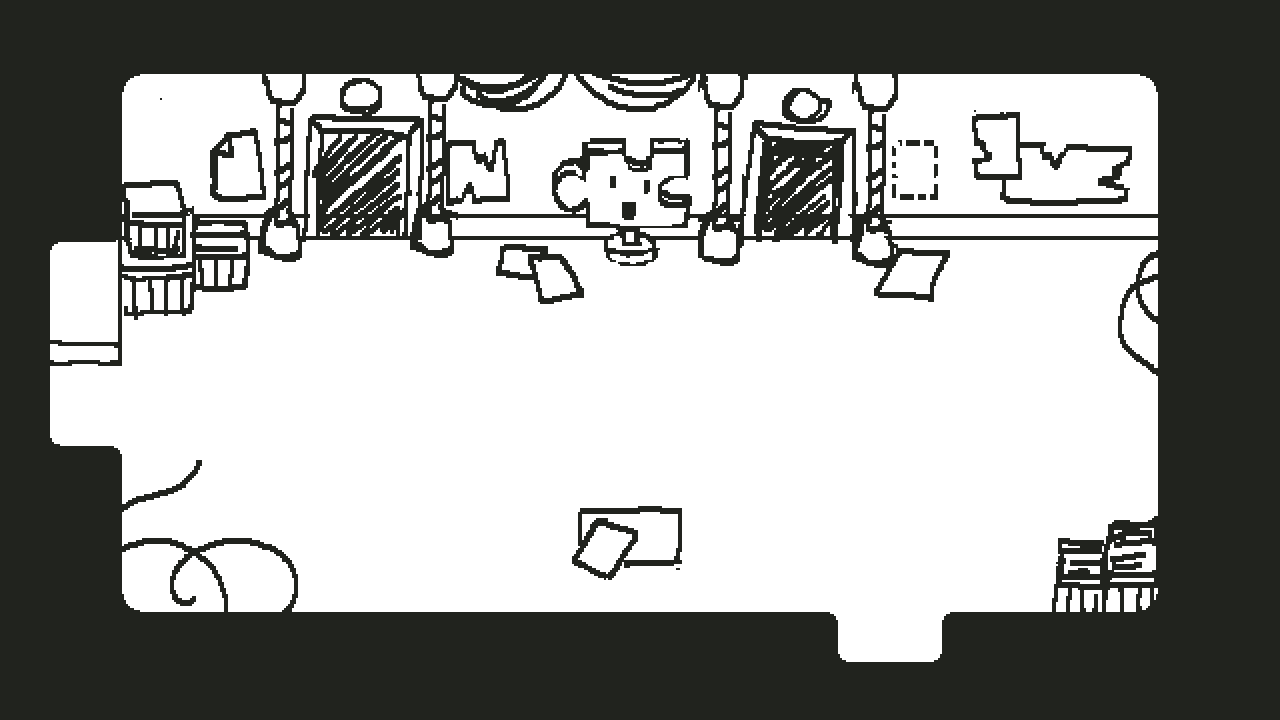
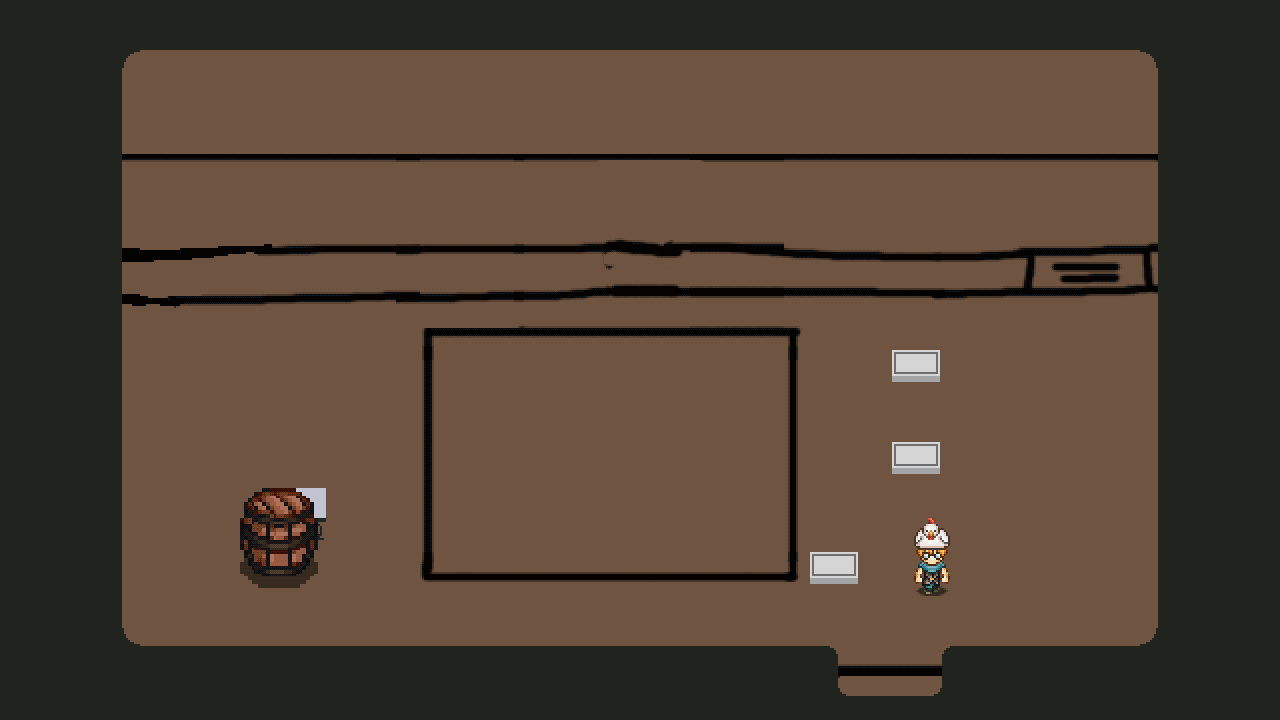
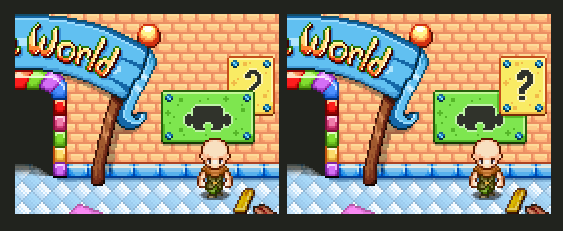
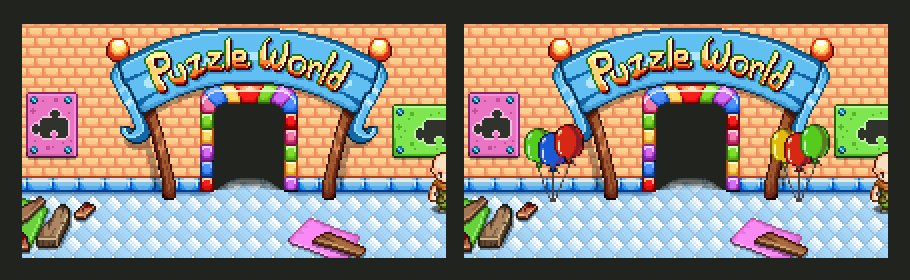
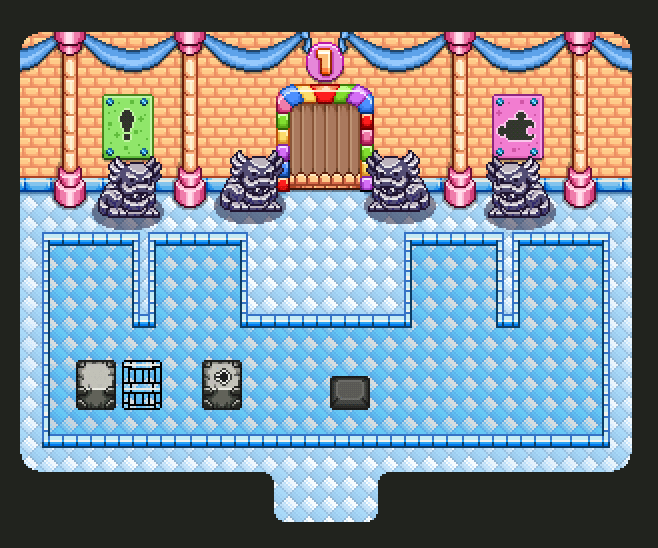
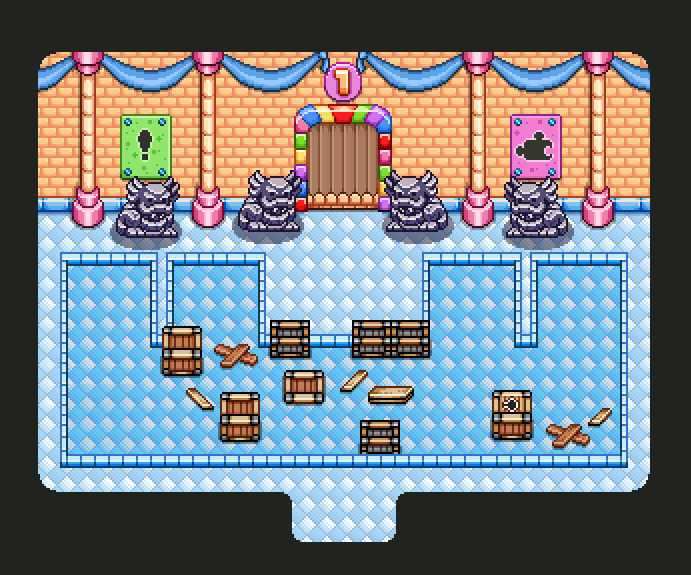
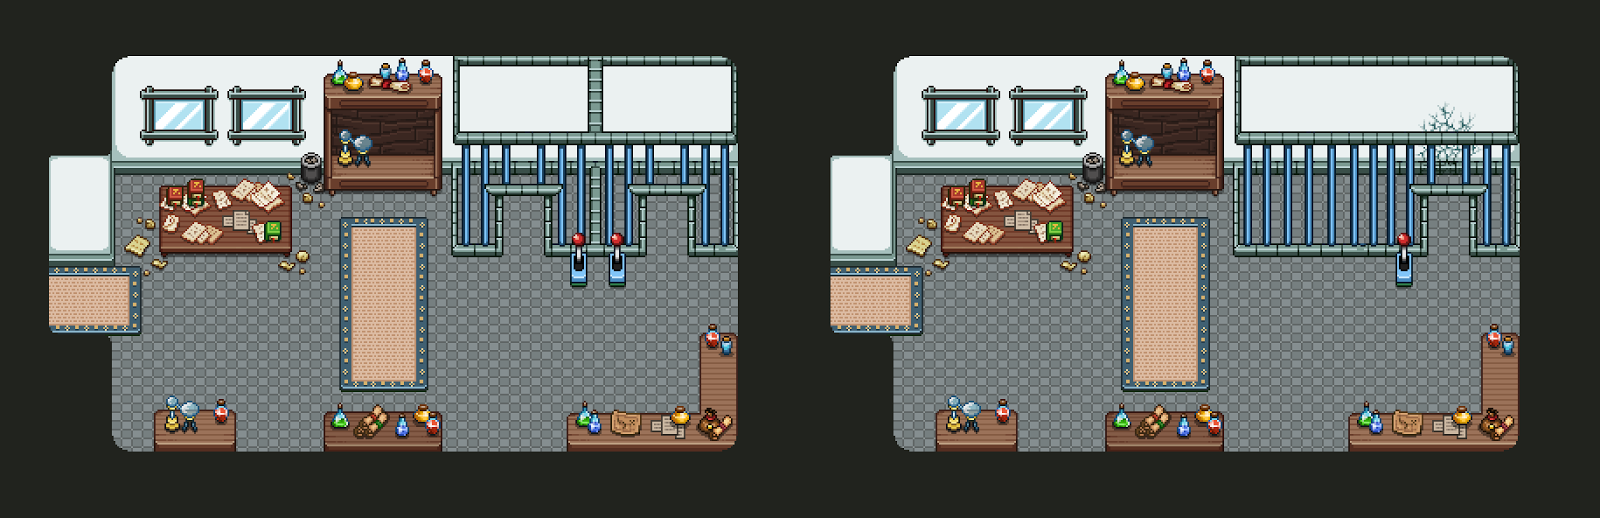
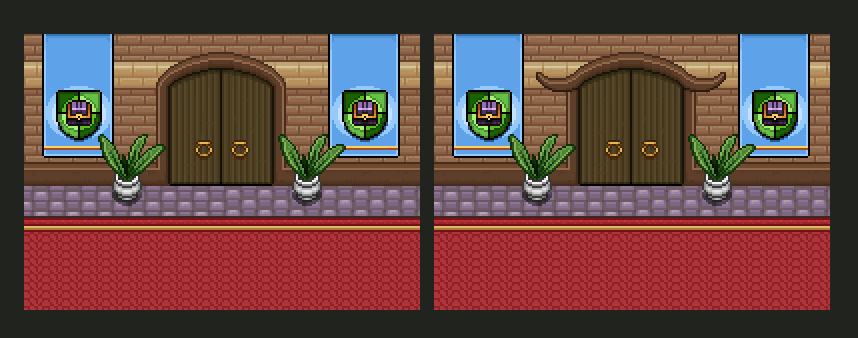
First up, fixing a graphical error shown above! Behind the door transparency the closed door peeked through, rather than the floor. It has now been fixed.

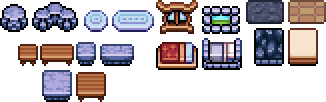
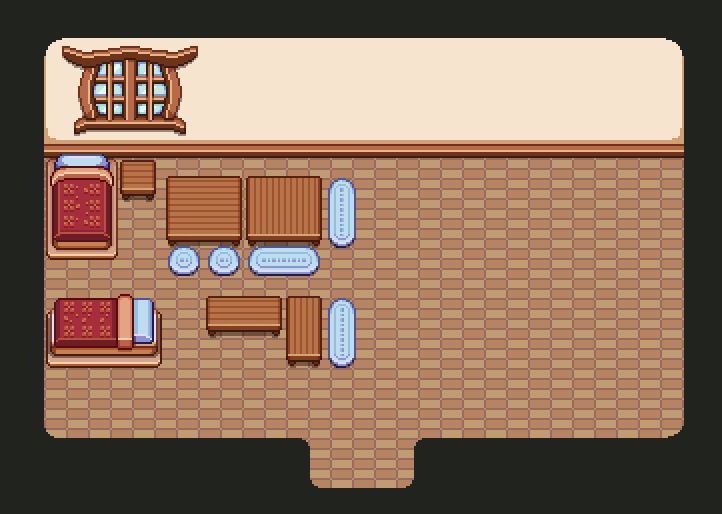
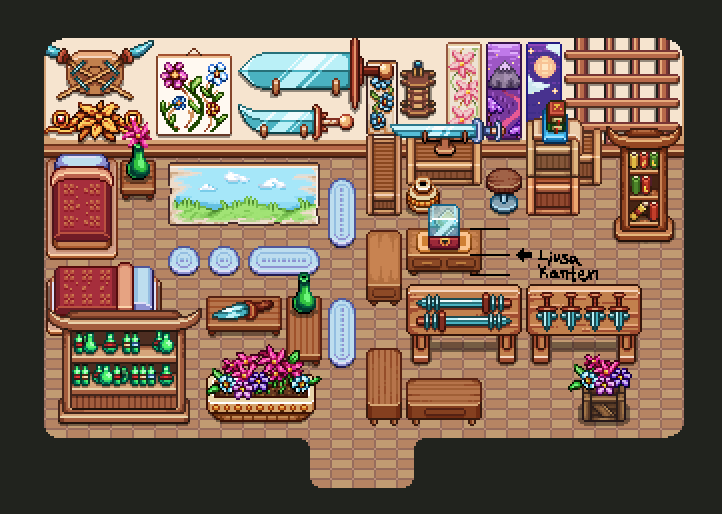
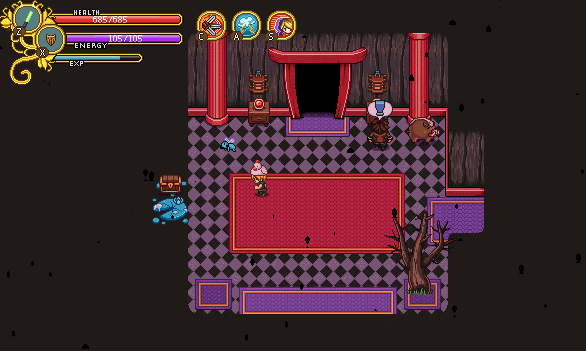
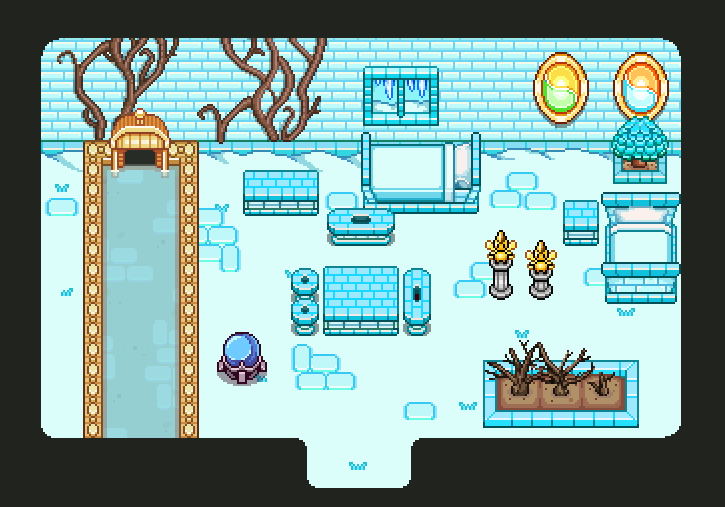
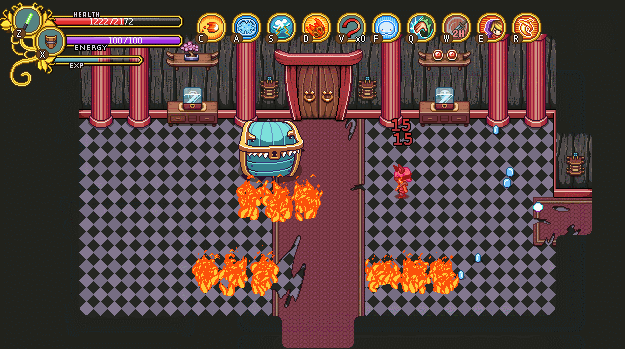
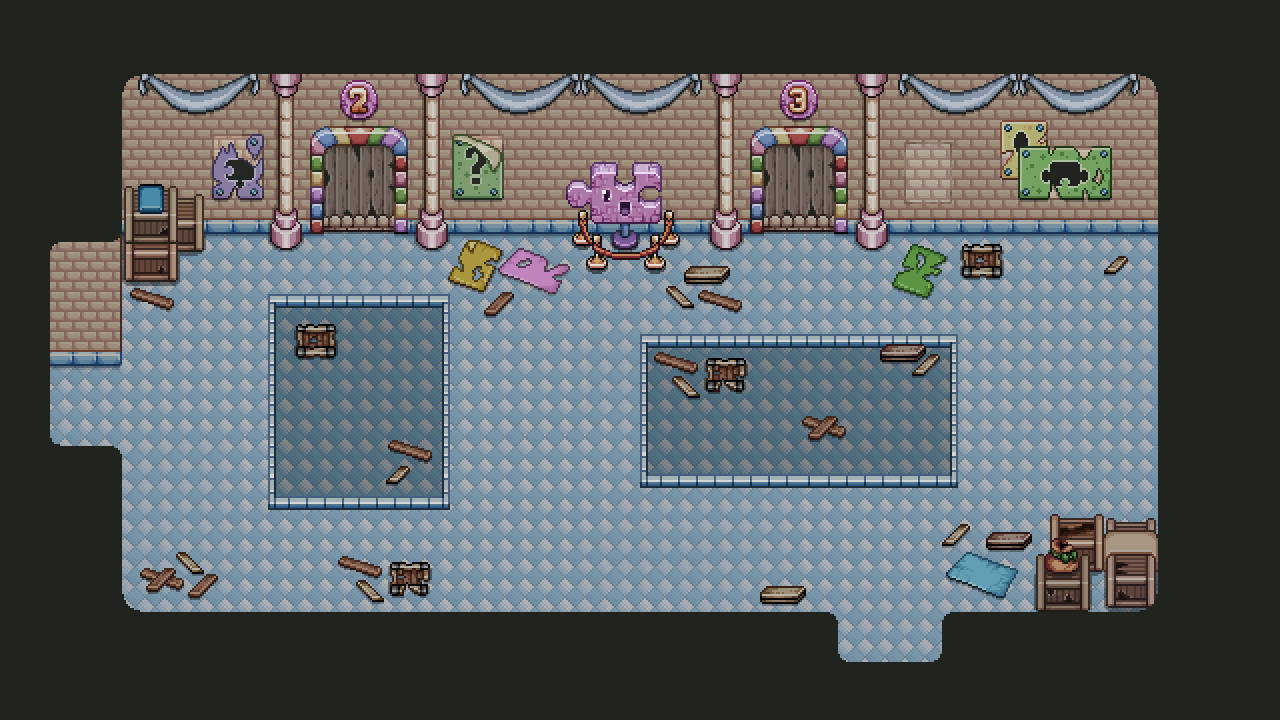
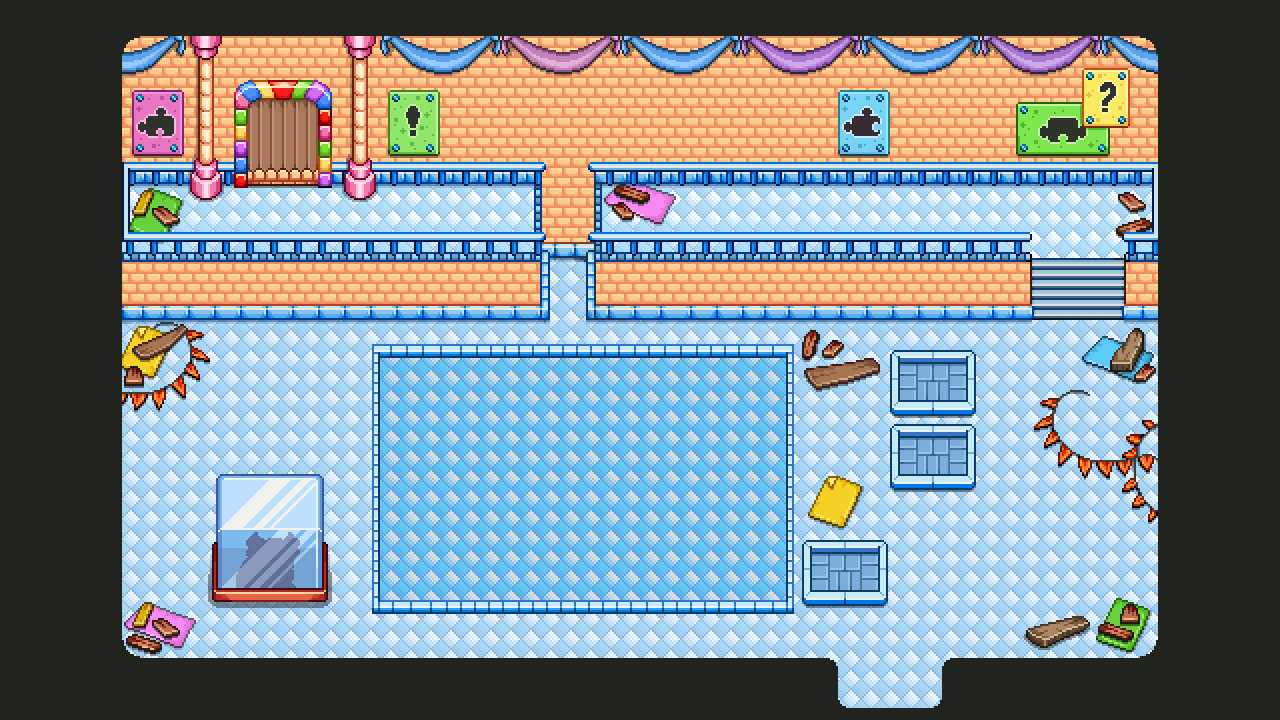
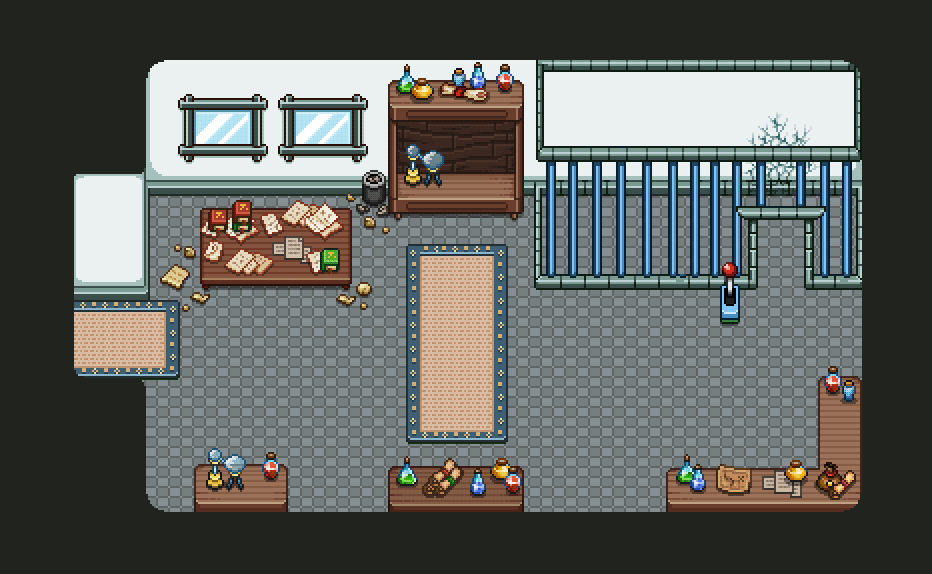
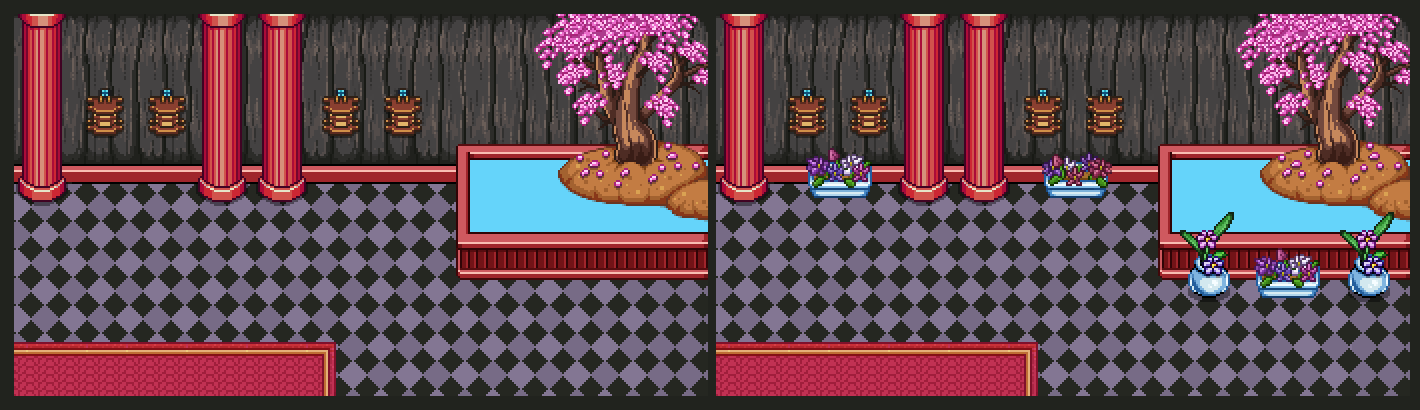
I also added a bunch of extra decorations for the second fighting room in zone 3. It just looked a bit empty, so I felt it needed a bit more polish:

11

12

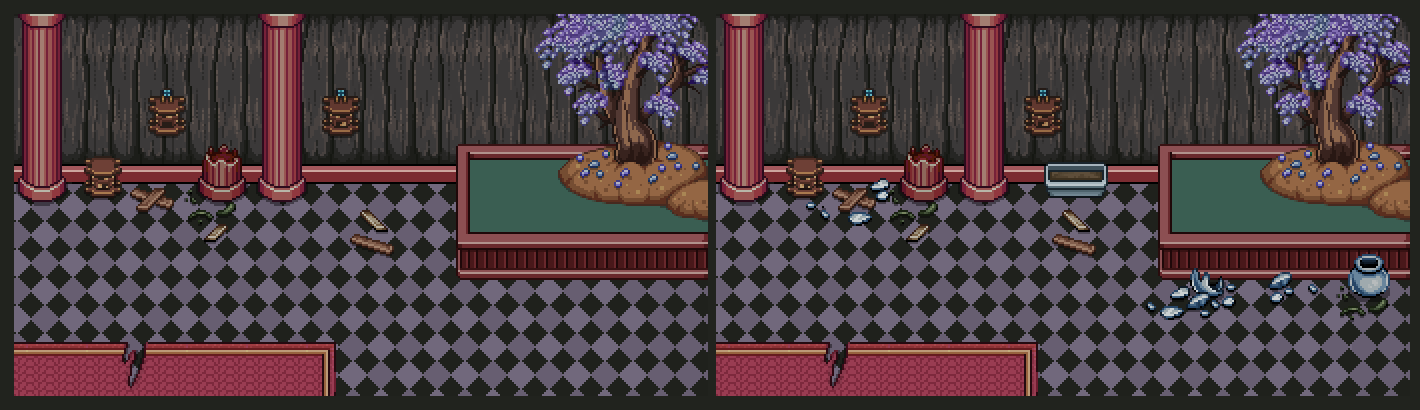
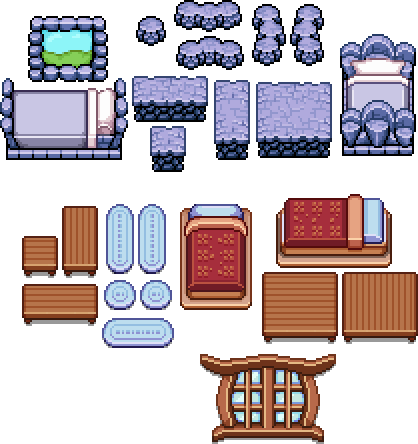
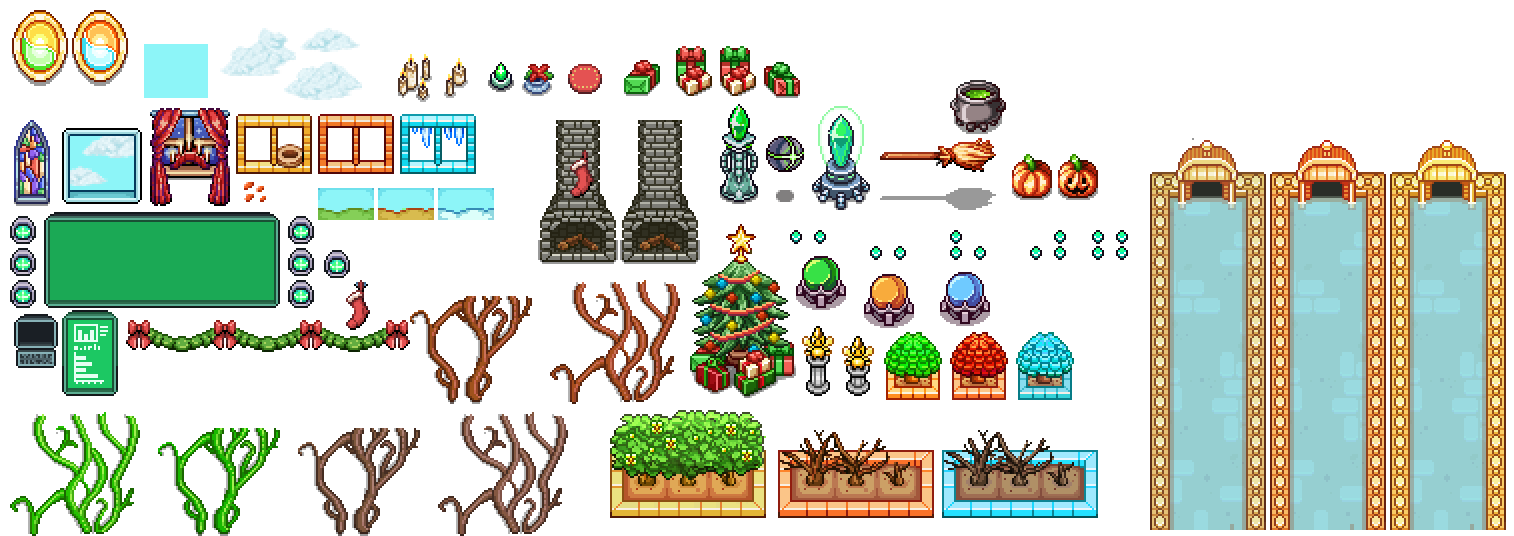
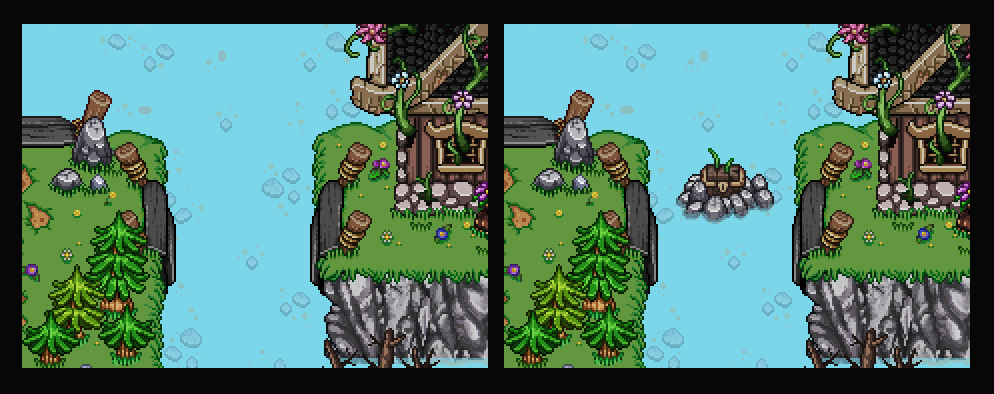
I also adjusted the garland you’ll unlock in the Seasonne batch of housing items, making sure it’s properly stackable. Previously, you had to put them next to each other like in the left version below, but by editing the size they will now stack seamlessly when you put two next to eachother:

13

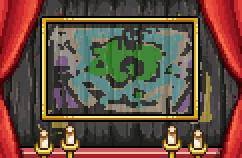
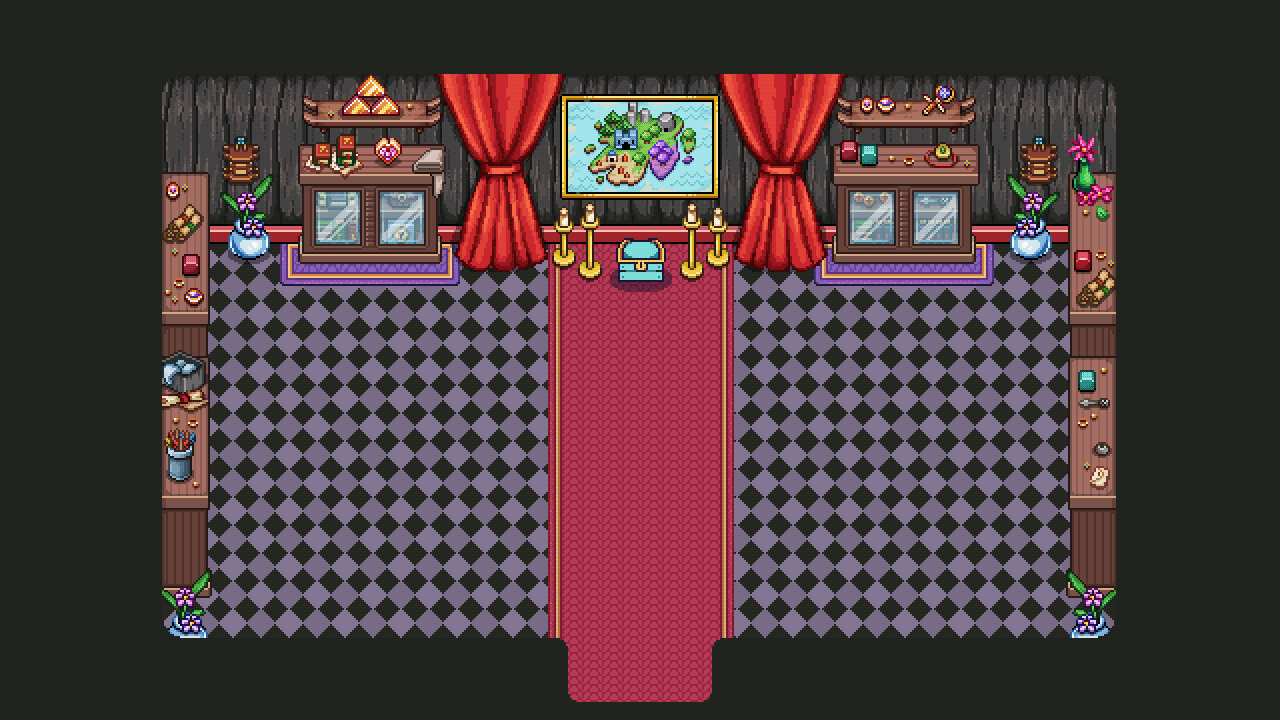
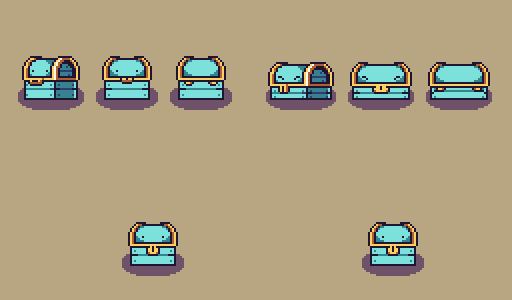
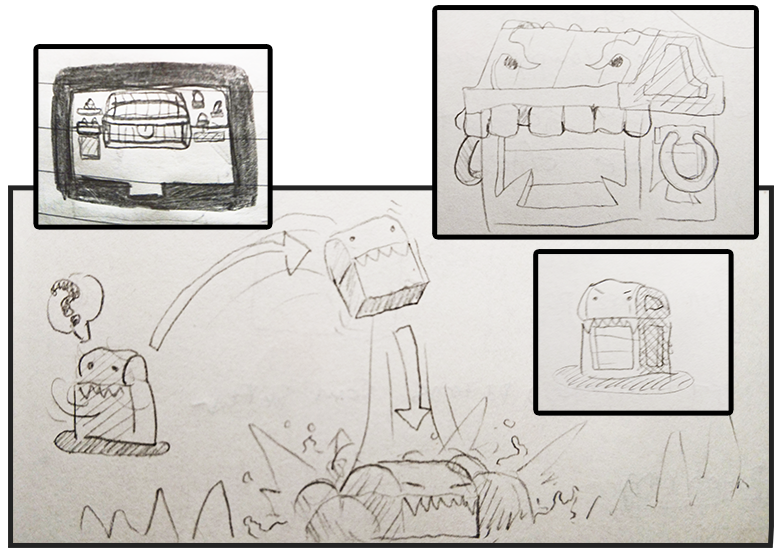
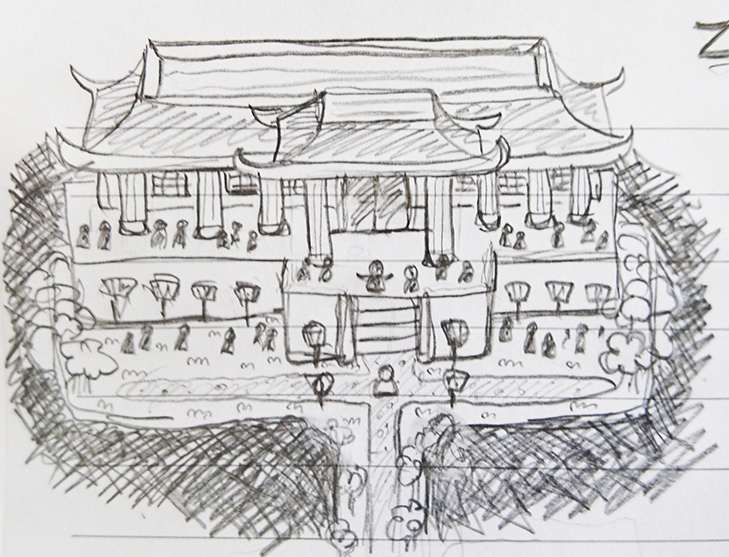
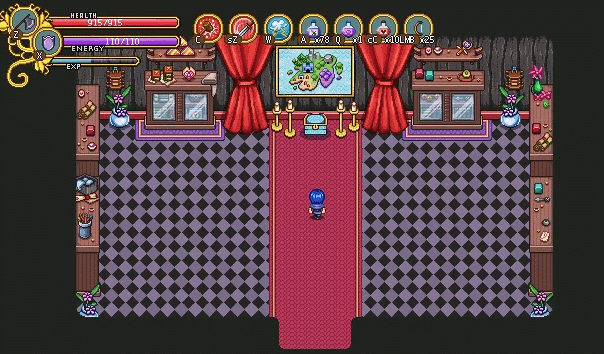
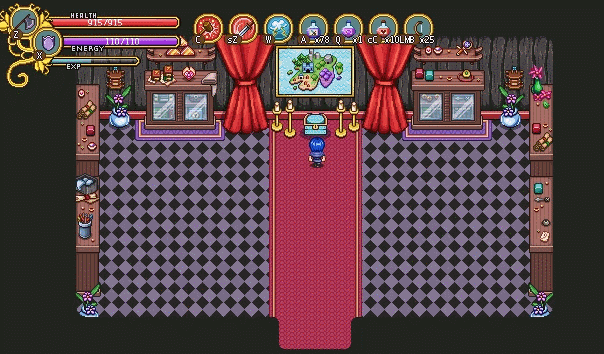
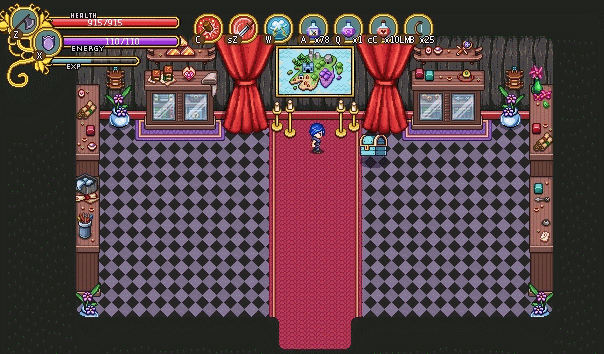
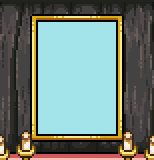
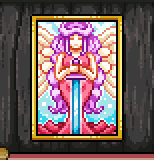
Finally, we’re swapping out the map painting in the Mimic boss room for a portrait of Grindea! Progress and finished versions below:

14

15

16

Now, a lot of you have asked when frontline will be updated with the third Tai Ming area. Here’s our estimate: HOPEFULLY this weekend! We’ll do our very best to make that happen, at least :)

Remember the Mimic boss? Improvements have been made, and the prototyping goes on!

01

Since the last prototype we decided to keep the waves he spits out, but with mixed enemies, so there will be enemies from all around the world rather than from one area at a time. We also removed a couple of waves, since this fight likely is long enough as it is – this is stage 3 after all!

02

Occasionally while you battle the wave(s) he spits out, the Mimic will launch random disables or damage dealing stuff as well. These can be anything from bombs, slime, rockets, fire – you name it! These will be random, but certain disables/attacks don’t unlock until you’ve progressed far enough in the fight.

Yet another step closer to finishing the map! Now there’s mainly a ton of animations and polish, polish, polish remaining!! :D

…And of course… The actual background for the fight!

Right now the prototype version of the boss room looks like below (which can also be seen in the GIFs above):

03

After doing some thinking & talking, I made a sketch preview of what the finish thing could look like, and had it approved by Teddy and Fred before I began work:

04

The most complicated thing in the room is probably the painting – which we, oh irony, have decided to swap out for another one yet to be made. For now, here’s this one, which will likely appear somewhere else in Tai Ming instead:

05

And here’s the finished room for the first stage:

06

As the fight progresses, you will jump through time and the room will change. And so… On to stage two! For this one, some time has passed and it’s time to break and demolish the props inside:

07

As I made this I did not yet know the painting would get swapped out, and so it too got a ruined version, though I do not yet know if that will be in the game or not. Maybe this will be the only time you’ll ever be able to see it, so take a good look!! ;)

08

For the next stage, we jump back to our own time, and this particular room of Tai Ming has seen some serious ruin compared to the rest. But first…. some more housing miniatures!

With Tai Ming and Mount Bloom’s housing items finished, it’s time to create their miniatures and add them to the game, and this time I thought we’d mix it up with a video!

Only the basic items for each batch in this one – the video would be way to long otherwise! More to follow in another post. For now, here’s the result from this vid:

09

And the large versions for comparison:

10

That’s all for this week! Next week the work on the boss room continues, and we begin piecing together the cutscenes one by one. Stay tuned!

With Tai Ming nearing completion, and a revamp of Arcade Mode in general and Arcadia in particular, it’s no wonder a lot of our recent talks have been about exactly what new Arcadia will look like. This meeting we dove in and decided on some more things:

Buying Houses for Arcadia
Basically, Arcadia will start as an area of wilderness! The place where you start will be small, with most of the map being covered with wood and other obstacles. As time progresses you will be able to ask various people for help clearing the area, and in doing so revealing a bunch of signposts indicating what could be build at the spot.

Clicking the sign will trigger a preview of what the building or decoration will look like, and what it will bring to Arcadia. For instance, aside from shops and buildings with gameplay features of various kinds, there will be decorative things that may not give you a new feature per say, but will bring people with quests to town.

Essence & Gold
Essence will be used to buy perks, as well as transmute decorative hats and other gear that carry over to Story Mode. Essence might also become the currency used to buy housing items in the Arcade Mode version of the feature.

Gold, meanwhile, will be used to unlock new buildings and decorations, and pretty much everything else.

Candy & Muffin
Muffin’s house from Seasonne will be available from start, though there will be nobody at home in the beginning. Once you’ve either died a number of time or gotten to a certain highscore, Candy or Muffin will start inhabiting the house.

If you’ve died x times, Muffin will appear and allow you to make Arcade Mode easier by giving you a number of treats (3 maximum, much like perks). Treats might include things such as health orbs healing more or there being no elite enemies. The downside to this is that you will get a much reduced highscore for using these treats.

If you gain x highscore, Candy will appear and allow you to activate certain curses (again 3 maximum, much the same as perks). These curses serve to make the game harder in various ways, such as doubling the amount of elites or removing health orbs altogether. With curses activated you will gain a higher score than during regular runs.

While it might sound tempting to do so, you can’t combine treats and curses: you’ll have to use one or the other.

The Arena
There will be an arena where you can practice boss fights once you’ve reached them through one of your Arcade Mode runs. In the arena you’ll also be able to run the same PvP challenges that will eventually become available in Story Mode, as well. It’s likely you’ll have to pay some gold to practice boss fights, while PvP will be free.

The Aquarium
One of the decorative spots, a house where you’ll see a collection of all the fishes you’ve caught during your Arcade Mode runs (one of each). This place will also attract NPCs with quests!

The Inn
…Will work much like it does now, only with more NPCs and more quests!

—-

And by the time we reached this point of our discussion, the hamburger place we were at were closing so we had to go back home to do regular work. More planning next time, and instead, let’s have some more text previews:

01

02

03

04

While making these it’s really easy to start coming up with things for previous areas as well, as you remember other bookcases or signs where you’d like to have some kind of text but haven’t added one yet. All in good time though, we want to avoid backtracking too much while we still have quite a long way to go before the main story is done.

All in all there will be 35 optional flavor texts available throughout Tai Ming! Can you find them all? I guess we’ll see… :)

Now it’s time for the final batch of themed housing items for a while now! Tai Ming, bring it on~
You know, you’d think that with Tai Ming being a town and all, there would be plenty of ready made housing objects there, right? Not so. I’m not kidding, I had to remake almost every single item in some way!

Next time we make a town, I’ll make sure to follow the housing guidelines to begin with. Not that I could follow the guidelines before since we didn’t have any… But you know ;)

Anyway! The basic items, not much to say. A very basic batch, with things you’ve likely seen before (although remade in size or with additional versions for Housing):

01TaiMingBase

The surfaces here will have a different height than items in the rest of the housing batches, since people in Tai Ming prefer sitting on the floor rather than chairs!

Compared to the basic batch, the special item one is.. a bit overwhelming: so many items!! There were so many wall decorations I couldn’t even fit them all on one wall, but had to put one on the floor just to show you. There are also a bunch of variations for some of these objects (such as different versions of decorations on top of the crates in the upper right corner) that there was no room to show as well:

01TaiMingSpecial

I think it’s likely that not all of these will be unlocked as you enter Tai Ming: some of the more generic looking objects will likely become part of the first basic batch, and others will be granted as quest or chest rewards.

And now…. More Mimic boss stuff! This time of his third and giant phase~

01A

We’ve already gone through two prototypes for this version. Here is the first one, where the Mimic pretty much spits out random things all the time. We felt this version was a little too messy in the end, so it was scrapped.

01B

Cue prototype #2:

02A

This version has a more clear pattern: he begins by spitting out a bunch of Pillar Mountains and Evergrind Fields themed enemies, then spits out slime at random intervals while you either beat the enemies or him up. After you’ve damaged him enough he then moves on to Flying Fortress enemies, while spitting out rockets. After dealing even more damage on him, he’ll move on to Temple of Seasons enemies – and so on.

02B

We liked this version a bit more, but we didn’t particularly enjoy how much it felt like you were replaying the game, so we’ll probably do one more prototype where we mix the encounters up a bit more between areas but keep the intervals he spits them out at!

It’s been another week, and on the menu for this week’s recap we have MORE housing (it never ends!), some previews of the optional examination texts you’ll be able to find around Tai Ming, a bunch of portrait expressions for the upcoming third zone, and… some animations! Let’s begin with housing~

While the housing items made up to this point has been saved and await implementation, we still have two areas to go! First up: Mount Bloom~

01

This area transformed to housing is quite straight forward – ROCKS! Above are the basic items that every batch will have: Floor & Wall textures, bed, tables, chairs, etc. And below, lots of random items, many of which you can already find in the mountain:

02

Mushrooms, crystals, some more rocks, a statue, a… a Fluffyfeathers? and some of the greenery seen around the caves of Mount Bloom! These items have all been resized and recolored to fit with the housing system and the rest of the item batches. Except Fluffyfeathers. Cause he’s perfect the way he is. Right?

Now, it’s been our ambition to add more of these optional texts for a while now, and we’ll begin with Tai Ming and work our way back!
Some of you might have noticed magnifying glasses appearing here and there. They most often signify that you’re able to examine something, and sometimes it’s even relevant to the story. From the beginning we’ve wanted to add more of these flavor texts here and there throughout the world of Grindea, but it’s also something we’ve been very good at forgetting. No more, though!

Here are a few example texts from the first zone of Tai Ming (do excuse any spelling or grammar errors, as this is from my draft document):

03

04

05

06

Since adding these will make the few actually story-relevant (or otherwise more important) ones less apparent, we’re considering making another version of the magnifying glass that’s bigger and more epic looking to signify this piece of information might be useful to you somehow. It’s also very likely the story-relevant hints will have their magnifying glass appear from further away, while you have to step quite close to see the ones that are only for flavor.

Hopefully you’ll enjoy this update once it launches. With any luck, these texts will help you feel more immersed in the game world!

With most of the cutscenes in Tai Ming’s third zone prototyped and ready, it’s also time to bring some flavor to those faces! I don’t know if we’ve mentioned it before, but the third zone will be all about the priests quarters, so naturally that’s why this first preview is filled with almost nothing but priests:

07

08

With grave things happening around the ancient world of Tai Ming, I’m afraid there aren’t a lot of happy faces here, and it will remain so in any coming previews we might show as well!

Finally, have a couple of Fred’s animations, featuring the final stage of the Mimic boss:

MimicIdle

MimicSpew

See you next week! :D

You’d think after finishing a bunch of sprites for housing, you’re all set, right? Nope! Time for step two in housing: making drop appearances/menu miniatures for everything!

01

Honestly, if there’s one thing I wish I knew how to streamline better it’s finding the right folder for stuff and saving a ton of items as PNG. Maybe there’s a way I haven’t found yet (I have not exactly done much looking).

Regardless, it takes a tooon of time saving items once you’ve finished making them. Not only do you have to check it for flaws (one of my great skills is accidentally leaving empty pixels in objects, trying to catch that before adding items to the folders now), and actually save it with all that entails, in the case of housing you also need to make menu versions since the big ones are much too large to show properly in the interface!

Above you can see a bunch of examples of miniatures, with the bigger versions below. After making this many, we had a talk about how to display Temple of Seasons stuff (since they will be three versions at once), and I had for some reason assumed that meant I should make three versions of everything. Because that would entail a whole lot of extra coding, we decided to either make one version that were all three at once, or simply stick with one of them and put a special icon next to it showing it gets transformed by the seasons.

After trying out the first idea (see above, upper right), we decided to simply stick with one version, in this case the summer!

02

And the madness continues! This time a bunch of surfaces and beds~

03

04

05

See that stray pixel between the red tablecloth and the left vines? Yeah, that’s exactly the kind of thing I’m trying to avoid. And clearly failed to do so before uploading this image! Oh well, at least it won’t be in the game :D

06

And now…. Time for some Mimic updates!

07

To make this guy’s eat-attack look a little more interesting we decided to swap out coins of various colors for a different set of items. The mimic will still eat huge coins (which won’t do anything), but the items that cause various effects will be as follow:

Emblem – Causes shockwaves (not pictured yet)
Chili Pepper – Fire
Hourglass – Slows player character(s)
Box of Bombs – The mimic spews out a bunch of bombs!

Since Fred has a very hectic schedule right now with a ton of animations needed for next update, I stepped in to make temporary objects for him to eat (wip above). These will be upgraded and animated by Fred once he has a few spare minutes:

08

Here’s a GIF showing how the mimic boss has improved since last time. AGAIN all GIFs in this post run slower than in the actual game. I’m looking for a different program to record GIFs in since FRAPS isn’t working anymore and cutting things in GIFcam is a bother. If anyone has any  suggestions they are very welcome! Anyway!! Instead of simply leaving fire on the ground, he now shoots out balls of flame that cause a fire to burn where they land. We also made an effect for the hourglass slow-down, to make it more clear when you get affected by it:

09

In the third phase, the mimic will grow even bigger and become static. In order to harm the player, he will spew out a ton of random items and enemies.

In this part of the battle we have two options, and we have not quite decided which one to go for yet – either he’ll send the player far back (the room would then be a bit larger vertically) with some kind of pushing attack, then fill up the room with obstacles and enemies the player needs to get past in order to hit the Mimic again. The second option is to have the Mimic invincible, until he gets exhausted (triggered by you clearing enough waves of enemies/items), at which point he’ll reveal his tongue which you can hit do deal damage.

We’ve also discussed a special attack where the Mimic starts sucking all the items he spewed out towards him, causing damage to the player if you get sucked too close (due to spikes or something similar poking out of the chest), but we haven’t finalized that part yet so I cannot say if it will actually appear in the game.

Finally, let’s end this week with a quick look at the skill you’ll unlock in the fourth dungeon~

10

So this skill has the codename “the ghost skill” because we haven’t come up with anything better yet. What it does is basically it shows you the spirit world, where things look a bit different.

11

There are a ton of possibilities for this skill, including having enemies that can damage you in the real world by using real weapons, but you cannot hurt them unless you go into the spirit world. There’s also obstacles you can only pass in the spirit world, or hidden treasures only seen while in it.

With this skill you’ll also be able to talk to ghosts, which might help you on your journey or give you quests?! Who knows, this is just a very early prototype after all.

12

What do you think? Too dark and scary? We’ll do our best to make sure nothing becomes too creepy, just the right amount!

It’s our 260th recap and this week I’ll be focusing on more housing content, while Teddy and Fred continue prototyping the Mimic boss!

Last time when we looked at the Seasonne housing items, there were a bunch of the basic ones. This time, it’s time to add some random special items! A christmas tree, christmas stockings, garlands, presents, a christmas flower… Pretty much everything christmas inspired I could think of quickly:

WinterSpecial01

Do you feel like we missed another christmas themed item that would be cool to have in the house? Go ahead and comment! :)

For the Temple of Seasons housing items, most items will have 3 versions that change depending on the season. You’ll be able to place an orb to change the season in the room, which will change your items (and if you won’t want to keep the orb after swapping season, you can simply remove it again).

Some progress GIFs of the bed:

SummerBase01Bed

SummerBase01Bed02

For the Temple of Seasons summer window, I’d like there to be a cute little bird in the nest or something. I just keep coming up with ideas hoping Fred and Teddy will cooperate in implementing them! But since it’s a great idea, I’m sure they will… Right?! ;)

The wall decorations to the right and the fairy statues will remain the same regardless of season, the rest will change as you hit the orb:

SummerSpecial01

And now, time to change those seasons!

First up, the autumn batch! The vines have dried up and the leaves have fallen off the bushes. Also everything has orange hues rather than yellow and green. For the window I imagine dried up leaves blowing past:

01 Autumn

In the winter version, everything is blue and white, and the vegetation have become more colorless (aside from the magic bush in the corner which never dies). There’s hanging a bunch of icicles in the window:

02 Winter

And now… finally…. A preview of the Mimic boss fight!! (These GIFs are for some reason a bit laggy/slower than what the actual game looks like, but you’ll get the idea anyway)

01

This is the first version of this little guy, which we’ve (not surprisingly) focused on first. In total he’ll have three stages, where he grows in size and gets more complicated attacks in each step.

02

The first version is very straight forward right now, and will probably remain so. He basically jumps after you Jumpkin-style, getting enraged after you deal enough damage. Once you’ve done enough, he’ll go into a super rage-mode, jumping around and causing shockwaves:

03

The next version is a bigger and meaner version of the first. When he’s not jumping around, this time in a more Giga Slime-fashion, except for the slime, he spits out a ton of random items (in this version we’re using placeholder coins), after which he’ll start eating the items up again:

Mimic2

Depending on what item he eats, various bad effects will happen. One will cause flames to appear on the ground, another will have him send out shockwaves, a third will slow down the player, and a fourth sends out a ton a bombs. Madness!

Hey guys! In order to keep things clear about where we’re heading, plus better keeping track of our design ideas, we’ve decided to have shorter meetings but keep them more often. So this week it was time to get together and discuss the future of Grindea once more! There are some pretty big design decisions going on here… Let’s dive into ’em:

Making magic weapons semi-ranged
So, magic weapons don’t give as much attack, and it kind of sucks that magic users face a clear disadvantage when they’ve run out of mana. So we decided that we want to add a tiny magic orb (or something like that) that shoots out from the magic weapons as you hit with them, making the range of your weapon slightly longer. Of course, this won’t be long range by any means, but it should make it possible to do some damage while running around waiting for that energy to recharge.

Easy Mode or no Easy Mode?
We had a quite long discussion about whether or not to implement Easy Mode. On the surface it seems like such an easy decision: why not add Easy Mode? Well, our worry is that by adding Easy Mode, a lot of people who would succeeded in Normal Mode after trying a little longer, would just give up on harder challenges and swap to Easy Mode. And, in doing so, they would probably end up thinking ‘man that’s annoying’ rather than ‘OMG I FINALLY MADE IT’ upon victory.

We’ve had a lot of forum threads or feedback that begins with someone claiming something is impossible, only for them to come back a while later saying ‘okay I totally get it now, this is amazing’. Would those people persist and end up feeling amazing after beating that difficult challenge if there was an Easy Mode? Or would they end up thinking Normal Mode is too hard and the game is poorly balanced since they felt forced into swapping to an easier setting?

In the beginning of our time in Early Access there were quite a few of threads with people claiming the overall game was too hard, but as time has progressed, those threads don’t seem to appear any longer and those who do have problems end up farming for levels and better items before giving the challenge a go again.

So, perhaps Easy Mode is not as needed as we first thought? Because of this we probably won’t implement Easy Mode anytime soon, anyway (but we’ll definitely reconsider if there’s renewed complains about the game’s difficulty).

Making Fishing more challenging
Fishing is… well, fishing, so it’s very straight forward and there’s only so many steps in difficulty. Unfortunately that also makes fishing kind of repetitive after a while, so we’re considering adding another mechanic after a couple of maps. The mechanic we’re thinking about is that the fish can move up or down as well, which means that at some point the fish will dive/swim upwards and you’ll have to press up or down accordingly within the time limit. Of course, this isn’t a high priority addition, so it probably won’t happen for a while. But in the long run it might help make fishing a little bit more interesting.

Potion Rework / Bottle Addition

Potions are great, but we don’t like how they work right now, where you can stack endless numbers and basically get a permanent increase in whichever stat so long as you have enough potions. To counter this, we’re strongly considering an introduction of Bottles which are a very limited commodity of which you’ll only be able to find 3 in total. These bottles can then be filled with the potion of your choice.

You’d get your first bottle from Remedi after clearing the Collector’s Trials, and after you’ve decided what to put in it and use it for the first time, it will slowly refill itself over time and as you do damage on regular enemies (yes, it’s a magic bottle). If you have more than one bottle, you can choose whether to fill the bottles with the same potion or use different potions. You can use two different potions at once, but you won’t be able to drink another potion of the same kind until the first one’s effect has run out.

With this change, it’d also be possible to reintroduce health potions, for all of you guys constantly asking about various healing features ;) Of course, we’ll likely balance them so it’s more efficient to use the other potions, but maybe it’d still help ease the minds of those who really want to be able to heal their character.

There are more cards this week, as well, as we finish up the Tai Ming card album! First up: the Ancient Statue card :)

01

For this card, my notes said the statue got some bird poop on it. It quickly became a fine line between painting the statue big enough for the poop to show up in the final image, while also not only being about the statue. In the end I think I went slightly too small with the statue, but whatever!

02

For this card I kept the colors soft and didn’t go too crazy with the highlights. Some variation and all that.. :)

For the second card, let’s take a look at the Monkey Card! My notes for the monkey card said: the monkey holding a plate of fruits. Alright then:

01 (1)

After painting the base and resizing, I added a couple cherry blossom trees (used the game sprites for this), to give the pic a bit more Tai Ming feeling:

02 (1)

Now! Time for the final Tai Ming Card (unless I’ve forgotten something and lost the notes?!): Echo of Madness!!

I used a slightly different approach when making this card, because I knew I wanted to use the backgrounds from the game for this one. So, I began by making the Echo and a mirror against a transparent background, keeping the center of the mirror transparent as well (my notes were: the Echo is standing in front of a mirror, but he has no mirror image):

01 (2)

Next, I added the game background, and another part of it slightly tilted for the mirror, as well as a speech bubble. Cause why not:

02

…Aaand the finished card:

03

Alright! Before posting some fresh non-spoilery (well, kinda) animations made by Fred, let’s take a look at some more housing items!

The theme for this batch is Flying Fortress, (tho I added some other stuff to give you an idea of what it can look like combined with items from other areas). Most of the items are based on sprites found throughout the game, only resized (or completely remade) to fit the grid.

bed

Housing Interior_001

It is my hopes that both the sentry and the broom will be animated to at least move up and down in the air, though it would be pretty cool if the sentry could move around the house on its own. I guess that’s up to Teddy, though, who would have to implement those features :)

And finally!!! A sneak peek of what the final Tai Ming boss will look like:

Mimicc

Another week, and more Puzzle World!

Now, the battle room! As you might guess from the name, this is where a bunch of battles will take place, likely an encounter with several waves (though we haven’t decided on any specifics yet):

02-gif

For this room, I kind of wanted to add a mascot of some sort. A lot of theme parks use mascots here and there for decoration, and I thought this place shouldn’t be no different. And what better shape than a puzzle piece? Perhaps I should add some more, maybe of different shapes and colors, to other rooms!

The floor is kind of bare in this room, as it’s a fighting room and we don’t want you to run into a bunch of colliders as you battle (cause that’s super annoying). I did add some boxes to the corners though, since I didn’t want the room to look completely empty. Since this place was never really finished, I think it makes sense that boxes with supplies for the continued development of the theme park still remain here and there.

03

Next room is the monkey challenge room, which has been previewed in a previous post. Here, the player will try to steal back a key from a gang of annoying monkeys, intent on keeping the key to themselves!

monkeygif

As with the fighting room, the key to this room is to keep the floor as clean (from colliders) as possible, since you’ll spend your time in here trying to beat up and chasing enemies back and forth. Since we had a prototype for this room already, I kept the same size as in the test. It worked well enough when we tried it, so no point changing a size that already works!

I did shorten the distance to the exit though: such a long corridor didn’t make a lot of sense, and would – in my opinion – only look visually worse than the shorter distance :)

monkeycomplete

And now, the final Puzzle World room!! This one is the Path Puzzle room, where you have to move a set of statues around in the past so that they are at the right place in present day…

While a lot of these graphics were already made and reused from previous rooms, I had to do some pretty cool new stuff for this one! For one, this room needed two levels, which meant I had to make a railing of sorts to make it easier to tell the levels apart:

pathgif

I also had to make that big glass thingy, containing something you need to figure out how to get out of there! And it was a lot of fun: shiny things are the best to make!

pathfinished

Now, as the third zone of Tai Ming – and the final challenge(s) of the dungeon – draws near, we decided it was time to have a meeting to flesh out the final boss of the dungeon: an ancient Mimic!

Pretty much since we started developing Grindea, we’ve known we wanted a boss mimic somewhere in the world, and once we knew the third “temple” would be an ancient town where time travel is the focus, we couldn’t think of a better place for our Mimic!

The time travel aspect of this place helped us come up with one of the key features of this boss battle: it will be divided into three phases, where each phase ends with a time shift, during which the Mimic gains strenght. Basically, you start the battle in the past, and once you’re close to defeating the first, young, version of the mimic, you’ll get sent forward in time, where a bunch of years have passed. The mimic, unaffected by your time jumping, will have grown in size and power over the years, and poses a bigger challenge…

notes

During the first phase, the mimic is little more than a jumpkin – but in the shape of a chest. It will have one or two special attacks, but this is definitely the easiest stage, and should be over pretty quickly.

In the second phase, the mimic has grown to the size of Giga Slime (roughly). The battle will remind you of that boss as well, as the mimic jumps around the battlefield, doing damage with its massive body. It also has a series of special attacks where it spits a ton of coins on the ground in different patterns – which may hurt you as they land – and goes to eat them up straight away, dealing damage to anyone in its path. Sometimes, it will spit out a powerup of some sort as well – and if you fail to destroy it before the Mimic eats it up again, it will gain a powerboost against you. Like Giga Slime, the Mimic will also have an attack resembling the hammer-attack of Giga Slime; basically a regular attack it can pull if you stand too close to it for too long. Only instead of producing a slime hammer, it will use any of the weapons inside of it (or its tongue)!

In the third phase, the boss has grown to a massive size, and is now static. It will attack you using any of its many hatches to send out weapons of various kinds against you. It also has a special attack where it blows you to the opposite end of the screen and sends out a ton of things from its inside! These things might be enemies (from anywhere in the game), barrels, crates, items, money – basically anything you can think of.

This is one ancient mimic, and it’s been stuffed with things over the years!

sketchy

Since the boss is divided into three different phases, we haven’t given each phase too many attacks. As we start prototyping this battle, it’s possible we’ll add more, but I think this is one of those bosses where the battle might be challenging enough even without 500x different attack patterns! I guess we’ll see – either case I’m very excited to see this in the game.

No game set in a fantasy world is complete without a mimic, right? :)

This week I (Vilya) have finally started working on Puzzle World, the small extension of Tai Ming’s second zone set in the north! It’s been a blast – but first, let’s take a look at something I forgot: the Giant Thorn-Worm boss portrait!

01-sprite

02-gif

Based on Fred’s sprite, the Giant Thorn-Worm boss portrait is pretty straight forward, as it’s.. well, just a worm. Of course, it had to be adjusted in some ways: for one, it needed to be a lot longer than it is in the sprite, or it’d barely reach above the title text! I also added a few more spikes to its back.

Other than that, I tried to stay true to the sprite. Perhaps I could have added some texture to its skin, and maybe I will at a later stage – but I think it’s important that the boss portrait resembles the actual sprite as much as possible, especially when the sprite is as big as the Giant Thorn-Worm is.

As for the boss title itself, the main title will be “Giant Thorn-Worm”, with “The Threat from Below” as its sub-title. This is actually a reference to the movie Tremors, which was known as “Hotet från Underjorden” (The Threat From Below/the Underground) when it came to Sweden!

03-thorn-worm

And now…. It’s time to begin! Using the sketches from last week, I’m going to create the backgrounds for each of the Puzzle World rooms. It’s gonna be a lot of fun, since this place will be totally different from everything else in Tai Ming graphics wise: bright colors and crazy color combinations everywhere! Wohoo!

To celebrate a completely new set of graphics, here’s a video showing the process of creating this room! Videos are definitely more fun to do when there are a lot of new graphics involved, so I’ll probably do one or two graphics for each new area, rather than spam a ton of videos of me recoloring and reshaping previously made objects from now on:


After finishing recording the video, I decided to add and change a few minor things before the finished room. First up, moving the question mark poster to the front – in the back it could be anything, and I think it’s unnecessary to confuse players about it:

01-poster

Next. adding some balloons. I mean, it’s a theme park, after all – so it’s not really complete without a few balloons. Right?

02-balloons

Third, in the original sketch I had a “cool effect” around the first door of the theme park, which felt a bit redundant after I completed the rest of the room. However, after giving it some thought, I wanted to try creating it after all – in the worst case we’ll simply remove the effect again, but for now I kind of like it:

03-door-effect

Here’s the finished first room after these changes:

04-room1

And now: the first actual puzzle room of this brand-new theme park! This one is focused on statues, but solving it won’t be as easy as you might have thought – you see, the guys building the puzzle haven’t actually finished it yet, so you’ll have to figure out another way to get out of here.. :)

02

A step-by-step GIF of the design! Since most of the wall and floor stuff has been made already, there’s a lot less to do in this room. The banners are actually reused from the HQ (though resized and remade just a tiny bit), while the pillars and the puzzle parts on the floor had to be made from scratch.

Next, some half-built puzzle blocks in wood, lying around on the floor:

05-room-2-boxes

These puzzle blocks are made in wood and are supposed to be based on the ‘real’ puzzle blocks you find out and about in the world of Grindea. However, I chose to make these in wood so that when you travel to the present to fight enemies, there aren’t a bunch of puzzle blocks blocking your way as you battle – they have decayed and only planks will be left on the floor, which have no colliders.

It also serves to remind people that the guy who build this theme park is kind of cheap and would rather build the puzzle blocks in a cheap material than order the more expensive plastic- or stone versions… ;)

Finished version of the room:

06-room-2

Now, after focusing so long on Tai Ming’s second zone, it’s finally nearing completion and we can look on to the third and final zone! As such, we had a meeting where we discussed exactly how it will look and what will take place here…

shrine_ext

Since the second zone has become quite big and advanced, we agreed that it’s best to keep the third zone smaller and a lot more straight forward, in order to pace things well. When you first enter this zone, you will see a weird celebration and a bunch of strange things happening in front of a lot of people outside an ancient shrine! I know I’m vague, but it’s gonna be really cool if we get it right!

shrine_int

Next, you’ll be sent back to the present, where you’ll make your way through the shrine itself. Here you’ll be sent back and forth in time seemingly randomly – the time warp thing has gone crazy it seems! There will be some battles and some cutscenes explaining what’s happening next, and things are getting quite scary..!


outside

Finally, you’ll reach your destination: outside, on the other end of the shrine, is a meadow with an altar at the end. At the altar, you’ll find an artefact, and not one but two epic fights draw close…

I’m so excited to begin making the third zone now that it’s been designed much more thoroughly and I almost feel like the end of the temple is within grasp! Of course, there’s still a lot of stuff left (we’re still not done with the second zone, after all!), but having it all designed really helps a lot with looking ahead :)

Oh yeah, meanwhile, Fred has been finished one NPC after another! Soon all of Tai Ming will be full of people :D

market-npcs

This week, we’ve finished up the final interior of Tai Ming’s second zone: the monkey lab! Here is the past version:

monkeylabpast01

Before designing this place, I (Vilya) had a talk with Fred and Teddy about what level of technology we wanted this place to have. We had plenty of options: we could either go full Flying Fortress style with lasers and very high technology, or we could go more primitive and ancient-oriented.

Since we wanted this area to feel quite modern for Tai Ming (making it stand out and all), we decided to keep it kind of high-tech, but not Flying Fortress laser-level. So there’s steel bars, lots of documentation, some glass vials and strange potions, some which will be animated and added later on by Fred!

After completing the above version, we decided to have one big cage rather than two small, with two monkeys in it. We also added some cracks to illustrate where a hole will be in the present, as well:

monkeylabpast

For the Present version, the walls & floor need to become more dull & dark, the glass windows have broken, papers have been shredded… and the poor monkeys who were stuck in the cage have died (unless… you decide to let them out) :(

monkeylabpresent

monkeylabpresent

Aside from these interiors, we also added a bunch of smaller stuff: changing the brown chests into purple ones on the banners in the past, to reflect the fact that the chests in Tai Ming will, in fact, be purple:

banner01a

We also wanted to Tai Ming-ify the doors inside the ancient Collector’s HQ a bit, so I added some fancy door frame decorations to them:

hqdoor

Just for fun and some flavor, an optional chest has appeared in Tai Ming’s present state, as well! But however will you be able to reach it with all the rocks blocking the way?

secretchest

There’s a couple of new characters, as well! This ancient version of Quinton (an ancestor, perhaps?) is the Quest Master of Tai Ming’s Collector’s HQ. He’ll give you one or two quests you need to complete in the town before you can proceed into the next zone:

portrait

Those of you who paid attention to the text screens in the Phase Puzzle course in Mount Bloom should be familiar with Tonee, who wrote about the course in some detail!

Well, here she is, visiting Tai Ming with her engineer friend from last week:

portrait02

What they’re doing there? Showing off the latest Phase Shifting technology of course! These things don’t fund themselves, you know ;)

Finally, here’s another giant Thorn-Worm, the ULTIMATE version, made & animated by Fred:

mama-worm

How much worse can that fight get, really?! Whew…

Next week, I’ll finish up the graphics for Tai Ming’s second zone, while Fred works on some much needed NPC sprites for the area! Next after that, Puzzle World, the short mini puzzle-dungeon “hidden” in the north of the zone. Stay tuned! :)